Create a simple Rich Text Editor using RichTextArea with Open and Save plus Formatting such as Bold, Italics and Underline using Silverlight.
Printer Friendly Download Tutorial (508KB) Download Source Code (8.74KB) Online Demonstration
Step 1
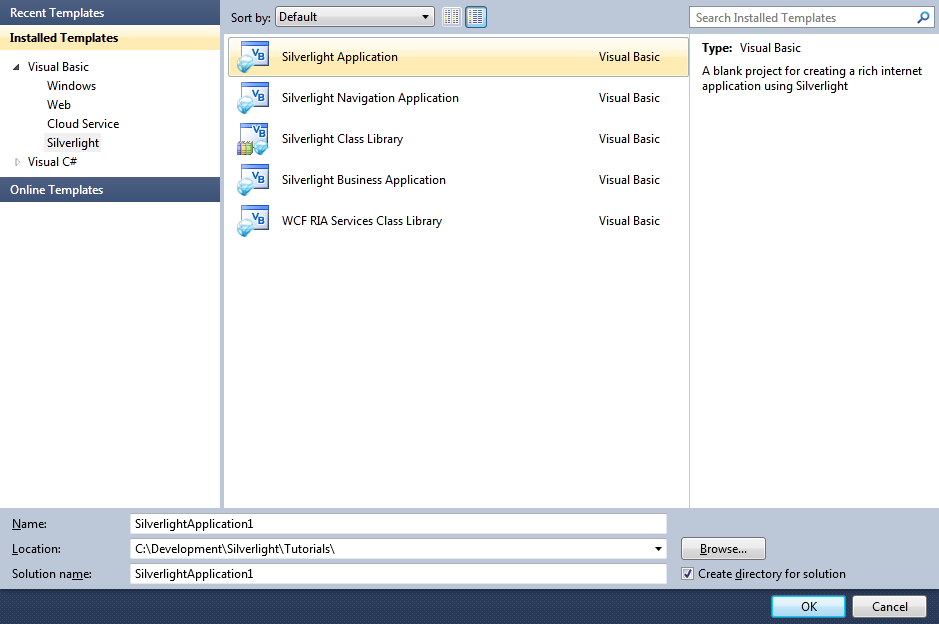
Start Microsoft Visual Web Developer 2010 Express, then Select File then New Project... Select "Visual Basic" then "Silverlight Application" from Templates, select a Location if you wish, then enter a name for the Project and then click OK, see below:
Step 2
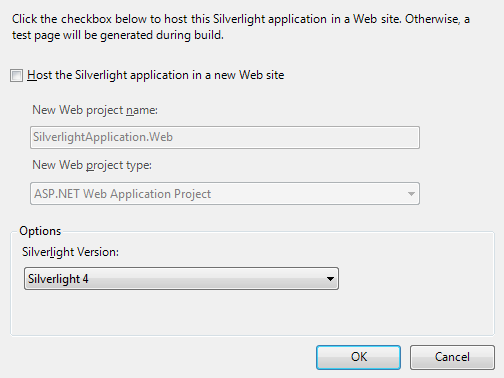
New Silverlight Application window should appear, uncheck the box "Host the Silverlight Application in a new Web site" and then select the required Silverlight Version, see below:
Step 3
A Blank Page named MainPage.xaml should then appear, see below:
Step 4
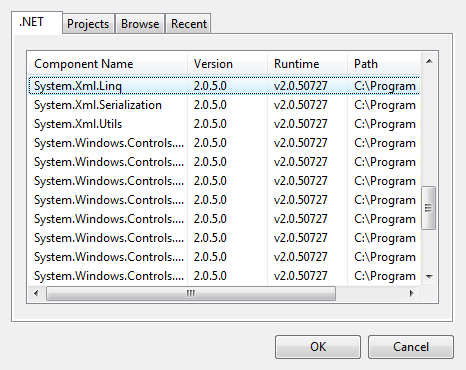
Select Project then Add Reference... The "Add Reference" window should appear, select "System.XML.Linq" from the ".NET" List, see below:
Step 5
Add the Reference to "System.XML.Linq" by Clicking on OK.
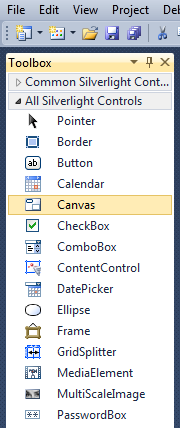
Then from the All Silverlight Controls section in the Toolbox select the Canvas control:
Step 6
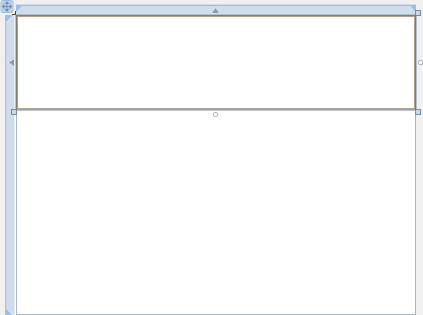
Draw a Canvas on the Page then in the XAML Pane above the "</Grid>" then change the "Canvas1" line to the following:
<Canvas Height="95" Width="400" VerticalAlignment="Top" HorizontalAlignment="Left" Name="Toolbar"></Canvas>
See below:
Step 7
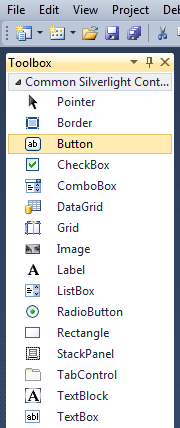
Then from the Common Silverlight Controls section in the Toolbox select the Button control:
Step 8
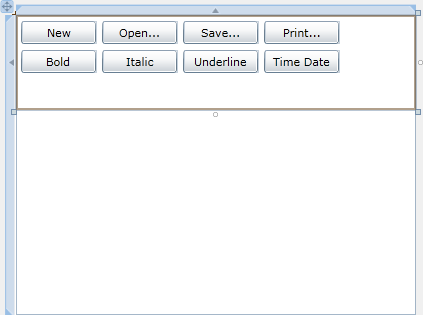
Draw Eight Buttons on the Canvas by dragging the Buttons from the Toolbox onto the Canvas then in the XAML Pane inbetween the "<Canvas>" and "</Canvas>" tags change the "<Button>" lines to the following:
<Button Canvas.Left="6" Canvas.Top="6" Height="23" Width="75" Name="New" Content="New"/>
<Button Canvas.Left="87" Canvas.Top="6" Height="23" Width="75" Name="Open" Content="Open..."/>
<Button Canvas.Left="168" Canvas.Top="6" Height="23" Width="75" Name="Save" Content="Save..."/>
<Button Canvas.Left="249" Canvas.Top="6" Height="23" Width="75" Name="Print" Content="Print..."/>
<Button Canvas.Left="6" Canvas.Top="35" Height="23" Width="75" Name="Bold" Content="Bold"/>
<Button Canvas.Left="87" Canvas.Top="35" Height="23" Width="75" Name="Italic" Content="Italic"/>
<Button Canvas.Left="168" Canvas.Top="35" Height="23" Width="75" Name="Underline" Content="Underline"/>
<Button Canvas.Left="249" Canvas.Top="35" Height="23" Width="75" Name="TimeDate" Content="Time Date"/>
See below:
Step 9
While still in the XAML Pane, below the last "<Button>" tag and above the "</Canvas>" type the following ComboBox XAML:
<ComboBox Canvas.Left="6" Canvas.Top="64" Height="23" Width="156" Name="Font"
    FontFamily="{Binding SelectedItem.FontFamily, RelativeSource={RelativeSource Self}}"
    FontSize="{Binding SelectedItem.FontSize, RelativeSource={RelativeSource Self}}">
  <ComboBoxItem Content="Arial" Tag="Arial" FontFamily="Arial" FontSize="12" IsSelected="True"/>
  <ComboBoxItem Content="Arial Black" Tag="Arial Black" FontFamily="Arial Black" FontSize="12"/>
  <ComboBoxItem Content="Comic Sans MS" Tag="Comic Sans MS" FontFamily="Comic Sans MS" FontSize="12"/>
  <ComboBoxItem Content="Courier New" Tag="Courier New" FontFamily="Courier New" FontSize="12"/>
  <ComboBoxItem Content="Georgia" Tag="Georgia" FontFamily="Georgia" FontSize="12"/>
  <ComboBoxItem Content="Lucida Sans Unicode" Tag="Lucida Sans Unicode" FontFamily="Lucida Sans Unicode" FontSize="12"/>
  <ComboBoxItem Content="Times New Roman" Tag="Times New Roman" FontFamily="Times New Roman" FontSize="12"/>
  <ComboBoxItem Content="Trebuchet MS" Tag="Trebuchet MS" FontFamily="Trebuchet MS" FontSize="12"/>
  <ComboBoxItem Content="Verdana" Tag="Verdana" FontFamily="Verdana" FontSize="12"/>
  <ComboBoxItem Content="Webdings" Tag="Webdings" FontSize="12"/>
</ComboBox>

<ComboBox Canvas.Left="168" Canvas.Top="64" Height="23" Width="75" Name="Size">
  <ComboBoxItem Content="8" Tag="8"/>
  <ComboBoxItem Content="10" Tag="10"/>
  <ComboBoxItem Content="12" Tag="12"/>
  <ComboBoxItem Content="16" Tag="16" IsSelected="True"/>
  <ComboBoxItem Content="20" Tag="20"/>
  <ComboBoxItem Content="24" Tag="24"/>
  <ComboBoxItem Content="28" Tag="28"/>
  <ComboBoxItem Content="36" Tag="36"/>
  <ComboBoxItem Content="48" Tag="48"/>
  <ComboBoxItem Content="72" Tag="72"/>
</ComboBox>

<ComboBox Canvas.Left="249" Canvas.Top="64" Height="23" Width="75" Name="Colour">
  <ComboBoxItem Tag="FF000000" IsSelected="True">
    <Rectangle Width="25" Height="14" Fill="Black"/>
  </ComboBoxItem>
  <ComboBoxItem Tag="FF808080">
    <Rectangle Width="25" Height="14" Fill="Gray"/>
  </ComboBoxItem>
  <ComboBoxItem Tag="FFFF0000">
    <Rectangle Width="25" Height="14" Fill="Red"/>
  </ComboBoxItem>
  <ComboBoxItem Tag="FFFFA500">
    <Rectangle Width="25" Height="14" Fill="Orange"/>
  </ComboBoxItem>
  <ComboBoxItem Tag="FFFFFF00">
    <Rectangle Width="25" Height="14" Fill="Yellow"/>
  </ComboBoxItem>
  <ComboBoxItem Tag="FF008000">
    <Rectangle Width="25" Height="14" Fill="Green"/>
  </ComboBoxItem>
  <ComboBoxItem Tag="FF00FFFF">
    <Rectangle Width="25" Height="14" Fill="Cyan"/>
  </ComboBoxItem>
  <ComboBoxItem Tag="FF0000FF">
    <Rectangle Width="25" Height="14" Fill="Blue"/>
  </ComboBoxItem>
  <ComboBoxItem Tag="FFFF00FF">
    <Rectangle Width="25" Height="14" Fill="Magenta"/>
  </ComboBoxItem>
  <ComboBoxItem Tag="FF800080">
    <Rectangle Width="25" Height="14" Fill="Purple"/>
  </ComboBoxItem>
</ComboBox>
See below:

Step 10
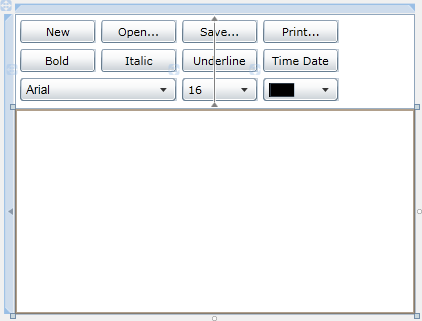
Again while still in the XAML Pane below the "</Canvas>" and above the "</Grid>" Tag, type the following RichTextArea XAML:
<RichTextArea Height="205" Width="400" Margin="0,95,0,0" HorizontalAlignment="Left" VerticalAlignment="Top"
TextWrapping="Wrap" BorderThickness="0" Name="Editor"/>
See below:
Step 11
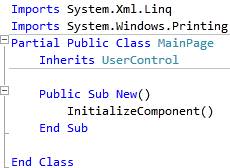
Right Click on the Page or the entry for "MainPage.xaml" in Solution Explorer and choose the "View Code" option. In the Code View above the "Partial Public Class MainPage" line type the following:
Imports System.Xml.Linq
Imports System.Windows.Printing
See Below:
Step 12
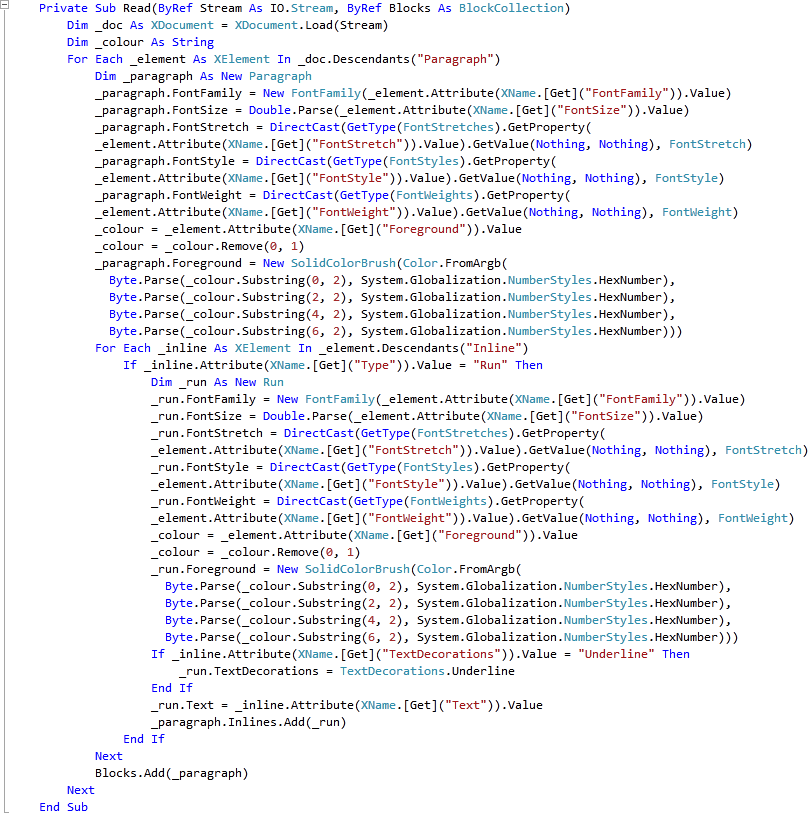
While still in the Code View for MainPage.xaml, below the "End Sub" for "Public Sub New()" Constructor type the following Sub:
Private Sub Read(ByRef Stream As IO.Stream, ByRef Blocks As BlockCollection)
  Dim _doc As XDocument = XDocument.Load(Stream)
  Dim _colour As String
  For Each _element As XElement In _doc.Descendants("Paragraph")
    Dim _paragraph As New Paragraph
    _paragraph.FontFamily = New FontFamily(_element.Attribute(XName.[Get]("FontFamily")).Value)
    _paragraph.FontSize = Double.Parse(_element.Attribute(XName.[Get]("FontSize")).Value)
    _paragraph.FontStretch = DirectCast(GetType(FontStretches).GetProperty(
    _element.Attribute(XName.[Get]("FontStretch")).Value).GetValue(Nothing, Nothing), FontStretch)
    _paragraph.FontStyle = DirectCast(GetType(FontStyles).GetProperty(
    _element.Attribute(XName.[Get]("FontStyle")).Value).GetValue(Nothing, Nothing), FontStyle)
    _paragraph.FontWeight = DirectCast(GetType(FontWeights).GetProperty(
    _element.Attribute(XName.[Get]("FontWeight")).Value).GetValue(Nothing, Nothing), FontWeight)
    _colour = _element.Attribute(XName.[Get]("Foreground")).Value
    _colour = _colour.Remove(0, 1)
    _paragraph.Foreground = New SolidColorBrush(Color.FromArgb(
      Byte.Parse(_colour.Substring(0, 2), System.Globalization.NumberStyles.HexNumber),
      Byte.Parse(_colour.Substring(2, 2), System.Globalization.NumberStyles.HexNumber),
      Byte.Parse(_colour.Substring(4, 2), System.Globalization.NumberStyles.HexNumber),
      Byte.Parse(_colour.Substring(6, 2), System.Globalization.NumberStyles.HexNumber)))
    For Each _inline As XElement In _element.Descendants("Inline")
      If _inline.Attribute(XName.[Get]("Type")).Value = "Run" Then
        Dim _run As New Run
        _run.FontFamily = New FontFamily(_element.Attribute(XName.[Get]("FontFamily")).Value)
        _run.FontSize = Double.Parse(_element.Attribute(XName.[Get]("FontSize")).Value)
        _run.FontStretch = DirectCast(GetType(FontStretches).GetProperty(
        _element.Attribute(XName.[Get]("FontStretch")).Value).GetValue(Nothing, Nothing), FontStretch)
        _run.FontStyle = DirectCast(GetType(FontStyles).GetProperty(
        _element.Attribute(XName.[Get]("FontStyle")).Value).GetValue(Nothing, Nothing), FontStyle)
        _run.FontWeight = DirectCast(GetType(FontWeights).GetProperty(
        _element.Attribute(XName.[Get]("FontWeight")).Value).GetValue(Nothing, Nothing), FontWeight)
        _colour = _element.Attribute(XName.[Get]("Foreground")).Value
        _colour = _colour.Remove(0, 1)
        _run.Foreground = New SolidColorBrush(Color.FromArgb(
          Byte.Parse(_colour.Substring(0, 2), System.Globalization.NumberStyles.HexNumber),
          Byte.Parse(_colour.Substring(2, 2), System.Globalization.NumberStyles.HexNumber),
          Byte.Parse(_colour.Substring(4, 2), System.Globalization.NumberStyles.HexNumber),
          Byte.Parse(_colour.Substring(6, 2), System.Globalization.NumberStyles.HexNumber)))
        If _inline.Attribute(XName.[Get]("TextDecorations")).Value = "Underline" Then
          _run.TextDecorations = TextDecorations.Underline
        End If
        _run.Text = _inline.Attribute(XName.[Get]("Text")).Value
        _paragraph.Inlines.Add(_run)
      End If
    Next
    Blocks.Add(_paragraph)
  Next
End Sub
See Below:
Step 13
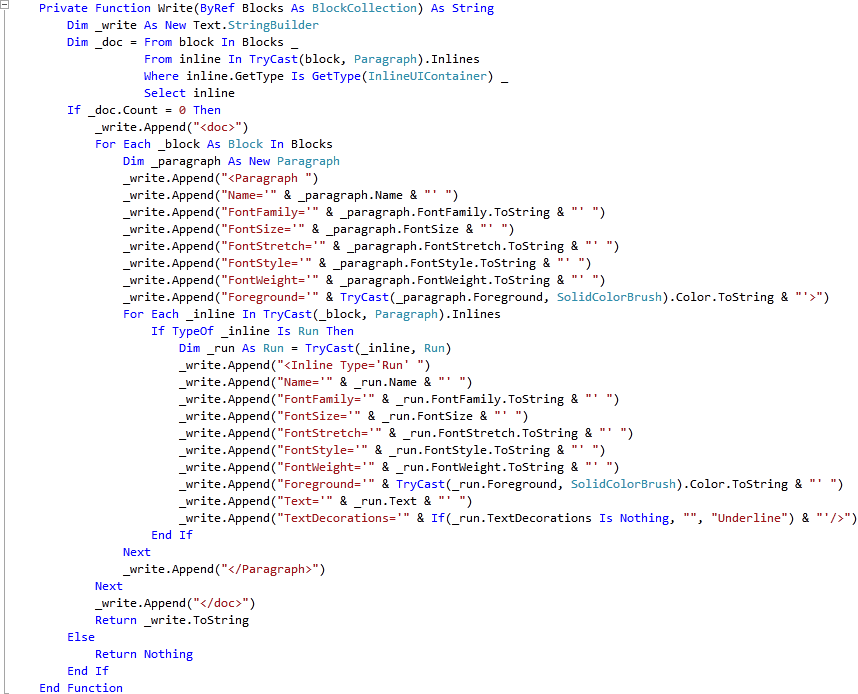
While still in the Code View for MainPage.xaml, below the "End Sub" for "Private Sub Read(...)" type the following Function:
Private Function Write(ByRef Blocks As BlockCollection) As String
  Dim _write As New Text.StringBuilder
  Dim _doc = From block In Blocks _
  From inline In TryCast(block, Paragraph).Inlines
    Where inline.GetType Is GetType(InlineUIContainer) _
    Select inline
  If _doc.Count = 0 Then
    _write.Append("<doc>")
    For Each _block As Block In Blocks
      Dim _paragraph As New Paragraph
      _write.Append("<Paragraph ")
      _write.Append("Name='" & _paragraph.Name &"' ")
      _write.Append("FontFamily='" & _paragraph.FontFamily.ToString & "' ")
      _write.Append("FontSize='" & _paragraph.FontSize & "' ")
      _write.Append("FontStretch='" & _paragraph.FontStretch.ToString & "' ")
      _write.Append("FontStyle='" & _paragraph.FontStyle.ToString & "' ")
      _write.Append("FontWeight='" & _paragraph.FontWeight.ToString & "' ")
      _write.Append("Foreground='" & TryCast(_paragraph.Foreground, SolidColorBrush).Color.ToString & "'>")
      For Each _inline In TryCast(_block, Paragraph).Inlines
        If TypeOf _inline Is Run Then
          Dim _run As Run = TryCast(_inline, Run)
          _write.Append("<Inline Type='Run' ")
          _write.Append("Name='" & _run.Name & "' ")
          _write.Append("FontFamily='" & _run.FontFamily.ToString & "' ")
          _write.Append("FontSize='" & _run.FontSize & "' ")
          _write.Append("FontStretch='" & _run.FontStretch.ToString & "' ")
          _write.Append("FontStyle='" & _run.FontStyle.ToString & "' ")
          _write.Append("FontWeight='" & _run.FontWeight.ToString & "' ")
          _write.Append("Foreground='" & TryCast(_run.Foreground, SolidColorBrush).Color.ToString & "' ")
          _write.Append("Text='" & _run.Text & "' ")
          _write.Append("TextDecorations='" & If(_run.TextDecorations Is Nothing, "", "Underline") & "'/>")
        End If
      Next
      _write.Append("</Paragraph>")
    Next
    _write.Append("</doc>")
    Return _write.ToString
  Else
    Return Nothing
  End If
End Function
See Below:
Step 14
Return to the Designer View, by selecting the "MainPage.xaml" Tab, or Right Click on the Page or the Entry for "MainPage.xaml" in Solution Explorer and choose the "View Designer" option.
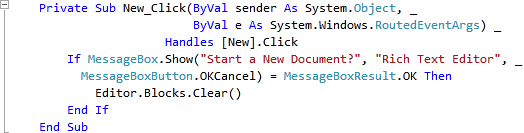
Double Click on the "New" Button Control and type in the New_Click Sub:
If MessageBox.Show("Start a New Document?", "Rich Text Editor", _
    MessageBoxButton.OKCancel) = MessageBoxResult.OK Then
  Editor.Blocks.Clear()
End If
See Below:
Step 15
Return to the Designer View, by selecting the "MainPage.xaml" Tab, or Right Click on the Page or the Entry for "MainPage.xaml" in Solution Explorer and choose the "View Designer" option.
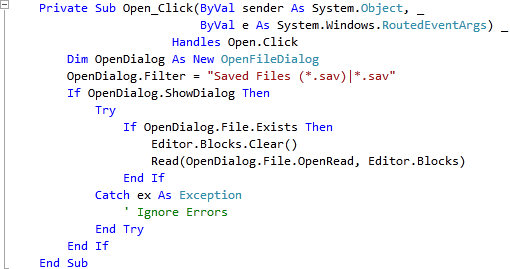
Double Click on the "Open..." Button and type in the Open_Click Sub:
Dim OpenDialog As New OpenFileDialog
OpenDialog.Filter = "Saved Files (*.sav)|*.sav"
If OpenDialog.ShowDialog Then
  Try
    If OpenDialog.File.Exists Then
      Editor.Blocks.Clear()
      Read(OpenDialog.File.OpenRead, Editor.Blocks)
    End If
  Catch ex As Exception
    ' Ignore Errors
  End Try
End If
See Below:
Step 16
Return to the Designer View again, by selecting the "MainPage.xaml" Tab, or Right Click on the Page or the Entry for "MainPage.xaml" in Solution Explorer and choose the "View Designer" option.
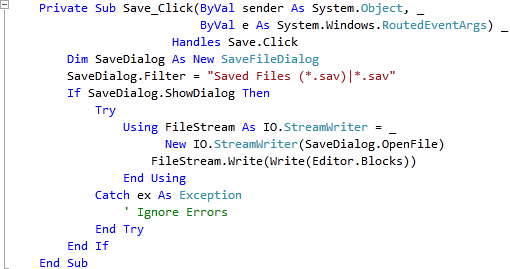
Double Click on the "Save..." Button and type in the Save_Click Sub:
Dim SaveDialog As New SaveFileDialog
SaveDialog.Filter = "Saved Files (*.sav)|*.sav"
If SaveDialog.ShowDialog Then
  Try
    Using FileStream As IO.StreamWriter = _
        New IO.StreamWriter(SaveDialog.OpenFile)
      FileStream.Write(Write(Editor.Blocks))
    End Using
  Catch ex As Exception
    ' Ignore Errors
  End Try
End If
See Below:
Step 17
Return to the Designer View, by selecting the "MainPage.xaml" Tab, or Right Click on the Page or the Entry for "MainPage.xaml" in Solution Explorer and choose the "View Designer" option.
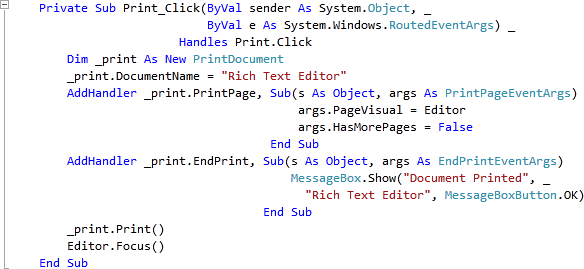
Double Click on the "Print" Button Control and type in the Print_Click Sub:
Dim _print As New PrintDocument
_print.DocumentName = "Rich Text Editor"
AddHandler _print.PrintPage, Sub(s As Object, args As PrintPageEventArgs)
    args.PageVisual = Editor
    args.HasMorePages = False
  End Sub
AddHandler _print.EndPrint, Sub(s As Object, args As EndPrintEventArgs)
    MessageBox.Show("Document Printed", _
      "Rich Text Editor", MessageBoxButton.OK)
  End Sub
_print.Print()
Editor.Focus()
See Below:
Step 18
Return to the Designer View, by selecting the "MainPage.xaml" Tab, or Right Click on the Page or the Entry for "MainPage.xaml" in Solution Explorer and choose the "View Designer" option.
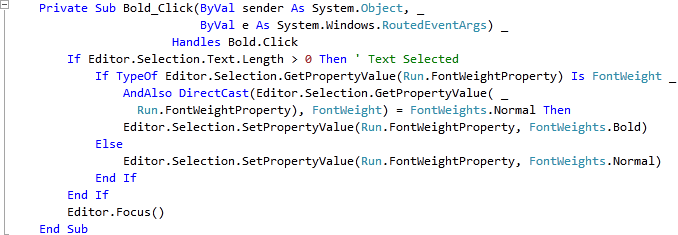
Double Click on the "Bold" Button and type in the Bold_Click Sub:
If Editor.Selection.Text.Length > 0 Then ' Text Selected
  If TypeOf Editor.Selection.GetPropertyValue(Run.FontWeightProperty) Is FontWeight _
      AndAlso DirectCast(Editor.Selection.GetPropertyValue( _
        Run.FontWeightProperty), FontWeight) = FontWeights.Normal Then
    Editor.Selection.SetPropertyValue(Run.FontWeightProperty, FontWeights.Bold)
  Else
    Editor.Selection.SetPropertyValue(Run.FontWeightProperty, FontWeights.Normal)
  End If
End If
Editor.Focus()
See Below:
Step 19
Return to the Designer View, by selecting the "MainPage.xaml" Tab, or Right Click on the Page or the Entry for "MainPage.xaml" in Solution Explorer and choose the "View Designer" option.
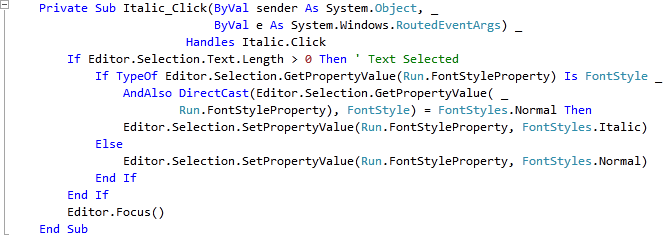
Double Click on the "Italic" Button and type in the Italic_Click Sub:
If Editor.Selection.Text.Length > 0 Then ' Text Selected
  If TypeOf Editor.Selection.GetPropertyValue(Run.FontStyleProperty) Is FontStyle _
      AndAlso DirectCast(Editor.Selection.GetPropertyValue( _
        Run.FontStyleProperty), FontStyle) = FontStyles.Normal Then
    Editor.Selection.SetPropertyValue(Run.FontStyleProperty, FontStyles.Italic)
  Else
    Editor.Selection.SetPropertyValue(Run.FontStyleProperty, FontStyles.Normal)
  End If
End If
Editor.Focus()
See Below:
Step 20
Return to the Designer View, by selecting the "MainPage.xaml" Tab, or Right Click on the Page or the Entry for "MainPage.xaml" in Solution Explorer and choose the "View Designer" option.
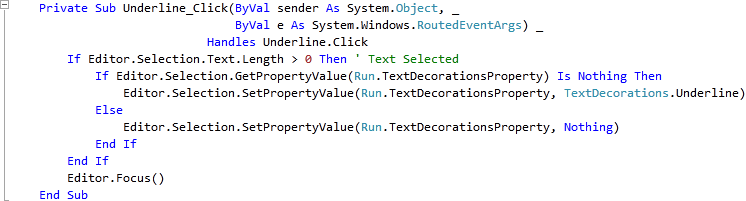
Double Click on the "Underline" Button and type in the Underline_Click Sub:
If Editor.Selection.Text.Length > 0 Then ' Text Selected
  If Editor.Selection.GetPropertyValue(Run.TextDecorationsProperty) Is Nothing Then
    Editor.Selection.SetPropertyValue(Run.TextDecorationsProperty, TextDecorations.Underline)
  Else
    Editor.Selection.SetPropertyValue(Run.TextDecorationsProperty, Nothing)
  End If
End If
Editor.Focus()
See Below:
Step 21
Return to the Designer View, by selecting the "MainPage.xaml" Tab, or Right Click on the Page or the Entry for "MainPage.xaml" in Solution Explorer and choose the "View Designer" option.
Double Click on the "Time Date" Button and type in the TimeDate_Click Sub:
Editor.Selection.Text = Format(Now, "HH:mm dd/MM/yyyy")
Editor.Focus()
See Below:

Step 22
Return to the Designer View, by selecting the "MainPage.xaml" Tab, or Right Click on the Page or the Entry for "MainPage.xaml" in Solution Explorer and choose the "View Designer" option.
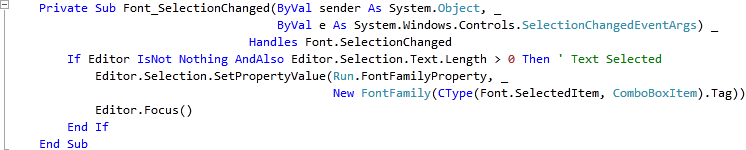
Double Click on the First or Left-most ComboBox (Font) and type in the Font_SelectionChanged Sub:
If Editor IsNot Nothing AndAlso Editor.Selection.Text.Length > 0 Then ' Text Selected
  Editor.Selection.SetPropertyValue(Run.FontFamilyProperty, _
    New FontFamily(CType(Font.SelectedItem, ComboBoxItem).Tag))
  Editor.Focus()
End If
See Below:
Step 23
Return to the Designer View, by selecting the "MainPage.xaml" Tab, or Right Click on the Page or the Entry for "MainPage.xaml" in Solution Explorer and choose the "View Designer" option.
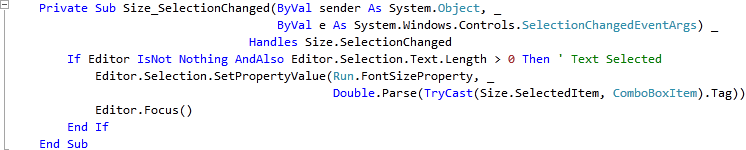
Double Click on the Second ComboBox (Size) and type in the Size_SelectionChanged Sub:
If Editor IsNot Nothing AndAlso Editor.Selection.Text.Length > 0 Then ' Text Selected
  Editor.Selection.SetPropertyValue(Run.FontSizeProperty, _
    Double.Parse(TryCast(Size.SelectedItem, ComboBoxItem).Tag))
  Editor.Focus()
End If
See Below:
Step 24
Return to the Designer View, by selecting the "MainPage.xaml" Tab, or Right Click on the Page or the Entry for "MainPage.xaml" in Solution Explorer and choose the "View Designer" option.
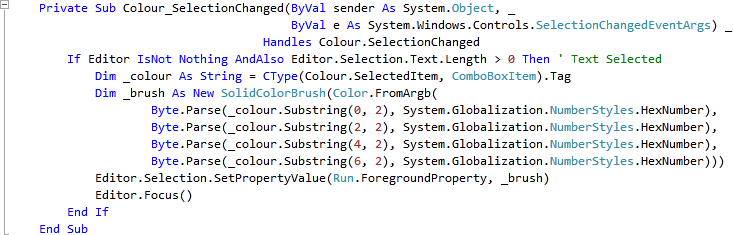
Double Click on the Third ComboBox (Colour) and type in the Colour_SelectionChanged Sub:
If Editor IsNot Nothing AndAlso Editor.Selection.Text.Length > 0 Then ' Text Selected
  Dim _colour As String = CType(Colour.SelectedItem, ComboBoxItem).Tag
  Dim _brush As New SolidColorBrush(Color.FromArgb(
    Byte.Parse(_colour.Substring(0, 2), System.Globalization.NumberStyles.HexNumber),
    Byte.Parse(_colour.Substring(2, 2), System.Globalization.NumberStyles.HexNumber),
    Byte.Parse(_colour.Substring(4, 2), System.Globalization.NumberStyles.HexNumber),
    Byte.Parse(_colour.Substring(6, 2), System.Globalization.NumberStyles.HexNumber)))
  Editor.Selection.SetPropertyValue(Run.ForegroundProperty, _brush)
  Editor.Focus()
End If
See Below:
Step 25
Save the Project as you have now finished the Silverlight application. Select Debug then Start Debugging or click on Start Debugging:
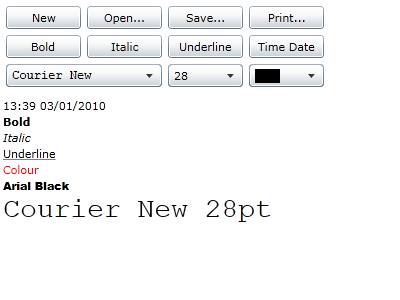
After you do, the following will appear in a new Web Browser window:

Step 26
You can Type into the RichTextArea, and then apply Formatting, Fonts, Sizes and Colours - then Save the Document to Open later, see below:
Step 27
Close the Browser window by clicking on the Close Button ![]() on
the top right of the Web Browser to Stop the application.
on
the top right of the Web Browser to Stop the application.
This is a very simple Rich Text Editor with some of the common features supported by Silverlight featured, see if you can add more features to this application such as Text Alignment, it is up to you!
![]()