Create a Task List application for Windows Phone 7 with this Tutorial for Listbox-based To Do lists with Open/Save support using LINQ to XML plus Add/Remove Items.
www.cespage.com/silverlight/wp7tut5.html
Step 1
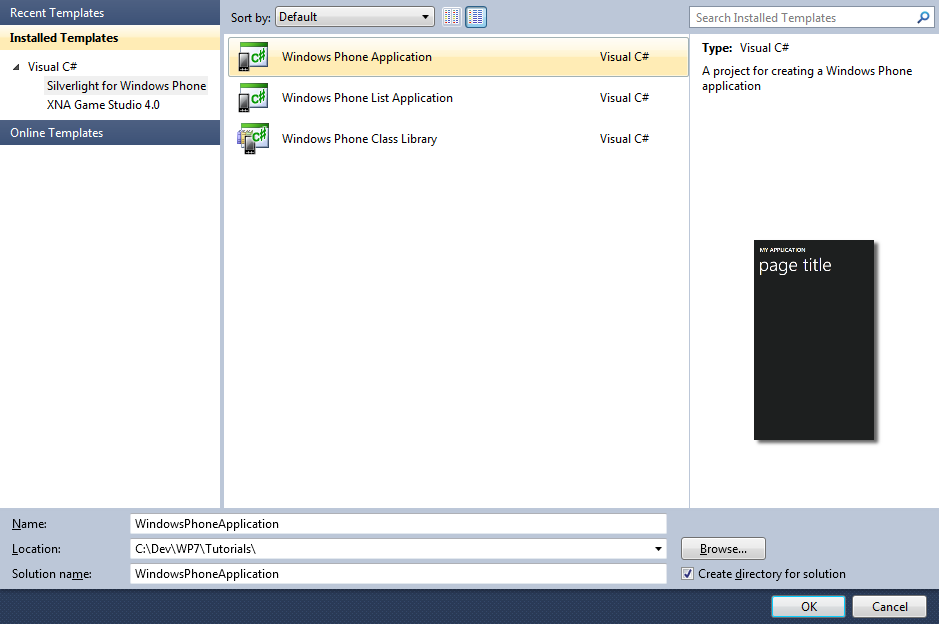
Start Microsoft Visual Studio 2010 Express for Windows Phone, then Select File then New Project... Select "Visual C#" then "Silverlight for Windows Phone" and then "Windows Phone Application" from Templates, select a Location if you wish, then enter a name for the Project and then click OK, see below:
Step 2
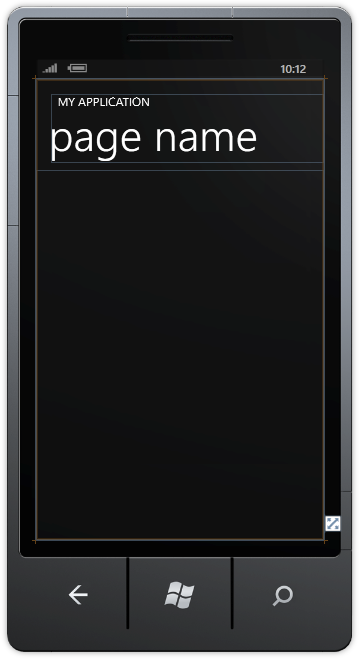
A Windows Phone application Page named MainPage.xaml should then appear, see below:
Step 3
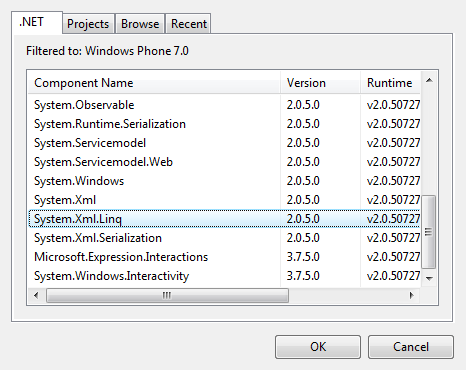
Select Project then Add Reference... The "Add Reference" window should appear, select "System.XML.Linq" then click on OK, see below:
Step 4
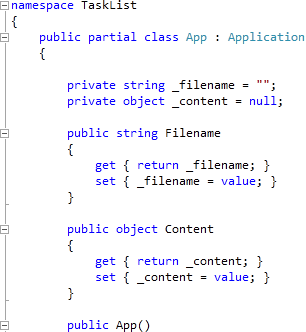
Right Click on the App.xaml Entry in the Solution Explorer and choose "View Code" then in the Code View for App.xaml.css, above the "public App()" line type the following:
private string _filename = "";
private object _content = null;

public string Filename
{
  get { return _filename; }
  set { _filename = value; }
}

public object Content
{
  get { return _content; }
  set { _content = value; }
}
See below:
Step 5
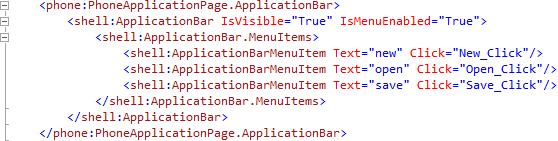
Return to the MainPage Designer View by selecting the "MainPage.xaml" Tab. Then in the XAML Pane above the <Grid x:Name="LayoutRoot" Background="{StaticResource PhoneBackgroundBrush}"> line type the following XAML:
<phone:PhoneApplicationPage.ApplicationBar>
  <shell:ApplicationBar IsVisible="True" IsMenuEnabled="True">
    <shell:ApplicationBar.MenuItems>
      <shell:ApplicationBarMenuItem Text="new" Click="New_Click"/>
      <shell:ApplicationBarMenuItem Text="open" Click="Open_Click"/>
      <shell:ApplicationBarMenuItem Text="save" Click="Save_Click"/>
    </shell:ApplicationBar.MenuItems>
  </shell:ApplicationBar>
</phone:PhoneApplicationPage.ApplicationBar>
See below:
Step 6
While still in the XAML Pane between the <Grid x:Name="ContentGrid" Grid.Row="1"> and </Grid> lines, type the following XAML:
<Grid x:Name="ContentMain">
  <Grid.RowDefinitions>
    <RowDefinition Height="Auto"/>
    <RowDefinition Height="Auto"/>
    <RowDefinition Height="*"/>
  </Grid.RowDefinitions>
  <!-- Content -->
  <TextBox Grid.Row="0" FontSize="24" Name="Subject"/>
  <Grid Grid.Row="1" x:Name="Buttons" >
    <Grid.ColumnDefinitions>
      <ColumnDefinition Width="160"/>
      <ColumnDefinition Width="160"/>
      <ColumnDefinition Width="160"/>
    </Grid.ColumnDefinitions>
    <!-- Buttons -->
    <Button Grid.Column="0" Content="add" Click="Add_Click"/>
    <Button Grid.Column="2" Content="remove" Click="Remove_Click"/>
  </Grid>
  <ListBox Grid.Row="2" Name="Tasks"/>
</Grid>
XAML:
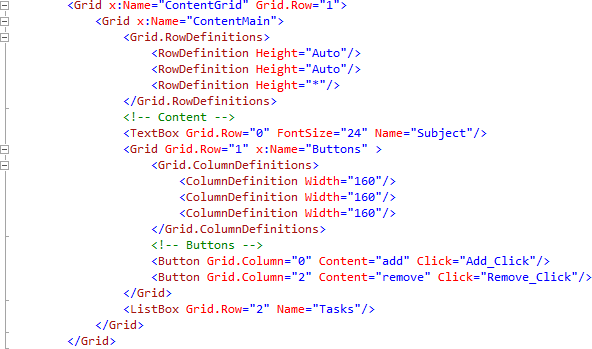
Design:
Step 7
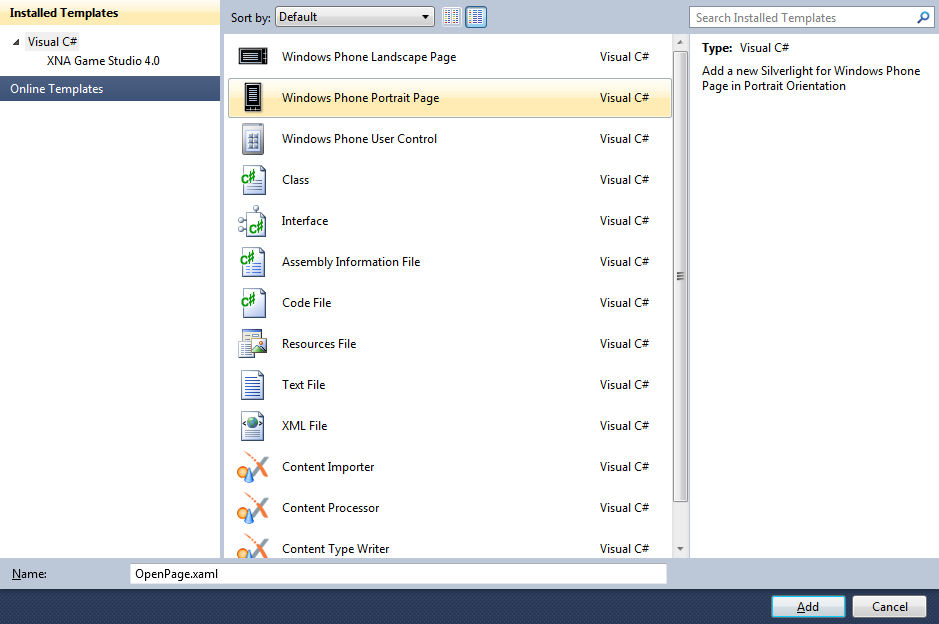
Select Project then "Add New Item...", and select the "Windows Phone Portrait Page" Template, then change the "Name" to OpenPage.xaml, see below:
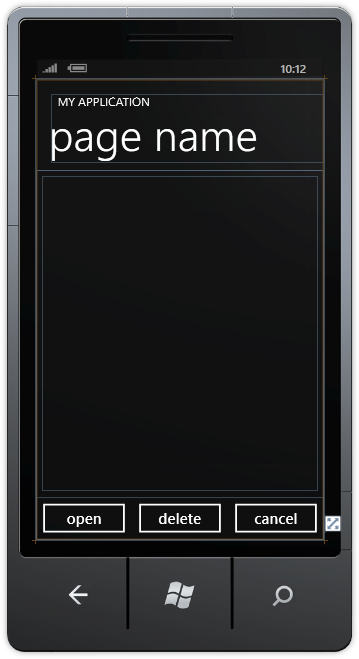
Step 8
In the Designer View for OpenPage.xaml, in the XAML Pane between between the <Grid Grid.Row="1" x:Name="ContentGrid"> and </Grid> lines type the following XAML:
<Grid x:Name="ContentMain">
  <Grid.RowDefinitions>
    <RowDefinition Height="*"/>
    <RowDefinition Height="Auto"/>
  </Grid.RowDefinitions>
  <!-- Content -->
  <ListBox Grid.Row="0" Margin="10" FontSize="48" Name="Files"/>
  <Grid Grid.Row="1" x:Name="Buttons" >
    <Grid.ColumnDefinitions>
      <ColumnDefinition Width="160"/>
      <ColumnDefinition Width="160"/>
      <ColumnDefinition Width="160"/>
    </Grid.ColumnDefinitions>
    <!-- Buttons -->
    <Button Grid.Column="0" Content="open" Click="Open_Click"/>
    <Button Grid.Column="1" Content="delete" Click="Delete_Click"/>
    <Button Grid.Column="2" Content="cancel" Click="Cancel_Click"/>
  </Grid>
</Grid>
XAML:

Design:
Step 9
Right Click on the Page or the entry for "OpenPage.xaml" in Solution Explorer and choose the "View Code" option. In the Code View above "namespace TaskList" type the following:
using System.IO.IsolatedStorage;
using System.Xml.Linq;
Also in the CodeView above "public OpenPage()" type the following Application declaration:
public App app = (App)Application.Current;
See Below:

Step 10
While still in the Code View for OpenPage.xaml.cs in the "public OpenPage()" Constructor below "InitializeComponent();" type the following:
ApplicationTitle.Text = "TASK LIST";
PageTitle.Text = "open";
Loaded += (object sender, RoutedEventArgs e) =>
  {
    Files.Items.Clear();
    using (IsolatedStorageFile storage = IsolatedStorageFile.GetUserStoreForApplication())
    {
      foreach (string filename in storage.GetFileNames("*.tsk"))
      {
        Files.Items.Add(filename.ToLower());
      }
    }
  };
See Below:

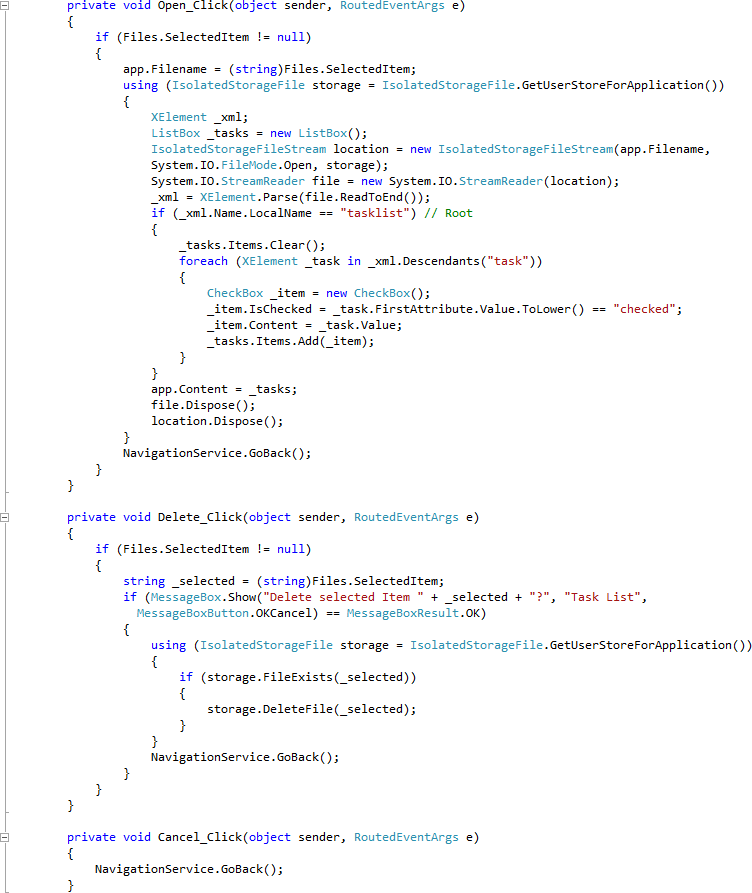
Step 11
While still in the Code View for OpenPage.xaml.cs, below the "}" of the "public OpenPage()" method type the following Event Handlers
private void Open_Click(object sender, RoutedEventArgs e)
{
  if (Files.SelectedItem != null)
  {
    app.Filename = (string)Files.SelectedItem;
    using (IsolatedStorageFile storage = IsolatedStorageFile.GetUserStoreForApplication())
    {
      XElement _xml;
      ListBox _tasks = new ListBox();
      IsolatedStorageFileStream location = new IsolatedStorageFileStream(app.Filename,
      System.IO.FileMode.Open, storage);
      System.IO.StreamReader file = new System.IO.StreamReader(location);
      _xml = XElement.Parse(file.ReadToEnd());
      if (_xml.Name.LocalName == "tasklist") // Root
      {
        _tasks.Items.Clear();
        foreach (XElement _task in _xml.Descendants("task"))
        {
          CheckBox _item = new CheckBox();
          _item.IsChecked = _task.FirstAttribute.Value.ToLower() == "checked";
          _item.Content = _task.Value;
          _tasks.Items.Add(_item);
        }
      }
      app.Content = _tasks;
      file.Dispose();
      location.Dispose();
    }
    NavigationService.GoBack();
  }
}

private void Delete_Click(object sender, RoutedEventArgs e)
{
  if (Files.SelectedItem != null)
  {
    string _selected = (string)Files.SelectedItem;
    if (MessageBox.Show("Delete selected Item " + _selected + "?", "Task List",
      MessageBoxButton.OKCancel) == MessageBoxResult.OK)
    {
      using (IsolatedStorageFile storage = IsolatedStorageFile.GetUserStoreForApplication())
      {
        if (storage.FileExists(_selected))
        {
          storage.DeleteFile(_selected);
        }
      }
      NavigationService.GoBack();
    }
  }
}

private void Cancel_Click(object sender, RoutedEventArgs e)
{
  NavigationService.GoBack();
}
See Below:
Step 12
Select Project then "Add New Item...", and select the "Windows Phone Portrait Page" Template, then change the "Name" to SavePage.xaml, see below:

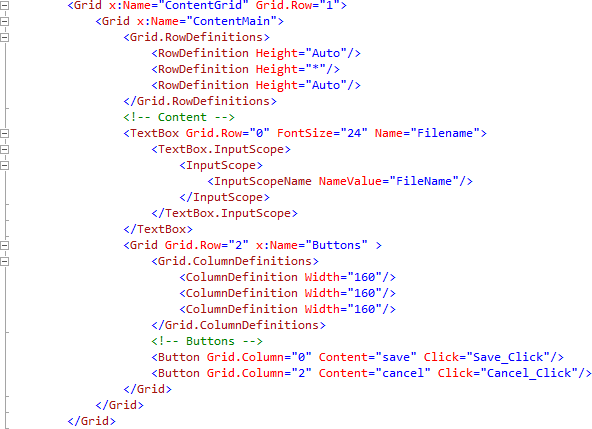
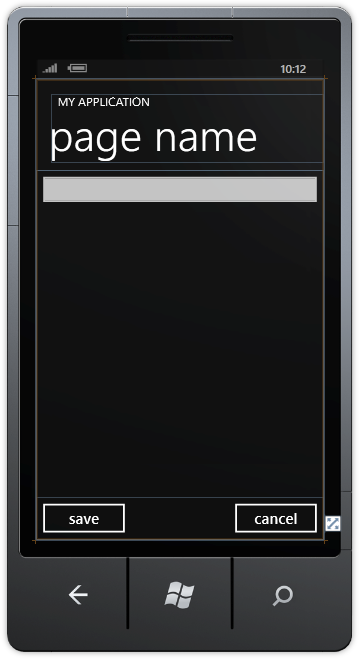
Step 13
In the Designer View for SavePage.xaml, in the XAML Pane between between the <Grid Grid.Row="1" x:Name="ContentGrid"> and </Grid> lines type the following XAML:
<Grid x:Name="ContentMain">
  <Grid.RowDefinitions>
    <RowDefinition Height="Auto"/>
    <RowDefinition Height="*"/>
    <RowDefinition Height="Auto"/>
  </Grid.RowDefinitions>
  <!-- Content -->
  <TextBox Grid.Row="0" FontSize="24" Name="Filename">
    <TextBox.InputScope>
      <InputScope>
        <InputScopeName NameValue="FileName"/>
      </InputScope>
    </TextBox.InputScope>
  </TextBox>
  <Grid Grid.Row="2" x:Name="Buttons" >
    <Grid.ColumnDefinitions>
      <ColumnDefinition Width="160"/>
      <ColumnDefinition Width="160"/>
      <ColumnDefinition Width="160"/>
    </Grid.ColumnDefinitions>
    <!-- Buttons -->
    <Button Grid.Column="0" Content="save" Click="Save_Click"/>
    <Button Grid.Column="2" Content="cancel" Click="Cancel_Click"/>
  </Grid>
</Grid>
XAML:
Design:
Step 14
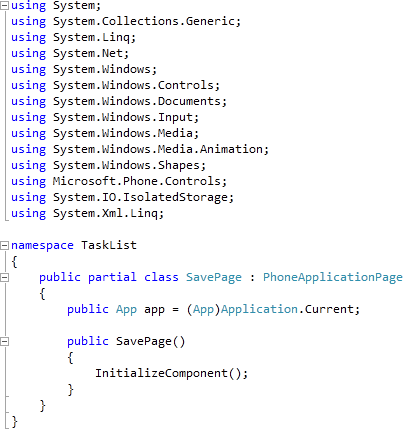
Right Click on the Page or the entry for "SavePage.xaml" in Solution Explorer and choose the "View Code" option. In the Code View above "namespace TaskList" type the following:
using System.IO.IsolatedStorage;
using System.Xml.Linq;
Also in the CodeView above "public SavePage()" type the following Application declaration:
public App app = (App)Application.Current;
See Below:
Step 15
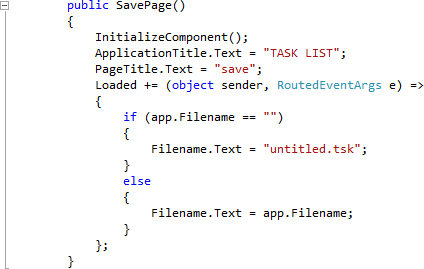
While still in the Code View for SavePage.xaml.cs in the "public SavePage()" Constructor below "InitializeComponent();" type the following:
ApplicationTitle.Text = "TASK LIST";
PageTitle.Text = "save";
Loaded += (object sender, RoutedEventArgs e) =>
  {
    if (app.Filename == "")
    {
      Filename.Text = "untitled.tsk";
    }
      else
    {
      Filename.Text = app.Filename;
    }
  };
See Below:
Step 16
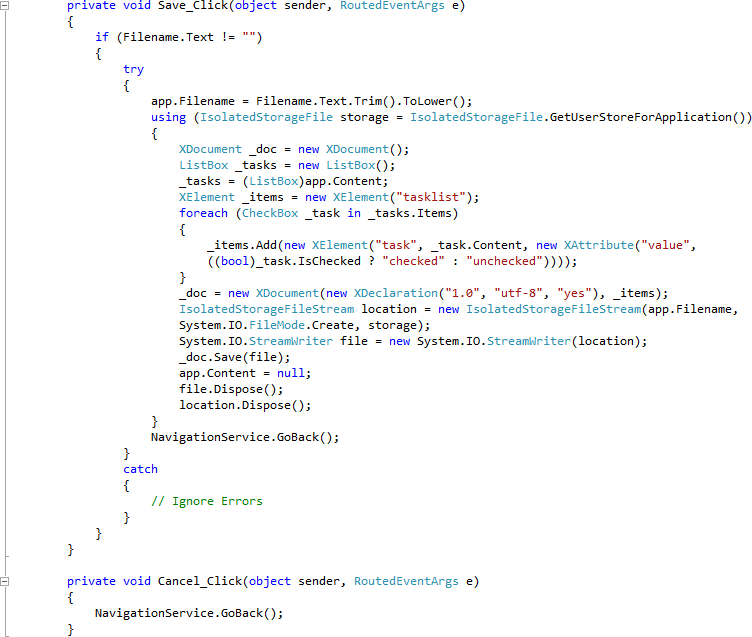
While still in the Code View for SavePage.xaml.cs, below the "}" of the "public SavePage()" method type the following Event Handlers
private void Save_Click(object sender, RoutedEventArgs e)
{
  if (Filename.Text != "")
  {
    try
    {
      app.Filename = Filename.Text.Trim().ToLower();
      using (IsolatedStorageFile storage = IsolatedStorageFile.GetUserStoreForApplication())
      {
        XDocument _doc = new XDocument();
        ListBox _tasks = new ListBox();
        _tasks = (ListBox)app.Content;
        XElement _items = new XElement("tasklist");
        foreach (CheckBox _task in _tasks.Items)
        {
          _items.Add(new XElement("task", _task.Content, new XAttribute("value",
          ((bool)_task.IsChecked ? "checked" : "unchecked"))));
        }
        _doc = new XDocument(new XDeclaration("1.0", "utf-8", "yes"), _items);
        IsolatedStorageFileStream location = new IsolatedStorageFileStream(app.Filename,
        System.IO.FileMode.Create, storage);
        System.IO.StreamWriter file = new System.IO.StreamWriter(location);
        _doc.Save(file);
        app.Content = null;
        file.Dispose();
        location.Dispose();
      }
    NavigationService.GoBack();
    }
    catch
    {
      // Ignore Errors
    }
  }
}

private void Cancel_Click(object sender, RoutedEventArgs e)
{
  NavigationService.GoBack();
}
See Below:
Step 17
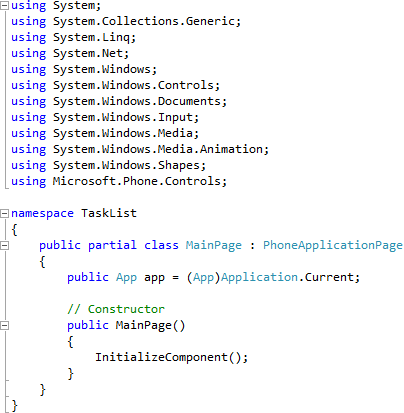
Return to MainPage.xaml by selecting the "MainPage.xaml" Tab then Right Click on the Page or the entry for "MainPage.xaml" in Solution Explorer and choose the "View Code" option. In the Code View above "public MainPage()" type the following Application declaration:
public App app = (App)Application.Current;
See Below:
Step 18
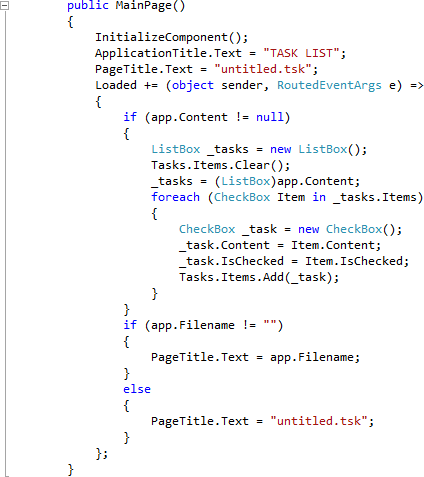
While still in the Code View for MainPage.xaml.cs in the "public MainPage()" Constructor below "InitializeComponent();" type or replace with the following:
ApplicationTitle.Text = "TASK LIST";
PageTitle.Text = "untitled.tsk";
Loaded += (object sender, RoutedEventArgs e) =>
  {
    if (app.Content != null)
    {
      ListBox _tasks = new ListBox();
      Tasks.Items.Clear();
      _tasks = (ListBox)app.Content;
      foreach (CheckBox Item in _tasks.Items)
      {
        CheckBox _task = new CheckBox();
        _task.Content = Item.Content;
        _task.IsChecked = Item.IsChecked;
        Tasks.Items.Add(_task);
      }
    }
    if (app.Filename != "")
    {
      PageTitle.Text = app.Filename;
    }
    else
    {
      PageTitle.Text = "untitled.tsk";
    }
  };
See Below:
Step 19
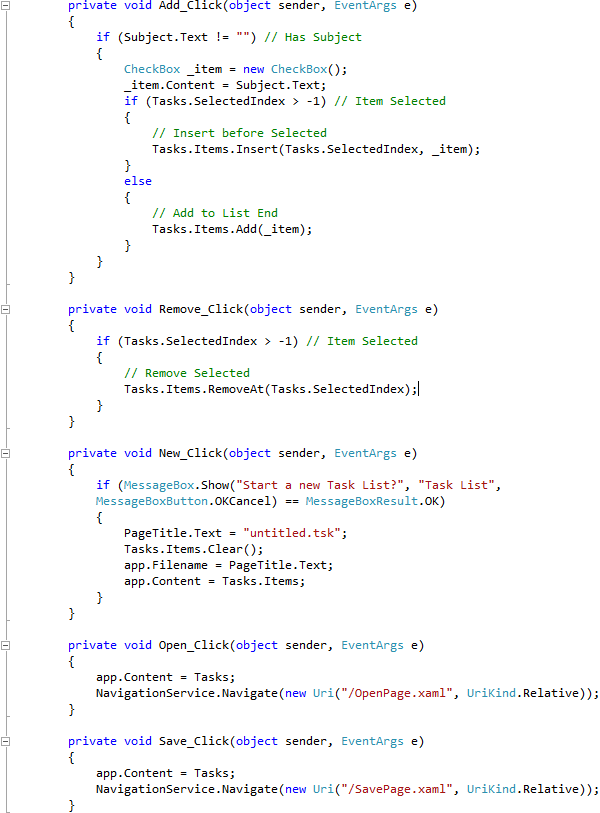
While still in the Code View for MainPage.xaml.cs, below the "}" of the "public MainPage()" method type the following Event Handlers:
private void Add_Click(object sender, EventArgs e)
{
  if (Subject.Text != "") // Has Subject
  {
    CheckBox _item = new CheckBox();
    _item.Content = Subject.Text;
    if (Tasks.SelectedIndex > -1) // Item Selected
    {
      // Insert before Selected
      Tasks.Items.Insert(Tasks.SelectedIndex, _item);
    }
    else
    {
      // Add to List End
      Tasks.Items.Add(_item);
    }
  }
}

private void Remove_Click(object sender, EventArgs e)
{
  if (Tasks.SelectedIndex > -1) // Item Selected
  {
    // Remove Selected
    Tasks.Items.RemoveAt(Tasks.SelectedIndex);
  }
}

private void New_Click(object sender, EventArgs e)
{
  if (MessageBox.Show("Start a new Task List?", "Task List",
  MessageBoxButton.OKCancel) == MessageBoxResult.OK)
  {
    PageTitle.Text = "untitled.tsk";
    Tasks.Items.Clear();
    app.Filename = PageTitle.Text;
    app.Content = Tasks.Items;
  }
}

private void Open_Click(object sender, EventArgs e)
{
  app.Content = Tasks;
  NavigationService.Navigate(new Uri("/OpenPage.xaml", UriKind.Relative));
}

private void Save_Click(object sender, EventArgs e)
{
  app.Content = Tasks;
  NavigationService.Navigate(new Uri("/SavePage.xaml", UriKind.Relative));
}
See Below:
Step 20
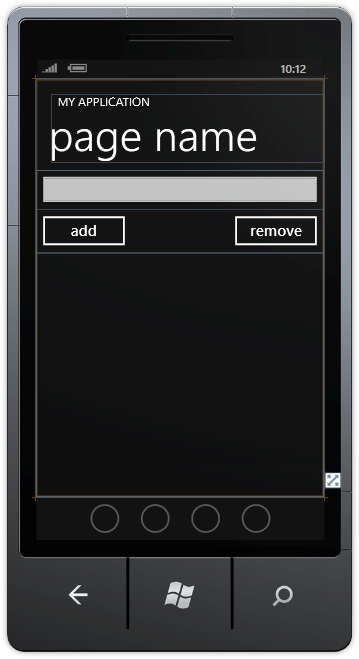
Save the Project as you have now finished the Windows Phone Silverlight application. Select the Windows Phone Emulator option then Select Debug then Start Debugging or click on Start Debugging:
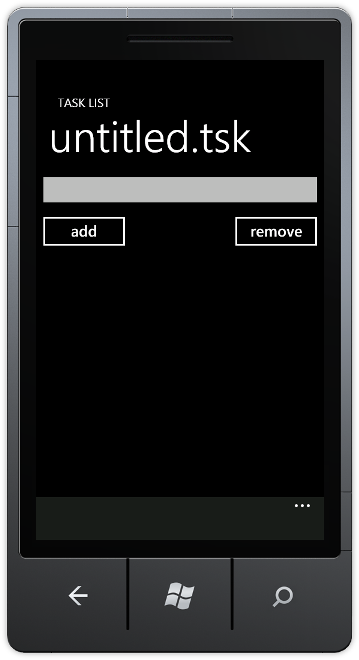
After you do, the following will appear in the Windows Phone Emulator after it has been loaded:
Step 21
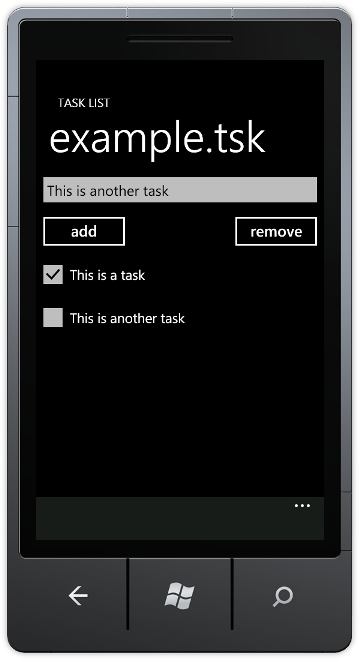
If you select and type into the TextBox the Subject of a Task, then Click on the Add button you can add some Tasks and tick the box when completed, you can then "Save" this list to "Open" later via the "..." menu, see below:
Step 22
You can then Stop the application by selecting the Visual Studio 2010 application window and clicking on the Stop Debugging button:
This is a Simple Task List application with the ability to Open and Save Task Lists files as XML including the items checked and the order they appear. Try adding new features like being able to move items Up and Down the list and being able to Edit previously entered Tasks or use this as a basis for more complex XML-based applications for Windows Phone 7 - make it your own!