This tutorial will show you how to create your own Slide Show application, which will allow you to view your Photos like a Slideshow, features Play/Pause Slideshow, Speed and more!
Printer Friendly Download Tutorial (470KB) Download Source Code (14.4KB)
Step 1
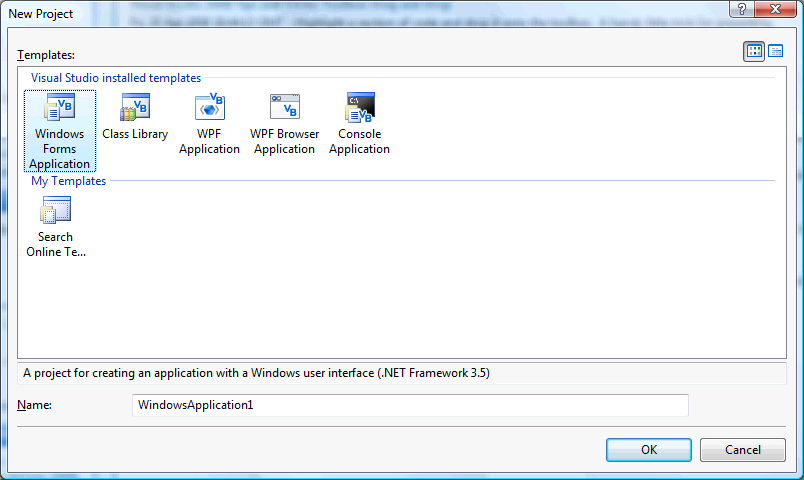
Start Microsoft Visual Basic 2008 Express Edition, then select File then New Project... Choose Windows Forms Application from the New Project Window, enter a name for the Project and then click OK, see below:
Step 2
A Blank Form named Form1 should then appear, see below:
Step 3
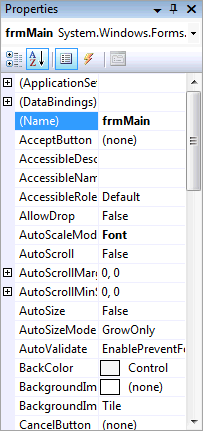
With Form1 selected goto the Properties box and change the Name from Form1 to frmMain
Step 4
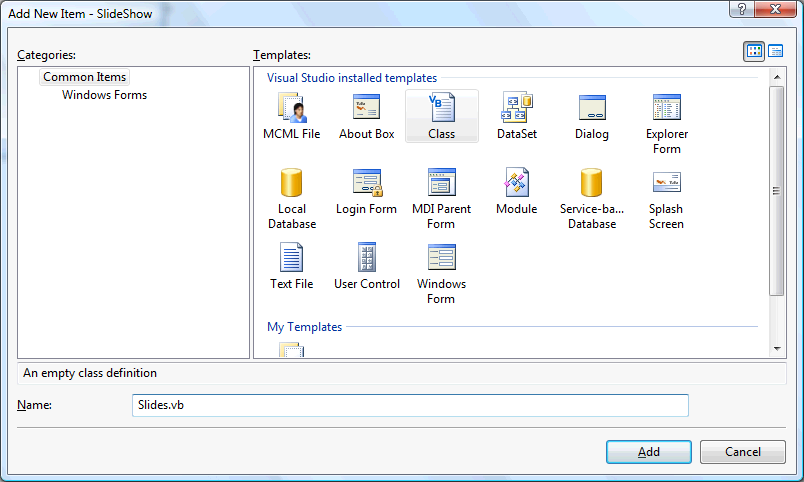
Then select Project then Add Class... and choose the "Class" Template if it is not already selected and give it the Name "Slides.vb" without the quotes, see below:
Step 5
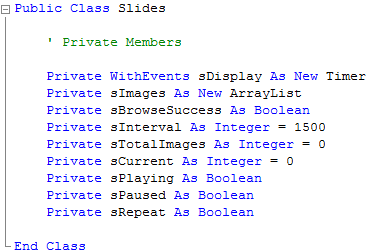
With the empty Slides Class displayed, if not double click on the "Slides.vb" item in Solution Explorer, then enter the following Private Members below the Public Class Slides line:
' Private Members

Private WithEvents sDisplay As New Timer
Private sImages As New ArrayList
Private sBrowseSuccess As Boolean
Private sInterval As Integer = 1500
Private sTotalImages As Integer = 0
Private sCurrent As Integer = 0
Private sPlaying As Boolean
Private sPaused As Boolean
Private sRepeat As Boolean
See Below:
Step 6
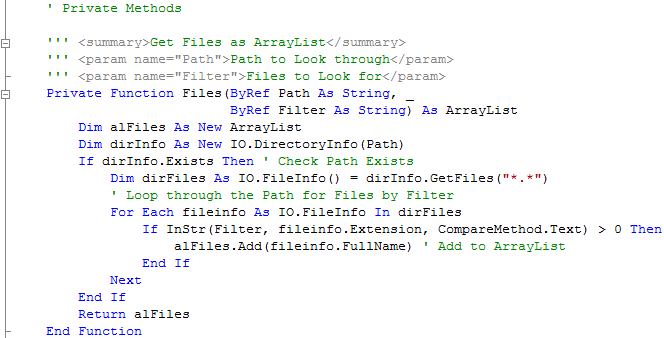
Again, with the Slides Class still displayed, enter the following Private Method above "End Class" and below the "Private Members" section:
' Private Methods

''' <summary>Get Files as ArrayList</summary>
''' <param name="Path">Path to Look through</param>
''' <param name="Filter">Files to Look for</param>
Private Function Files(ByRef Path As String, _
                     ByRef Filter As String) As ArrayList
  Dim alFiles As New ArrayList
  Dim dirInfo As New IO.DirectoryInfo(Path)
  If dirInfo.Exists Then ' Check Path Exists
    Dim dirFiles As IO.FileInfo() = dirInfo.GetFiles("*.*")
    ' Loop through the Path for Files by Filter
    For Each fileinfo As IO.FileInfo In dirFiles
      If InStr(Filter, fileinfo.Extension, CompareMethod.Text) > 0 Then
        alFiles.Add(fileinfo.FullName) ' Add to ArrayList
      End If
    Next
  End If
  Return alFiles
End Function
See Below:
Step 7
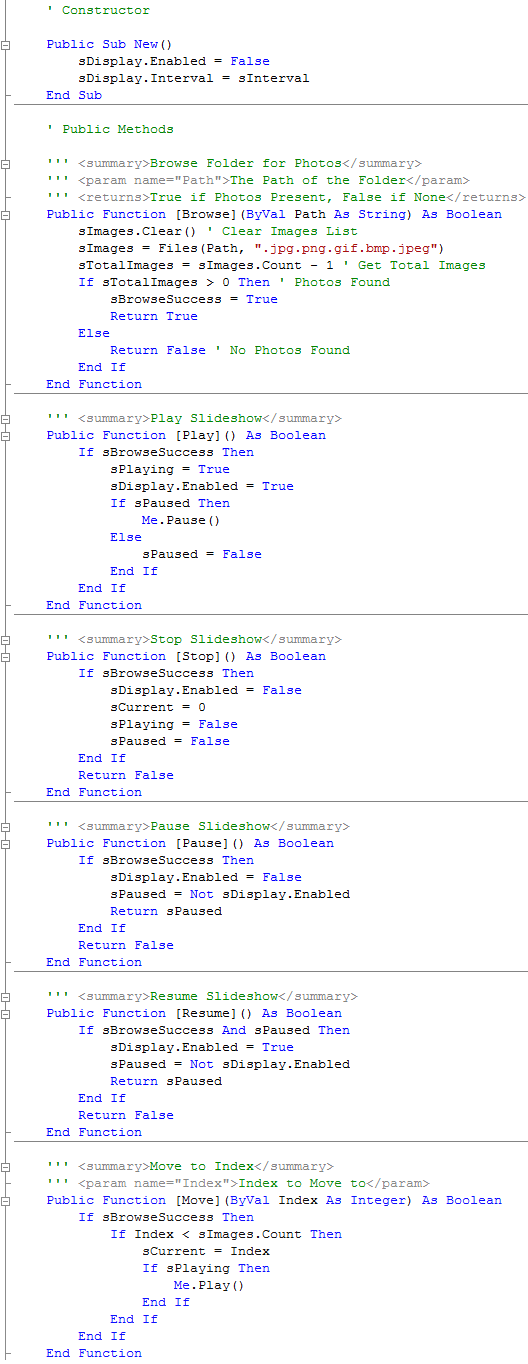
Again, with the mPlayerControl Class still displayed, enter the Constructor and Public Methods above the "End Class" of the Slides Class and below the "Private Methods" section:
' Constructor

Public Sub New()
  sDisplay.Enabled = False
  sDisplay.Interval = sInterval
End Sub

' Public Methods

''' <summary>Browse Folder for Photos</summary>
''' <param name="Path">The Path of the Folder</param>
''' <returns>True if Photos Present, False if None</returns>
Public Function [Browse](ByVal Path As String) As Boolean
  sImages.Clear() ' Clear Images List
  sImages = Files(Path, ".jpg.png.gif.bmp.jpeg")
  sTotalImages = sImages.Count - 1 ' Get Total Images
  If sTotalImages > 0 Then ' Photos Found
    sBrowseSuccess = True
    Return True
  Else
    Return False ' No Photos Found
  End If
End Function

''' <summary>Play Slideshow</summary>
Public Function [Play]() As Boolean
  If sBrowseSuccess Then
    sPlaying = True
    sDisplay.Enabled = True
    If sPaused Then
      Me.Pause()
    Else
      sPaused = False
    End If
  End If
End Function

''' <summary>Stop Slideshow</summary>
Public Function [Stop]() As Boolean
  If sBrowseSuccess Then
    sDisplay.Enabled = False
    sCurrent = 0
    sPlaying = False
    sPaused = False
  End If
  Return False
End Function

''' <summary>Pause Slideshow</summary>
Public Function [Pause]() As Boolean
  If sBrowseSuccess Then
    sDisplay.Enabled = False
    sPaused = Not sDisplay.Enabled
    Return sPaused
  End If
  Return False
End Function

''' <summary>Resume Slideshow</summary>
Public Function [Resume]() As Boolean
  If sBrowseSuccess And sPaused Then
      sDisplay.Enabled = True
      sPaused = Not sDisplay.Enabled
      Return sPaused
  End If
  Return False
End Function

''' <summary>Move to Index</summary>
''' <param name="Index">Index to Move to</param>
Public Function [Move](ByVal Index As Integer) As Boolean
  If sBrowseSuccess Then
    If Index < sImages.Count Then
      sCurrent = Index
      If sPlaying Then
        Me.Play()
      End If
    End If
  End If
End Function
See Below:
Step 8
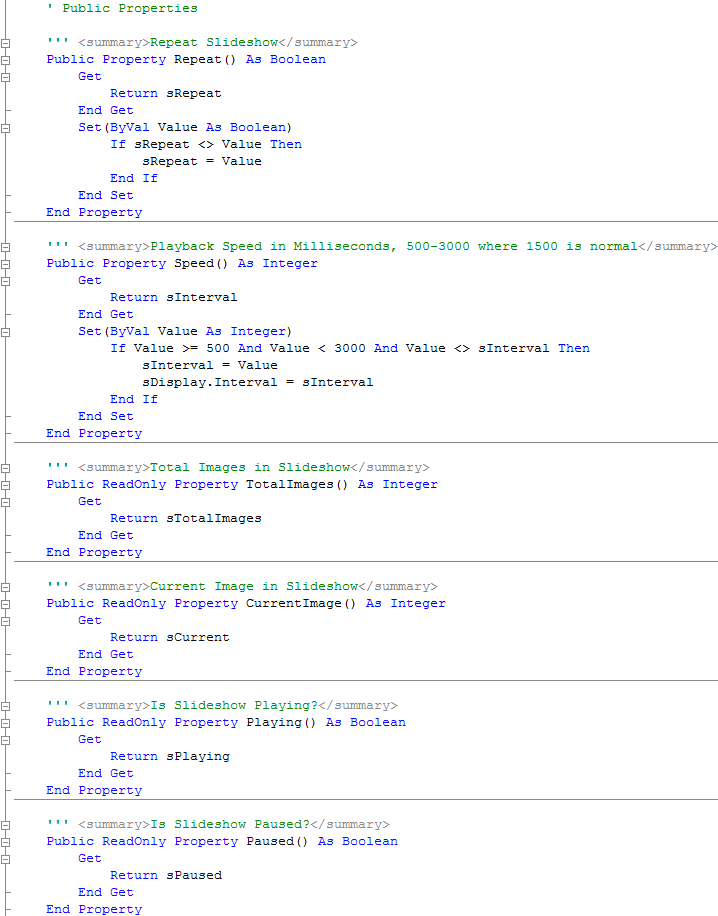
With the Slides Class still displayed, enter the following Public Properties above "End Class" and below the "Public Methods" Section:
' Public Properties

''' <summary>Repeat Slideshow</summary>
Public Property Repeat() As Boolean
  Get
      Return sRepeat
  End Get
  Set(ByVal Value As Boolean)
    If sRepeat <> Value Then
      sRepeat = Value
    End If
  End Set
End Property

''' <summary>Playback Speed in Milliseconds, 500-3000 where 1500 is normal</summary>
Public Property Speed() As Integer
  Get
    Return sInterval
  End Get
  Set(ByVal Value As Integer)
    If Value >= 500 And Value < 3000 And Value <> sInterval Then
      sInterval = Value
      sDisplay.Interval = sInterval
    End If
  End Set
End Property

''' <summary>Total Images in Slideshow</summary>
Public ReadOnly Property TotalImages() As Integer
  Get
    Return sTotalImages
  End Get
End Property

''' <summary>Current Image in Slideshow</summary>
Public ReadOnly Property CurrentImage() As Integer
  Get
    Return sCurrent
  End Get
End Property

''' <summary>Is Slideshow Playing?</summary>
Public ReadOnly Property Playing() As Boolean
  Get
    Return sPlaying
  End Get
End Property

''' <summary>Is Slideshow Paused?</summary>
Public ReadOnly Property Paused() As Boolean
  Get
    Return sPaused
  End Get
End Property
See Below:
Step 9
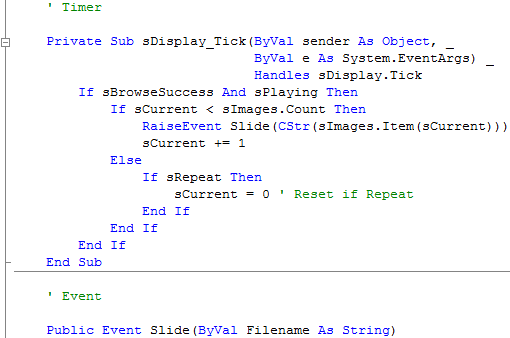
Finally in the Slides Class enter the following Timer and Event methods above "End Class" and below the "Public Properties" Section:
' Timer

Private Sub sDisplay_Tick(ByVal sender As Object, _
                          ByVal e As System.EventArgs) _
                          Handles sDisplay.Tick
  If sBrowseSuccess And sPlaying Then
    If sCurrent < sImages.Count Then
      RaiseEvent Slide(CStr(sImages.Item(sCurrent)))
      sCurrent += 1
    Else
      If sRepeat Then
        sCurrent = 0 ' Reset if Repeat
      End If
    End If
  End If
End Sub

' Event

Public Event Slide(ByVal Filename As String)
See Below:
Step 10
Select frmMain, by double-clicking on the entry for "frmMain in Solution Explorer or click on the "frmMain [Design]" Tab if Present.
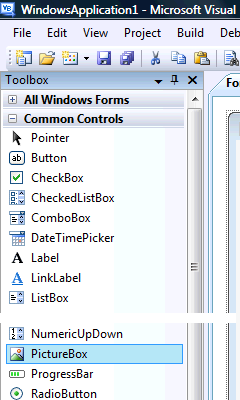
Then from the Common Controls tab on the Toolbox select the PictureBox component:
Step 11
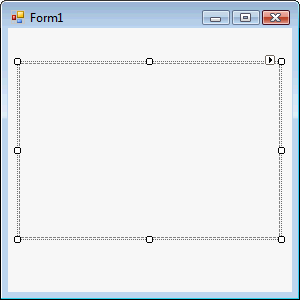
Draw a PictureBox on the Form, make sure to position and size the PictureBox so it appears as below:
Step 12
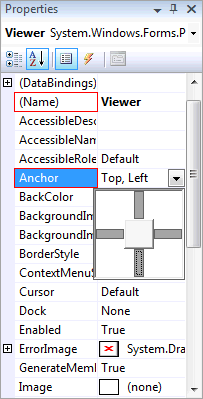
Then goto the Properties box and change the Name to "Viewer" and the Anchor property to "Top, Bottom, Left, Right", both without quotes, see Below:
Step 13
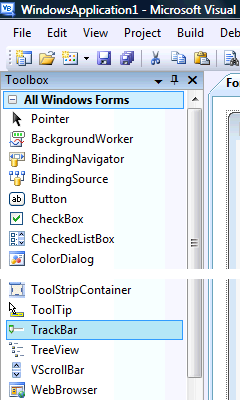
Then from the All Windows Forms tab on the Toolbox select the Trackbar Control, see Below:
Step 14
Draw a Trackbar Component on the Form, see below:
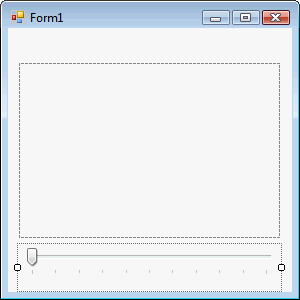
Step 15
Then goto the Properties box and change the Name to "Trackbar" and the Dock property to "Bottom", both without quotes, see Below:

Step 16
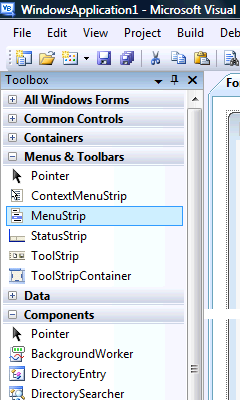
Then from the Menus & Toolbars tab on the Toolbox select the MenuStrip Control, see Below:
Step 17
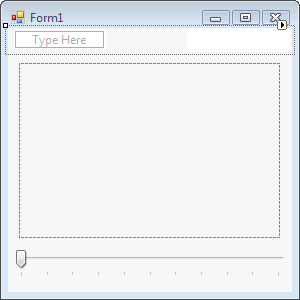
Either double-click on the MenuStrip Control entry in the Menu & Toolbars tab on the Toolbox or keep the MenuStrip Component Clicked and then move it over the Form then let go. Change the Name of the MenuStrip in the properties to mnuSlides. The Form will then look as below:
Step 18
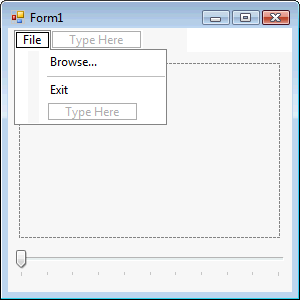
Click or select where the MenuStrip says "Type Here", an editable Textbox will appear type in "File" without the quotes in this Box, then in the Box below that type in "Browse...", then "-" which is minus or the hyphen key which will appear as a Seperator, and then finally "Exit". The MenuStrip should look as below:
Step 19
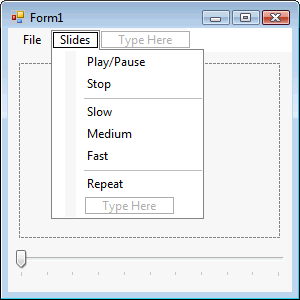
Click or select where the MenuStrip says "Type Here" next to "File", and in this type in "Slides" without the quotes in this Box, then in the Box below that type "Play/Pause", then below that "Stop", then type in "-" which is minus or the hyphen key for a Seperator, then below that "Slower", then "Medium", then "Fast" then another "-" for a seperator and finally "Repeat". The MenuStrip should look as below:
Step 20
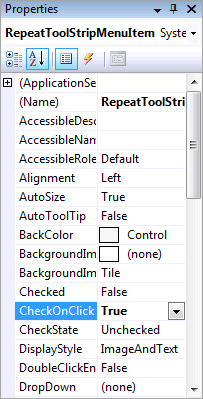
Select the Repeat menu item in the Slides menu by clicking on it and then goto the Properties box for RepeatToolStripMenuItem and change the CheckOnClick Property to True, see Below:
Step 21
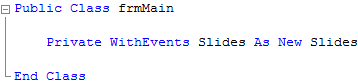
Right Click on the Form or the entry of the Form in Solution Explorer and choose the "View Code" option then below the "Public Class frmMain" type the following Private Declaration:
Private WithEvents Slides As New Slides
See Below:
Step 22
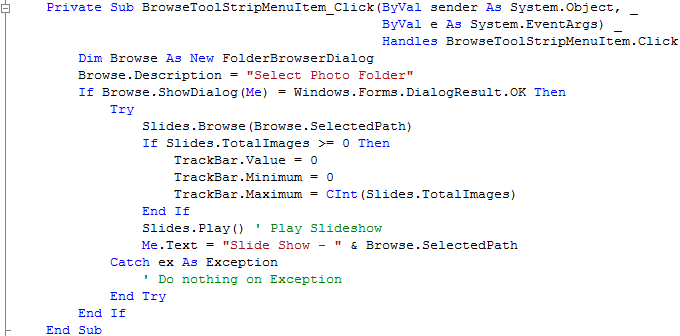
Click on the [Design] Tab to view the form again, then Click on "File" on the MenuStrip to show the MenuStrip then Double Click on the Menu Item Labeled "Browse..." (BrowserToolStripMenuItem) and type the following in the BrowseToolStripMenuItem_Click() Sub:
Dim Browse As New FolderBrowserDialog
Browse.Description = "Select Photo Folder"
If Browse.ShowDialog(Me) = Windows.Forms.DialogResult.OK Then
  Try
    Slides.Browse(Browse.SelectedPath)
    If Slides.TotalImages >= 0 Then
      TrackBar.Value = 0
      TrackBar.Minimum = 0
      TrackBar.Maximum = CInt(Slides.TotalImages)
    End If
    Slides.Play() ' Play Slideshow
    Me.Text = "Slide Show - " & Browse.SelectedPath
  Catch ex As Exception
    ' Do nothing on Exception
  End Try
End If
See Below:
Step 23
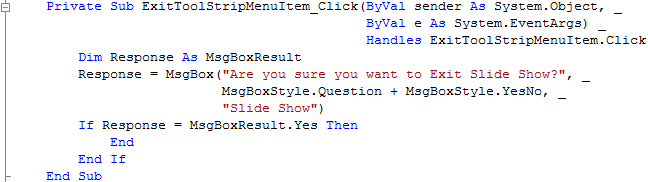
Click on the [Design] Tab to view the form again, then Click on "File" on the MenuStrip to show the MenuStrip then Double Click on the Menu Item Labeled "Exit" (ExitToolStripMenuItem) and type the following in the ExitToolStripMenuItem_Click() Sub
Dim Response As MsgBoxResult
Response = MsgBox("Are you sure you want to Exit Slide Show?", _
                  MsgBoxStyle.Question + MsgBoxStyle.YesNo, _
                  "Slide Show")
If Response = MsgBoxResult.Yes Then
  End
End If
See Below:
Step 24
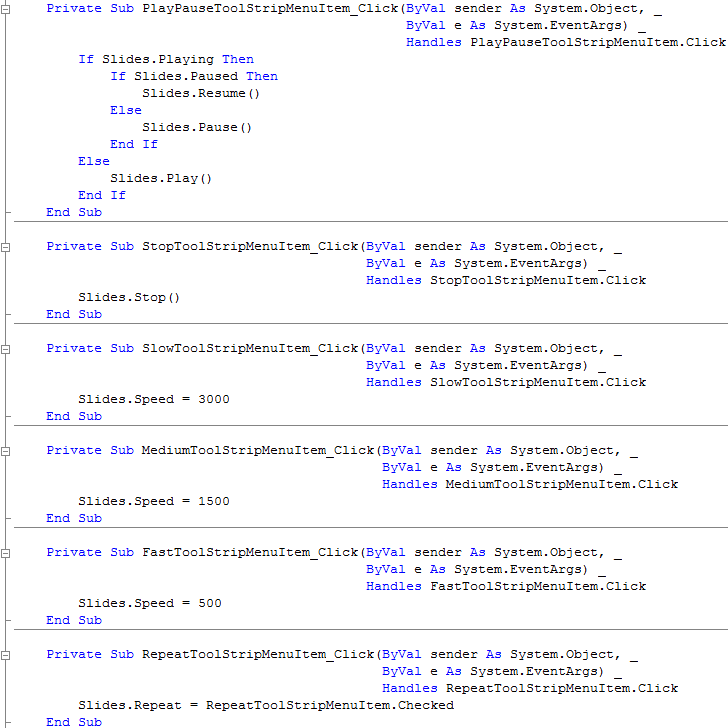
Click on the [Design] Tab to view the form again, then Click on "Slides" on the MenuStrip, then Double Click on the Menu Item Labeled "Play/Pause" (PlayPauseToolStripMenuItem) and type the following in the PlayPauseToolStripMenuItem_Click() Sub:
If Slides.Playing Then
  If Slides.Paused Then
    Slides.Resume()
  Else
    Slides.Pause()
  End If
Else
  Slides.Play()
End If
Click on [Design] tab or double click on the frmMain entry in Solution Explorer again, click "Slides", then Double Click on the Menu Item Labeled "Stop" (StopToolStripMenuItem) and type the following in the StopToolStripMenuItem_Click() Sub:
Slides.Stop()
Click on the [Design] Tab to view the form again, then Click on "Slides" on the MenuStrip, then Double Click on the Menu Item Labeled "Slow" (SlowToolStripMenuItem) and type the following in the SlowToolStripMenuItem_Click() Sub:
Slides.Speed = 3000
Click on the [Design] Tab to view the form again, then Click on "Slides" on the MenuStrip, then Double Click on the Menu Item Labeled "Medium" (MediumToolStripMenuItem) and type the following in the MediumToolStripMenuItem_Click() Sub:
Slides.Speed = 1500
Click on the [Design] Tab to view the form again, then Click on "Slides" on the MenuStrip, then Double Click on the Menu Item Labeled "Fast" (FastToolStripMenuItem) and type the following in the FastToolStripMenuItem_Click() Sub:
Slides.Speed = 500
Click on the [Design] Tab to view the form again, then Click on "Slides" on the MenuStrip, then Double Click on the Menu Item Labeled "Repeat" (RepeatToolStripMenuItem) and type the following in the RepeatToolStripMenuItem_Click() Sub:
Slides.Repeat = RepeatToolStripMenuItem.Checked
See Below:
Step 25
Click on the [Design] Tab to view the form again or double click on the frmMain entry in Solution Explorer, then Double-click on the Trackbar, and type the following in the TrackBar_Scroll(...) Sub:
Slides.Move(TrackBar.Value)
See Below:

Step 26
Click on the [Design] Tab to view the form again, then Double Click on the Form (frmMain) and type the following in the frmMain_Load() Sub
Me.Text = "Slide Show"
See Below:

Step 27
Return to the Code View, by double-clicking on the Form, this will show the frmMain_Load Sub from the previous step, in Code view are two drop-down boxes, select "Slides" from the first drop-down with "(frmMain Events)", and then from the other "(Declarations)" select "Slide" and type the following in the Slides_Slide(...) Sub:
Viewer.ImageLocation = Filename
TrackBar.Value = Slides.CurrentImage
See Below:

Step 28
Steps 28-30 are optional and just add Keyboard Shortcuts to the MenuItems, you don't have to do these if you don't want to!
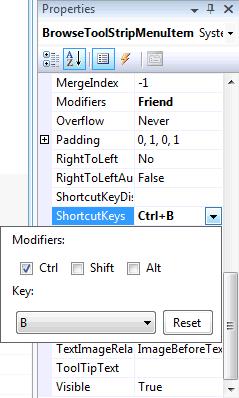
Click on the [Design] Tab to view the form again, click on "Browse" on the MenuStrip then in the Properties box look for the "ShortcutKeys" option and
click on the Drop Down arrow where "None" appears. Check the "Ctrl" Checkbox in "Modifiers" and then in the "Key" dropdown list select "B",
see below:
Step 29
The File Menu should appear as below:
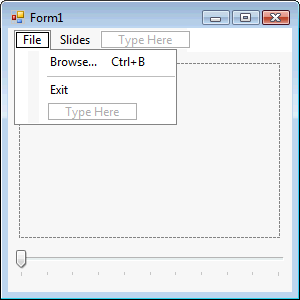
Step 30
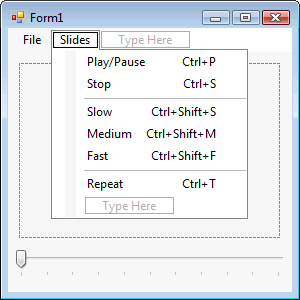
Click on or select the "Slides" Menu and set the "ShortcutKeys" Properties for the following Menu Items, "Play/Pause" should be set to "Ctrl+P", "Stop" to "Ctrl+S". "Slow" should be "Ctrl+Shift+S", "Medium" to "Ctrl+Shift+M" and "Fast" to "Ctrl+Shift+F". Repeat should be set to "Ctrl+T". The Slides Menu should appear as below:
Step 31
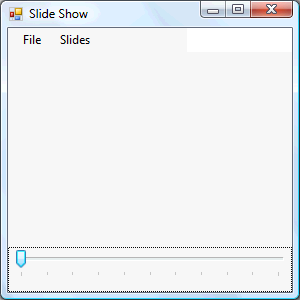
Save the Project as you have now finished the application, then click on Start:
When you do the following will appear:
Step 32
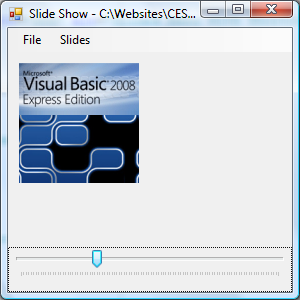
You can use the Browse feature to search for a folder then Display the Images in the PictureBox, see below:
Step 33
Click File then Exit or click on the Close button ![]() on the top right to end the application.
on the top right to end the application.
This is a very simple Slide Show application you can try adding your own features such as transitions and timings for the displaying of each Photo or add other functions you need to make it your own!
![]()