Windows Phone 7 applications support the ability to save Application Settings to persist customisation options on a device.
www.cespage.com/silverlight/wp7tut21.html
Step 1
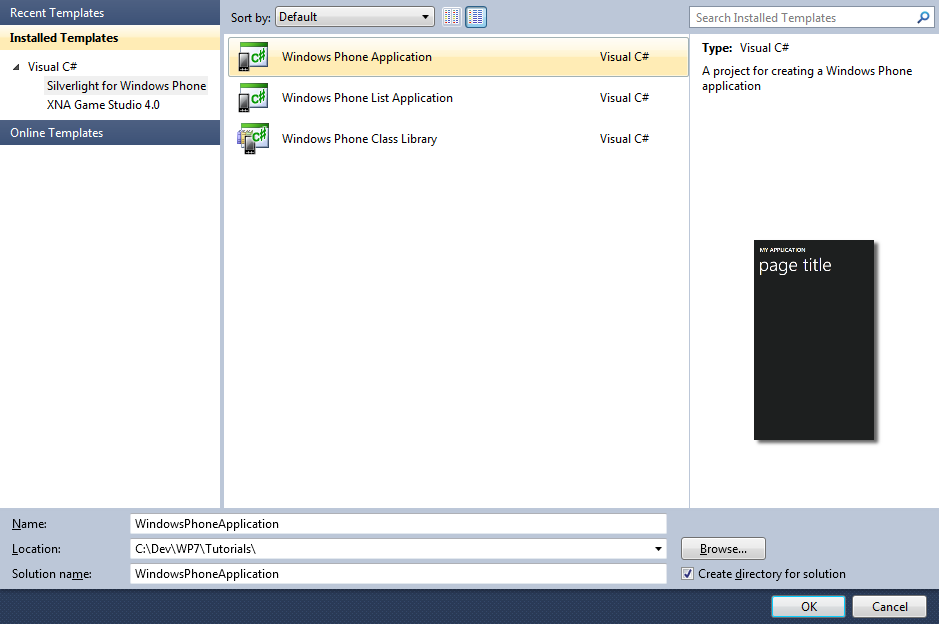
Start Microsoft Visual Studio 2010 Express for Windows Phone, then Select File then New Project... Select "Visual C#" then "Silverlight for Windows Phone" and then "Windows Phone Application" from Templates, select a Location if you wish, then enter a name for the Project and then click OK, see below:

Step 2
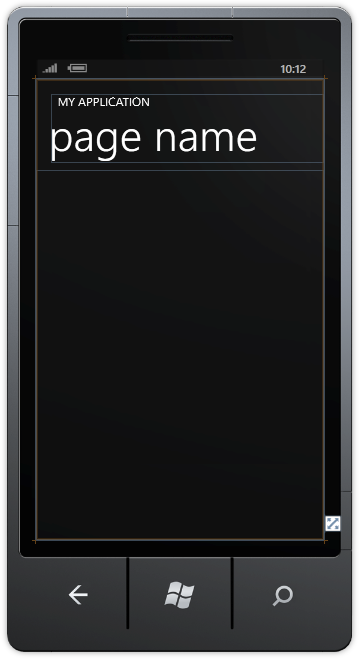
A Windows Phone application Page named MainPage.xaml should then appear, see below:
Step 3
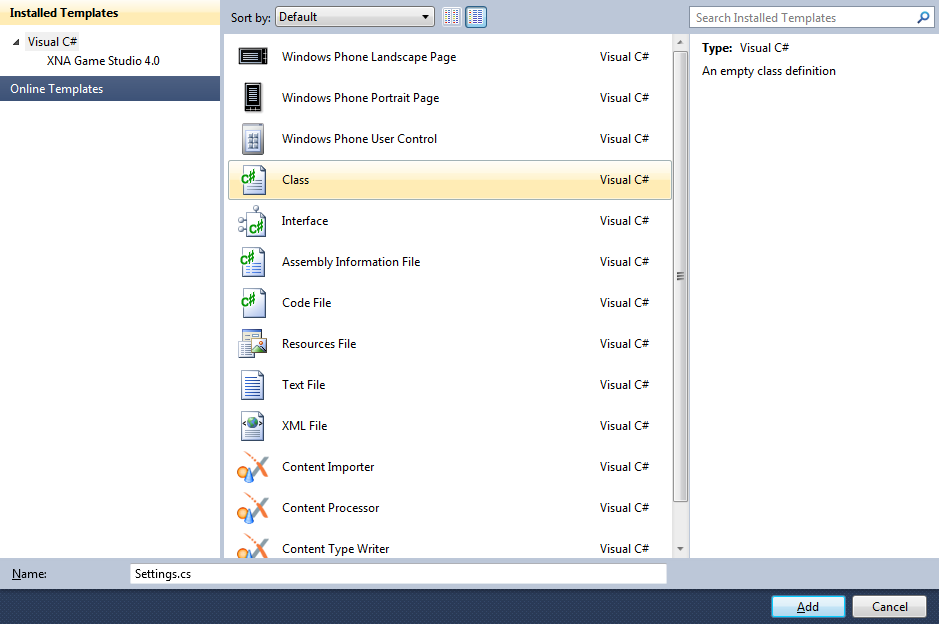
Select Project then "Add Class...", and select the "Class" Template is not already Selected, then change the "Name" to Settings.cs see below:
Step 4
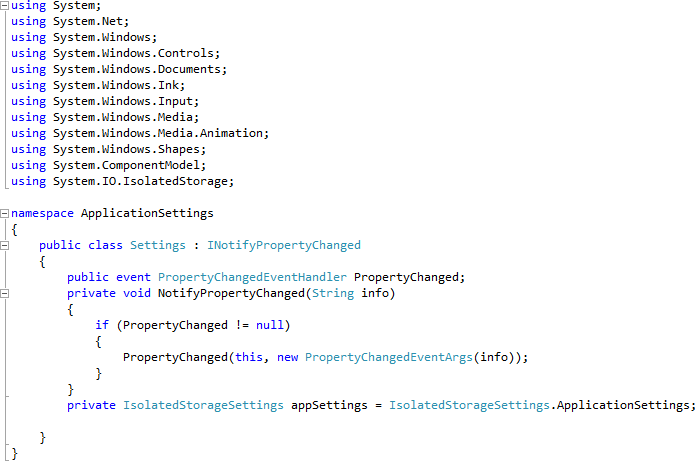
Add the new Class to the Project by Clicking on Add, then in the Code View for the new Class above "namespace ApplicationSettings" type the following:
using System.ComponentModel;
using System.IO.IsolatedStorage;
Also in the CodeView at the end of the line "public class Settings" type the following:
: INotifyPropertyChanged
Again in the CodeView below the "{" of the line "public class Settings" type the following:
public event PropertyChangedEventHandler PropertyChanged;
private void NotifyPropertyChanged(String info)
{
  if (PropertyChanged != null)
  {
    PropertyChanged(this, new PropertyChangedEventArgs(info));
  }
}
private IsolatedStorageSettings appSettings = IsolatedStorageSettings.ApplicationSettings;
See Below:
Step 5
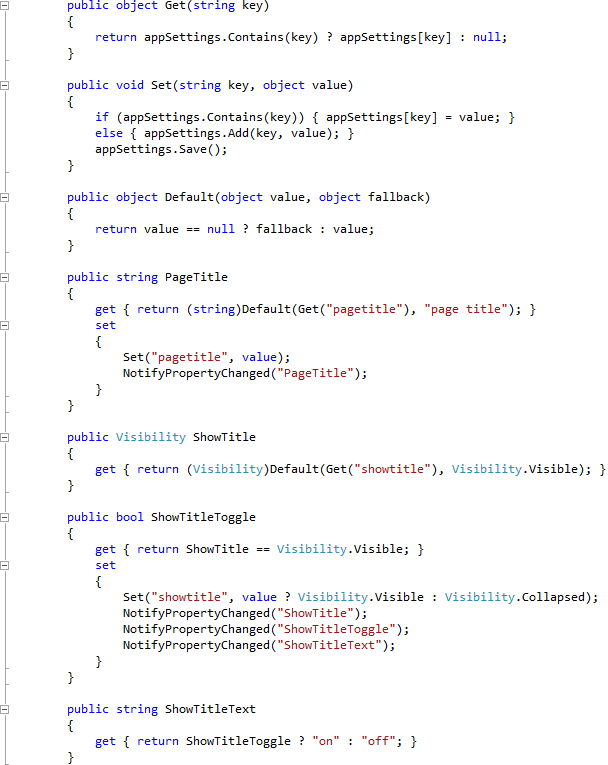
While still in the Code View for Settings.cs below "private IsolatedStorageSettings appSettings = IsolatedStorageSettings.ApplicationSettings;" type the following Methods and Properties:
public object Get(string key)
{
  return appSettings.Contains(key) ? appSettings[key] : null;
}

public void Set(string key, object value)
{
  if (appSettings.Contains(key)) { appSettings[key] = value; }
  else { appSettings.Add(key, value); }
  appSettings.Save();
}

public object Default(object value, object fallback)
{
  return value == null ? fallback : value;
}

public string PageTitle
{
  get { return (string)Default(Get("pagetitle"), "page title"); }
  set
  {
    Set("pagetitle", value);
    NotifyPropertyChanged("PageTitle");
  }
}

public Visibility ShowTitle
{
  get { return (Visibility)Default(Get("showtitle"), Visibility.Visible); }
}

public bool ShowTitleToggle
{
  get { return ShowTitle == Visibility.Visible; }
  set
  {
    Set("showtitle", value ? Visibility.Visible : Visibility.Collapsed);
    NotifyPropertyChanged("ShowTitle");
    NotifyPropertyChanged("ShowTitleToggle");
    NotifyPropertyChanged("ShowTitleText");
  }
}

public string ShowTitleText
{
  get { return ShowTitleToggle ? "on" : "off"; }
}
See Below:
Step 6
Right Click on the App.xaml Entry in the Solution Explorer and choose "View Code" then in the Code View for App.xaml.css, above the "public App()" line type the following:
public Settings Settings = new Settings();
See below:

Step 7
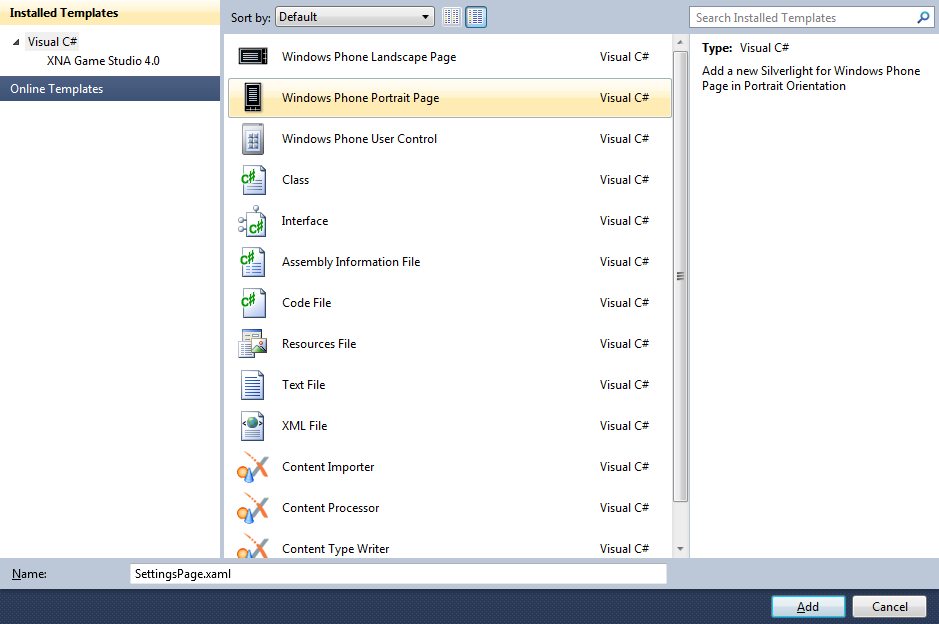
Select Project then "Add New Item...", and select the "Windows Phone Portrait Page" Template, then change the "Name" to SettingsPage.xaml, see below:
Step 8
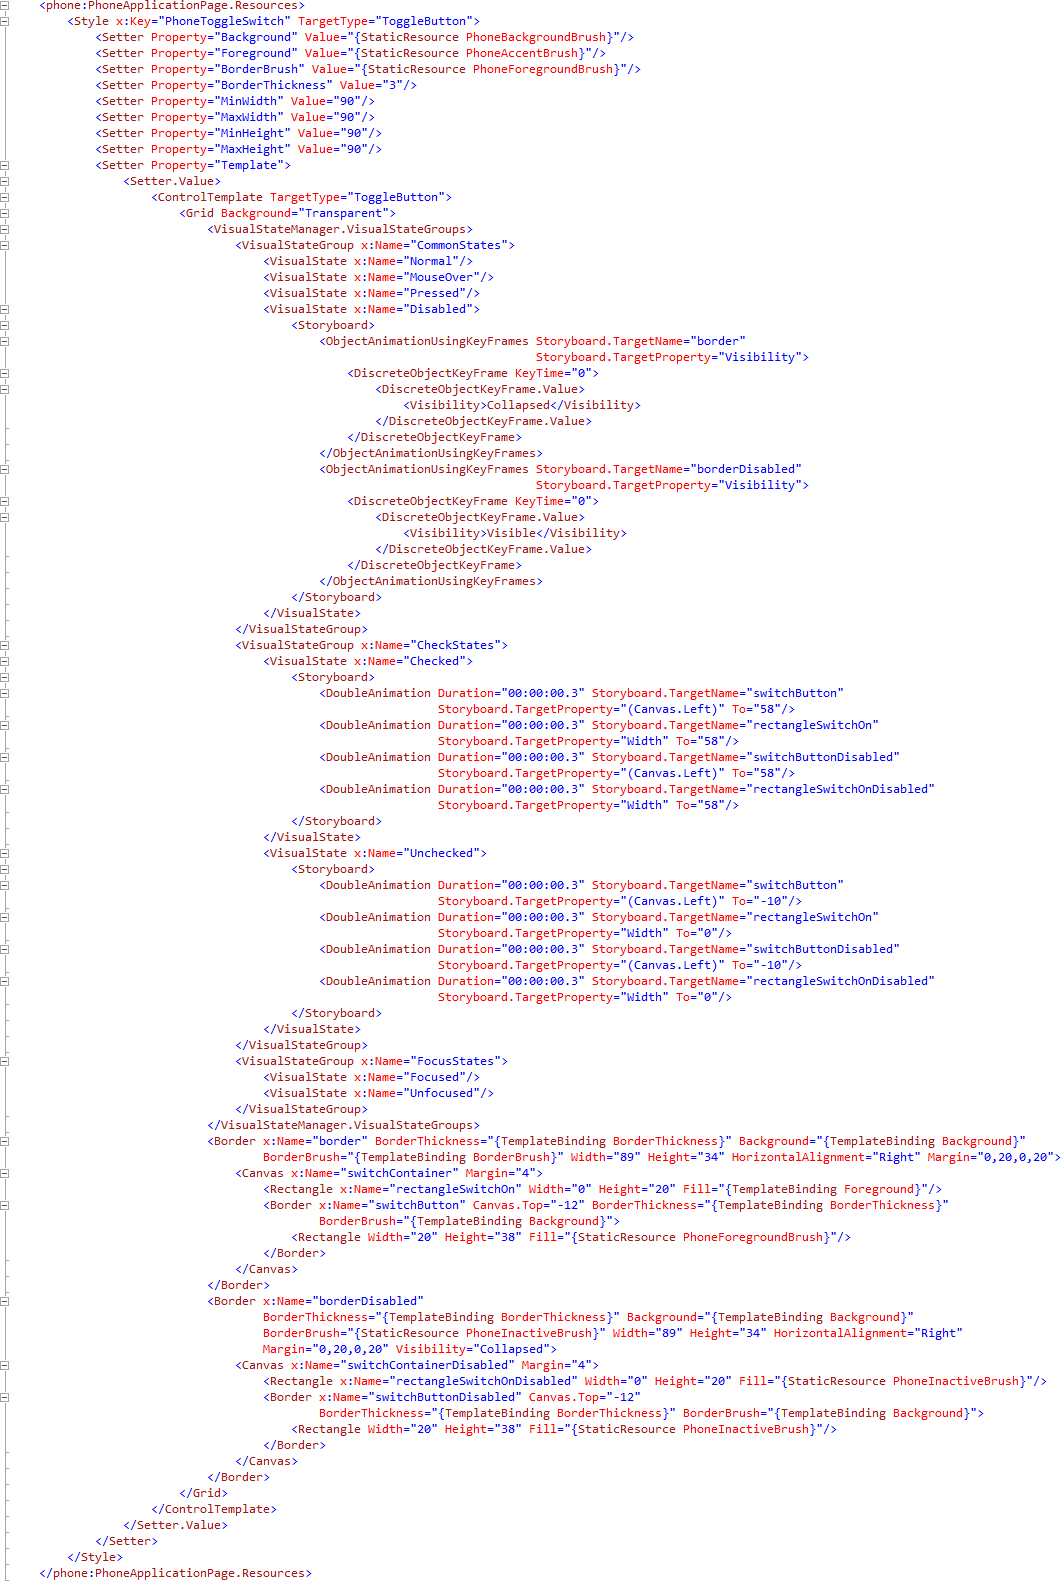
Add the new Class to the Project by Clicking on Add, then in the XAML Pane for SettingsPage.xaml above the <Grid x:Name="LayoutRoot" Background="Transparent"> line type the following XAML:
<phone:PhoneApplicationPage.Resources>
  <Style x:Key="PhoneToggleSwitch" TargetType="ToggleButton">
    <Setter Property="Background" Value="{StaticResource PhoneBackgroundBrush}"/>
    <Setter Property="Foreground" Value="{StaticResource PhoneAccentBrush}"/>
    <Setter Property="BorderBrush" Value="{StaticResource PhoneForegroundBrush}"/>
    <Setter Property="BorderThickness" Value="3"/>
    <Setter Property="MinWidth" Value="90"/>
    <Setter Property="MaxWidth" Value="90"/>
    <Setter Property="MinHeight" Value="90"/>
    <Setter Property="MaxHeight" Value="90"/>
    <Setter Property="Template">
      <Setter.Value>
        <ControlTemplate TargetType="ToggleButton">
          <Grid Background="Transparent">
            <VisualStateManager.VisualStateGroups>
              <VisualStateGroup x:Name="CommonStates">
                <VisualState x:Name="Normal"/>
                <VisualState x:Name="MouseOver"/>
                <VisualState x:Name="Pressed"/>
                <VisualState x:Name="Disabled">
                  <Storyboard>
                    <ObjectAnimationUsingKeyFrames Storyboard.TargetName="border" Storyboard.TargetProperty="Visibility">
                      <DiscreteObjectKeyFrame KeyTime="0">
                        <DiscreteObjectKeyFrame.Value>
                          <Visibility>Collapsed</Visibility>
                        </DiscreteObjectKeyFrame.Value>
                      </DiscreteObjectKeyFrame>
                    </ObjectAnimationUsingKeyFrames>
                    <ObjectAnimationUsingKeyFrames Storyboard.TargetName="borderDisabled" Storyboard.TargetProperty="Visibility">
                      <DiscreteObjectKeyFrame KeyTime="0">
                        <DiscreteObjectKeyFrame.Value>
                          <Visibility>Visible</Visibility>
                        </DiscreteObjectKeyFrame.Value>
                      </DiscreteObjectKeyFrame>
                    </ObjectAnimationUsingKeyFrames>
                  </Storyboard>
                </VisualState>
              </VisualStateGroup>
              <VisualStateGroup x:Name="CheckStates">
                <VisualState x:Name="Checked">
                  <Storyboard>
                    <DoubleAnimation Duration="00:00:00.3" Storyboard.TargetName="switchButton"
                        Storyboard.TargetProperty="(Canvas.Left)" To="58"/>
                    <DoubleAnimation Duration="00:00:00.3" Storyboard.TargetName="rectangleSwitchOn"
                        Storyboard.TargetProperty="Width" To="58"/>
                    <DoubleAnimation Duration="00:00:00.3" Storyboard.TargetName="switchButtonDisabled"
                        Storyboard.TargetProperty="(Canvas.Left)" To="58"/>
                    <DoubleAnimation Duration="00:00:00.3" Storyboard.TargetName="rectangleSwitchOnDisabled"
                        Storyboard.TargetProperty="Width" To="58"/>
                  </Storyboard>
                </VisualState>
                <VisualState x:Name="Unchecked">
                  <Storyboard>
                    <DoubleAnimation Duration="00:00:00.3" Storyboard.TargetName="switchButton"
                        Storyboard.TargetProperty="(Canvas.Left)" To="-10"/>
                    <DoubleAnimation Duration="00:00:00.3" Storyboard.TargetName="rectangleSwitchOn"
                        Storyboard.TargetProperty="Width" To="0"/>
                    <DoubleAnimation Duration="00:00:00.3" Storyboard.TargetName="switchButtonDisabled"
                        Storyboard.TargetProperty="(Canvas.Left)" To="-10"/>
                    <DoubleAnimation Duration="00:00:00.3" Storyboard.TargetName="rectangleSwitchOnDisabled"
                        Storyboard.TargetProperty="Width" To="0"/>
                  </Storyboard>
                </VisualState>
              </VisualStateGroup>
              <VisualStateGroup x:Name="FocusStates">
                <VisualState x:Name="Focused"/>
                <VisualState x:Name="Unfocused"/>
              </VisualStateGroup>
            </VisualStateManager.VisualStateGroups>
            <Border x:Name="border" BorderThickness="{TemplateBinding BorderThickness}" Background="{TemplateBinding Background}"
                BorderBrush="{TemplateBinding BorderBrush}" Width="89" Height="34" HorizontalAlignment="Right" Margin="0,20,0,20">
              <Canvas x:Name="switchContainer" Margin="4">
                <Rectangle x:Name="rectangleSwitchOn" Width="0" Height="20" Fill="{TemplateBinding Foreground}"/>
                <Border x:Name="switchButton" Canvas.Top="-12" BorderThickness="{TemplateBinding BorderThickness}"
                    BorderBrush="{TemplateBinding Background}">
                  <Rectangle Width="20" Height="38" Fill="{StaticResource PhoneForegroundBrush}"/>
                </Border>
              </Canvas>
            </Border>
            <Border x:Name="borderDisabled" BorderThickness="{TemplateBinding BorderThickness}" Background="{TemplateBinding Background}"
                BorderBrush="{StaticResource PhoneInactiveBrush}" Width="89" Height="34" HorizontalAlignment="Right"
                  Margin="0,20,0,20" Visibility="Collapsed">
              <Canvas x:Name="switchContainerDisabled" Margin="4">
                <Rectangle x:Name="rectangleSwitchOnDisabled" Width="0" Height="20" Fill="{StaticResource PhoneInactiveBrush}"/>
                  <Border x:Name="switchButtonDisabled" Canvas.Top="-12" BorderThickness="{TemplateBinding BorderThickness}"
                    BorderBrush="{TemplateBinding Background}">
                  <Rectangle Width="20" Height="38" Fill="{StaticResource PhoneInactiveBrush}"/>
                </Border>
              </Canvas>
            </Border>
          </Grid>
        </ControlTemplate>
      </Setter.Value>
    </Setter>
  </Style>
</phone:PhoneApplicationPage.Resources>
See below:
Step 9
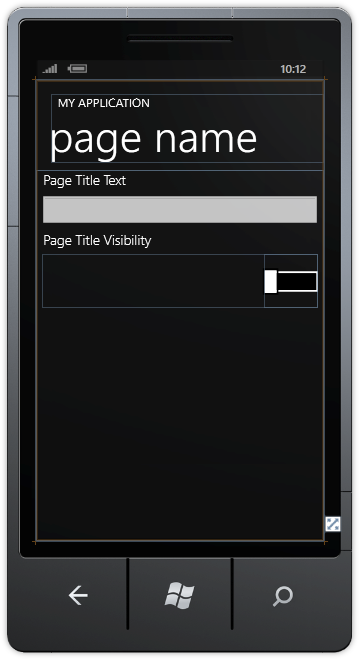
While still in the XAML Pane for SettingsPage.xaml, between between the <Grid Grid.Row="1" x:Name="ContentGrid"> and </Grid> lines type the following XAML:
<StackPanel>
  <TextBlock Text="Page Title Text" Style="{StaticResource PhoneTextTitle3Style}"/>
  <TextBox Text="{Binding Mode=TwoWay, Path=PageTitle}" />
  <TextBlock Text="Page Title Visibility" Style="{StaticResource PhoneTextTitle3Style}"/>
  <Grid Margin="10">
    <TextBlock VerticalAlignment="Center" Style="{StaticResource PhoneTextExtraLargeStyle}"
    Text="{Binding Path=ShowTitleText}"/>
    <ToggleButton HorizontalAlignment="Right" Style="{StaticResource PhoneToggleSwitch}"
    IsChecked="{Binding Mode=TwoWay,Path=ShowTitleToggle}"/>
  </Grid>
</StackPanel>
XAML:

Design:
Step 10
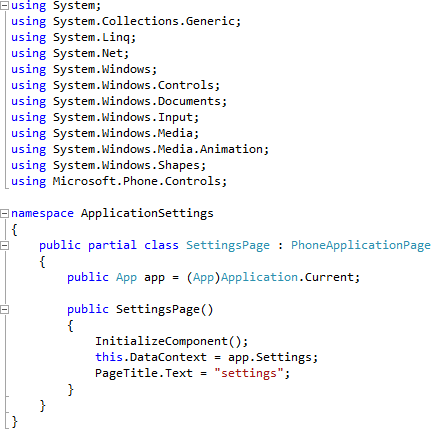
Right Click on the Page or the entry for "SettingsPage.xaml" in Solution Explorer and choose the "View Code" option. In the Code View above "public SettingsPage" type the following Application declaration:
public App app = (App)Application.Current;
Also in the CodeView in the "public SettingsPage()" Constructor below "InitializeComponent();" type the following:
this.DataContext = app.Settings;
PageTitle.Text = "settings";
See Below:
Step 11
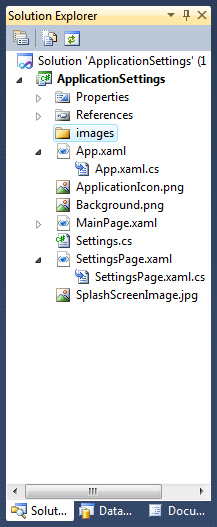
Right Click on the Entry for the Project in the Solution Explorer and choose "Add" then "New Folder", and give it the Name "images" (without quotes), see below:
Step 12
Download the following image (settings.png) by right-clicking on the image below and choose "Save Picture As..." or "Save Image As..." and Save them to a Folder on your computer:
Step 13
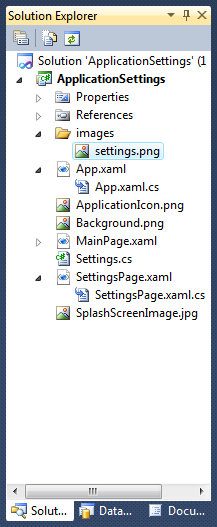
Right Click on the Entry for the "images" Folder for the Project in Solution Explorer, and choose "Add", then "Existing Item...", then in the "Add Existing Item" dialog select Folder you saved the image, then choose "Add" to add the settings.png to the images folder in the project, see below:
Step 14
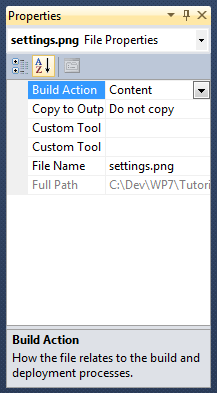
While still in the Solution Explorer click on the "settings.png" image then goto the Properties box and change the Build Action to Content, see below:
Step 15
Return to the MainPage Designer View by selecting the "MainPage.xaml" Tab, then in XAML Pane above the <Grid x:Name="LayoutRoot" Background="{StaticResource PhoneBackgroundBrush}"> Tag type the following ApplicationBar XAML:
<phone:PhoneApplicationPage.ApplicationBar>
  <shell:ApplicationBar IsVisible="True" IsMenuEnabled="False">
    <shell:ApplicationBar.Buttons>
      <shell:ApplicationBarIconButton Text="settings" IconUri="/images/settings.png" Click="Settings_Click"/>
    </shell:ApplicationBar.Buttons>
  </shell:ApplicationBar>
</phone:PhoneApplicationPage.ApplicationBar>
See below:

Step 16
While still in the XAML Pane replace the Page Title <TextBlock x:Name="PageTitle" Text="page name" Margin="-3,-8,0,0" Style="{StaticResource PhoneTextTitle1Style}"/> XAML in the TitlePanel with the following XAML:
<TextBlock x:Name="PageTitle" Text="{Binding Path=PageTitle}" Margin="-3,-8,0,0"
    Style="{StaticResource PhoneTextTitle1Style}" Visibility="{Binding Path=ShowTitle}"/>
See below:

Step 17
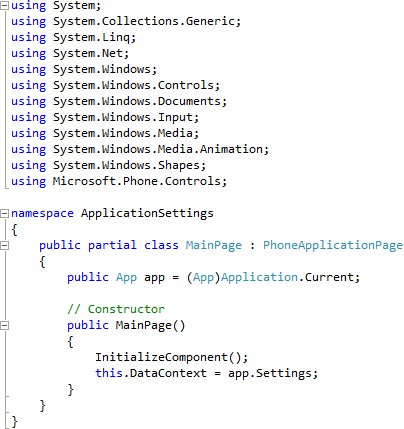
Right Click on the Page or the entry for "MainPage.xaml" in Solution Explorer and choose the "View Code" option. In the Code View above "public MainPage()" type the following Application declaration: type the following:
public App app = (App)Application.Current;
Also in the CodeView in the "public MainPage()" Constructor below "InitializeComponent();" type the following:
this.DataContext = app.Settings;
See Below:
Step 18
While still the Code View for MainPage.xaml.cs above "public MainPage()" type the following Event Handler:
private void Settings_Click(object sender, EventArgs e)
{
  NavigationService.Navigate(new Uri("/SettingsPage.xaml",UriKind.Relative));
}
See Below:

Step 19
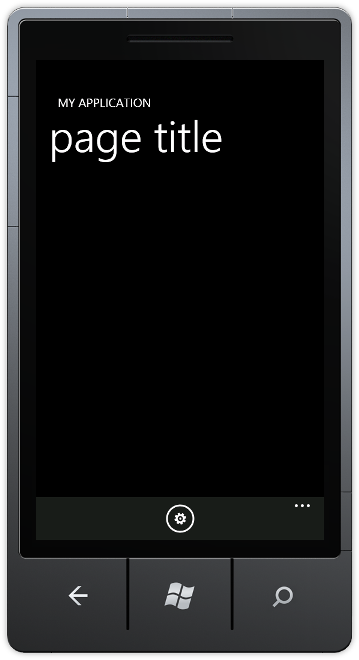
Save the Project as you have now finished the Windows Phone Silverlight application. Select the Windows Phone Emulator option then Select Debug then Start Debugging or click on Start Debugging:
After you do, the following will appear in the Windows Phone Emulator after it has been loaded:
Step 20
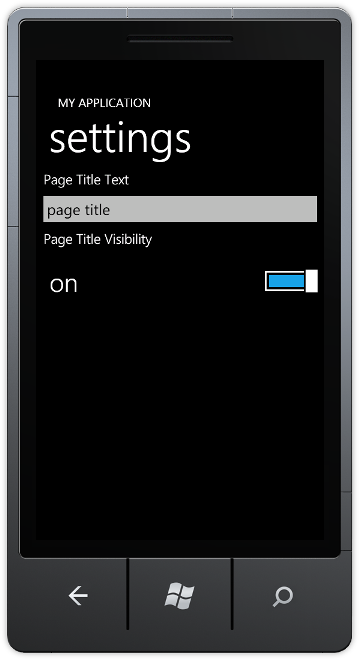
Tap on the "settings" button, you can "toggle" the title visiblity "on" or "off" or change the title, see below:
Step 21
You can then Stop the application by selecting the Visual Studio 2010 application window and clicking on the Stop Debugging button:
This is a simple example of using Application Settings, if you change the Page Title Text and then Tap "back" the Page Title text will change, or toggle the Page Title visibility with the Page Title Visibility. You can use this as the basis of your own application's settings page - make it your own!