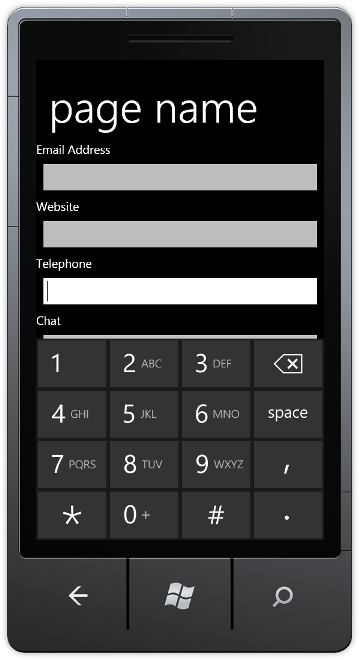
Windows Phone 7 supports Input Scopes on controls such as the TextBox so that the type of entry required is suited to the control, for example entering a website address or a telephone number displays a different kind of on-screen keyboard.
www.cespage.com/silverlight/wp7tut3.html
Step 1
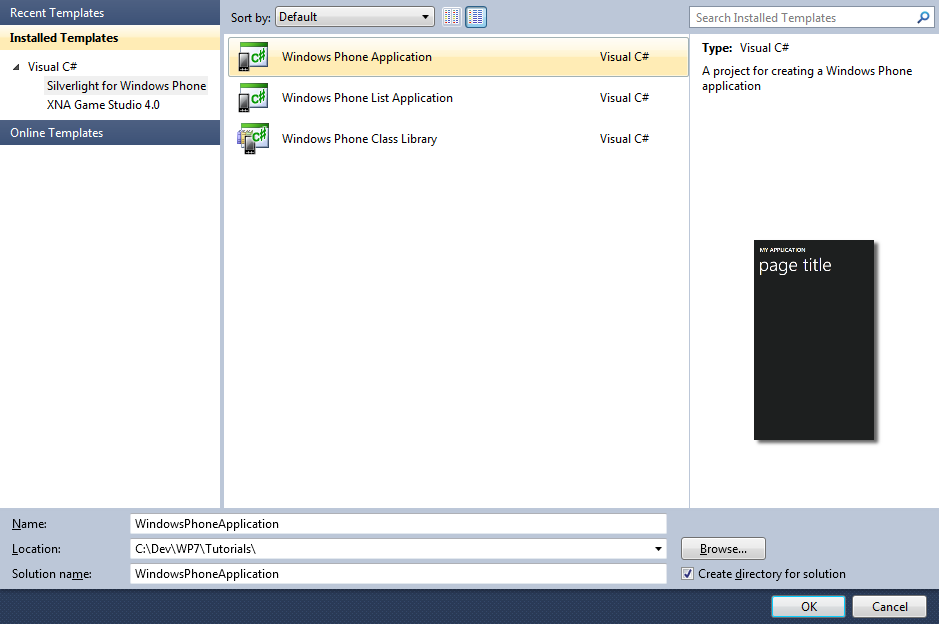
Start Microsoft Visual Studio 2010 Express for Windows Phone, then Select File then New Project... Select "Visual C#" then "Silverlight for Windows Phone" and then "Windows Phone Application" from Templates, select a Location if you wish, then enter a name for the Project and then click OK, see below:

Step 2
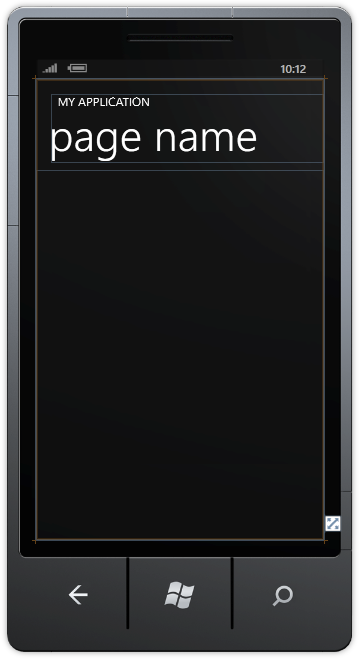
A Windows Phone application Page named MainPage.xaml should then appear, see below:
Step 3
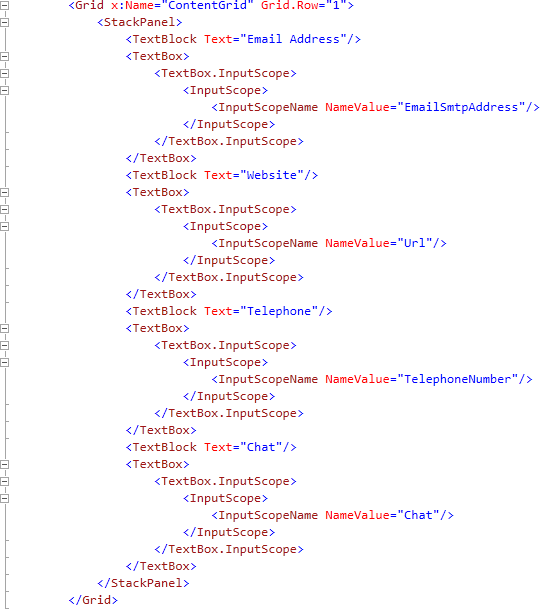
In the XAML Pane for the MainPage.xaml, between the <Grid x:Name="ContentGrid" Grid.Row="1"> and </Grid> tags, type the following XAML:
<StackPanel>
  <TextBlock Text="Email Address"/>
  <TextBox>
    <TextBox.InputScope>
      <InputScope>
        <InputScopeName NameValue="EmailSmtpAddress"/>
      </InputScope>
    </TextBox.InputScope>
  </TextBox>
  <TextBlock Text="Website"/>
  <TextBox>
    <TextBox.InputScope>
      <InputScope>
        <InputScopeName NameValue="Url"/>
      </InputScope>
    </TextBox.InputScope>
  </TextBox>
  <TextBlock Text="Telephone"/>
  <TextBox>
    <TextBox.InputScope>
      <InputScope>
        <InputScopeName NameValue="TelephoneNumber"/>
      </InputScope>
    </TextBox.InputScope>
  </TextBox>
  <TextBlock Text="Chat"/>
  <TextBox>
    <TextBox.InputScope>
      <InputScope>
        <InputScopeName NameValue="Chat"/>
      </InputScope>
    </TextBox.InputScope>
  </TextBox>
</StackPanel>
XAML:
Design:
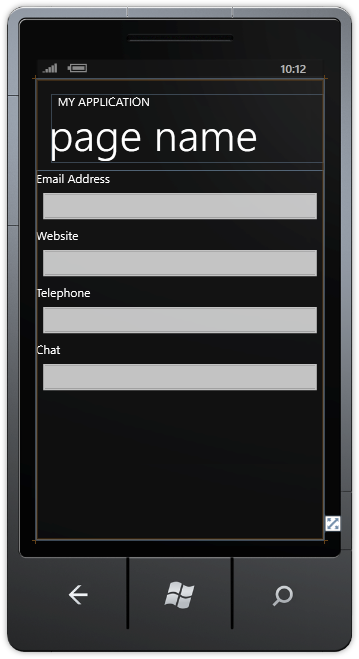
Step 4
Save the Project as you have now finished the Windows Phone Silverlight application. Select the Windows Phone Emulator option then Select Debug then Start Debugging or click on Start Debugging:
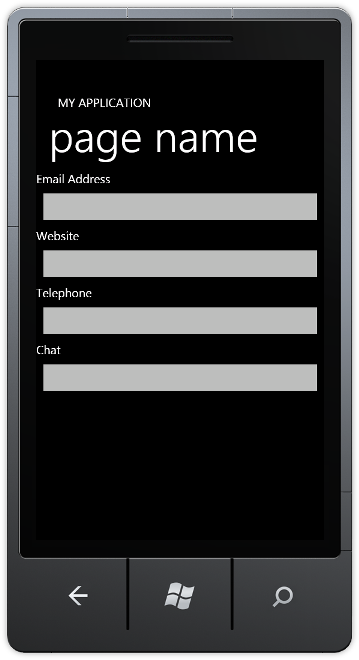
After you do, the following will appear in the Windows Phone Emulator after it has been loaded:
Step 5
Select any of the TextBoxes and a Keyboard will appear, determined by the InputScope for that TextBox, see below:
Step 6
You can then Stop the application by selecting the Visual Studio 2010 application window and clicking on the Stop Debugging button:
This was a very simple Input Scope example for Windows Phone - there are many input scopes available including ones for Dates, Currencies, Numbers and more, so you can choose the right keyboard for your needs and use this example as a basis of your own contextual keyboard-based applications, make it your own!