Gamer Card is an application allowing you to view Gamer Tag information from Xbox LIVE® such as Gamerscore, Recently Played Games and their Avatar using Silverlight on Windows Phone 7.
Printer Friendly Download Tutorial (1.02MB) Download Source Code (18.1KB)
Step 1
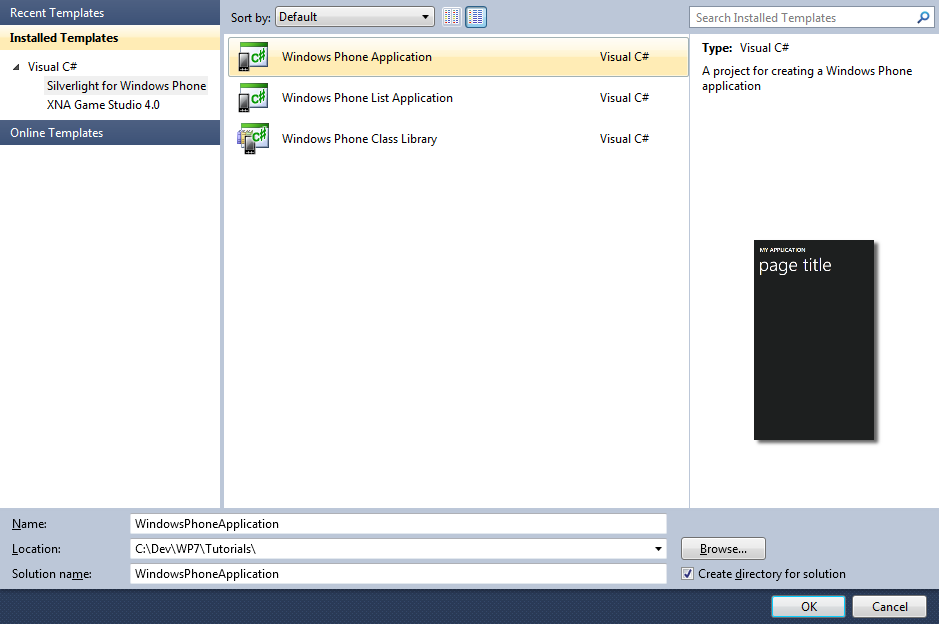
Start Microsoft Visual Studio 2010 Express for Windows Phone, then Select File then New Project... Select "Visual C#" then "Silverlight for Windows Phone" and then "Windows Phone Application" from Templates, select a Location if you wish, then enter a name for the Project and then click OK, see below:
Step 2
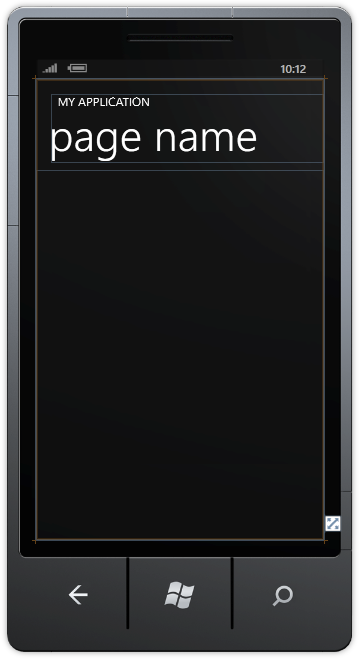
A Windows Phone application Page named MainPage.xaml should then appear, see below:
Step 3
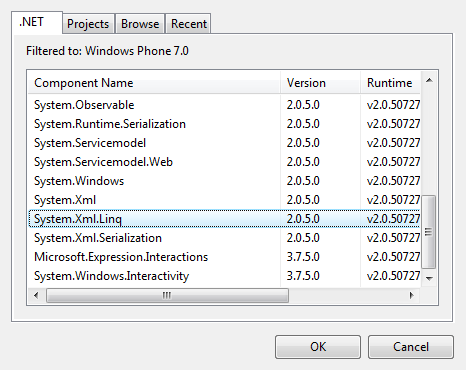
Select Project then Add Reference... The "Add Reference" window should appear, select "System.XML.Linq" from the ".NET" List, see below:
Step 4
Add the Reference to "System.XML.Linq" by Clicking on OK.
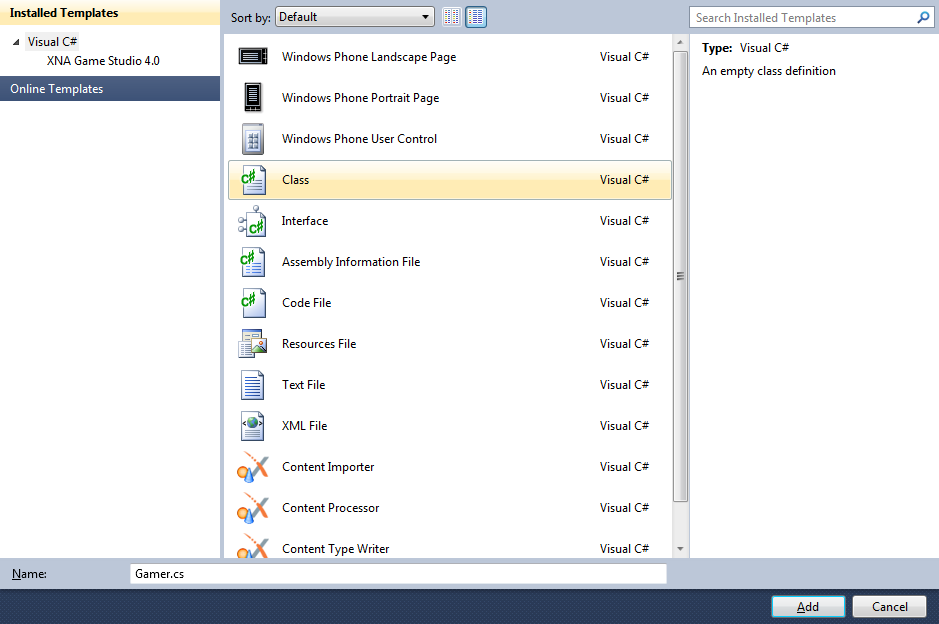
Select Project then "Add Class...", and select the "Class" Template is not already Selected, then change the "Name" to Gamer.cs see below:
Step 5
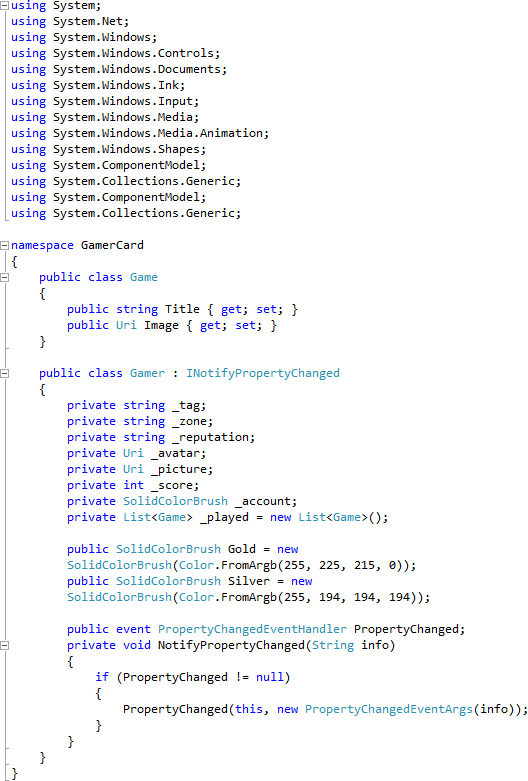
Add the new Class to the Project by Clicking on Add, then in the Code View for the new Class above "namespace GamerCard" type the following:
using System.ComponentModel;
using System.Collections.Generic;
Also in the CodeView above "public class Gamer" type the following SubClass:
public class Game
{
  public string Title { get; set; }
  public Uri Image { get; set; }
}
Again in the CodeView at the end of the line "public class Gamer" type the following:
: INotifyPropertyChanged
And in the CodeView below the "{" of the line "public class Gamer" type the following Declarations and Event:
private string _tag;
private string _zone;
private string _reputation;
private Uri _avatar;
private Uri _picture;
private int _score;
private SolidColorBrush _account;
private List<Game> _played = new List<Game>();

public SolidColorBrush Gold = new
SolidColorBrush(Color.FromArgb(255, 225, 215, 0));
public SolidColorBrush Silver = new
SolidColorBrush(Color.FromArgb(255, 194, 194, 194));

public event PropertyChangedEventHandler PropertyChanged;
private void NotifyPropertyChanged(String info)
{
  if (PropertyChanged != null)
  {
    PropertyChanged(this, new PropertyChangedEventArgs(info));
  }
}
See Below:
Step 6
While still in the Code View for Gamer.cs below the "}" of "private void NotifyPropertyChanged(String info)" type the following Properties:
public string Tag
{
  get { return _tag; }
  set
  {
    _tag = value;
    NotifyPropertyChanged("Tag");
  }
}

public string Zone
{
  get { return "Zone:" + _zone; }
  set
  {
    _zone = value;
    NotifyPropertyChanged("Zone");
  }
}

public string Reputation
{
  get { return "Rep:" + _reputation; }
  set
  {
    _reputation = value;
    NotifyPropertyChanged("Reputation");
  }
}

public Uri Avatar
{
  get { return _avatar; }
  set
  {
    _avatar = value;
    NotifyPropertyChanged("Avatar");
  }
}

public Uri Picture
{
  get { return _picture; }
  set
  {
    _picture = value;
    NotifyPropertyChanged("Picture");
  }
}

public int Score
{
  get { return _score; }
  set
  {
    _score = value;
    NotifyPropertyChanged("Score");
  }
}

public SolidColorBrush Account
{
  get { return _account; }
  set
  {
    _account = value;
    NotifyPropertyChanged("Account");
  }
}

public List<Game> Played
{
  get { return _played; }
  set
  {
    _played = value;
    NotifyPropertyChanged("Played");
  }
}
See Below:

Step 7
Return to the MainPage Designer View by selecting the "MainPage.xaml" Tab.
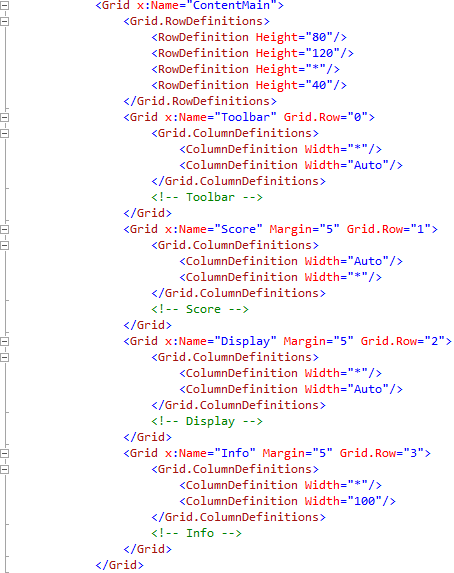
Then in XAML Pane between the <Grid x:Name="ContentGrid" Grid.Row="1"> and </Grid> lines type the following XAML:
<Grid x:Name="ContentMain">
  <Grid.RowDefinitions>
    <RowDefinition Height="80"/>
    <RowDefinition Height="120"/>
    <RowDefinition Height="*"/>
    <RowDefinition Height="40"/>
  </Grid.RowDefinitions>
  <Grid x:Name="Toolbar" Grid.Row="0">
    <Grid.ColumnDefinitions>
      <ColumnDefinition Width="*"/>
      <ColumnDefinition Width="Auto"/>
    </Grid.ColumnDefinitions>
    <!-- Toolbar -->
  </Grid>
  <Grid x:Name="Score" Margin="5" Grid.Row="1">
    <Grid.ColumnDefinitions>
      <ColumnDefinition Width="Auto"/>
      <ColumnDefinition Width="*"/>
    </Grid.ColumnDefinitions>
    <!-- Score -->
  </Grid>
  <Grid x:Name="Display" Margin="5" Grid.Row="2">
    <Grid.ColumnDefinitions>
      <ColumnDefinition Width="*"/>
      <ColumnDefinition Width="Auto"/>
    </Grid.ColumnDefinitions>
    <!-- Display -->
  </Grid>
  <Grid x:Name="Info" Margin="5" Grid.Row="3">
    <Grid.ColumnDefinitions>
      <ColumnDefinition Width="*"/>
      <ColumnDefinition Width="100"/>
    </Grid.ColumnDefinitions>
    <!-- Info -->
  </Grid>
</Grid>
XAML:
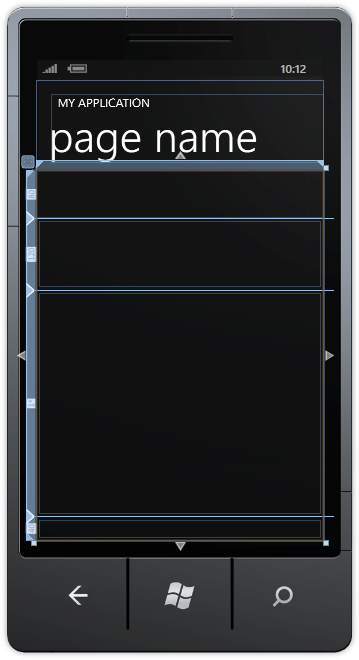
Design:
Step 8
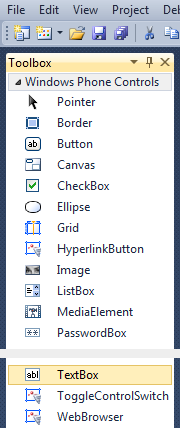
Then from the Windows Phone Controls section in the Toolbox select the TextBox control:
Step 9
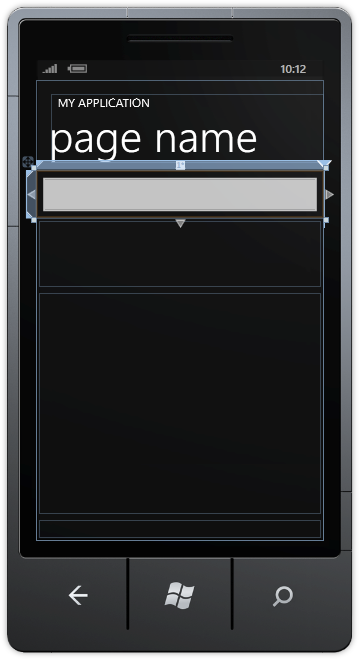
Draw a TextBox onto the Toolbar Section (upper smaller section) of the Grid on the Page, below the Page Title, and in the XAML Pane below the <!-- Toolbar --> line, change "TextBox1" to the following:
<TextBox Grid.Column="0" Name="Subject"/>
See below:
Step 10
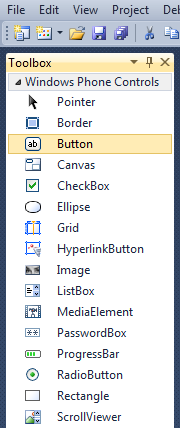
Then from the Windows Phone Controls section in the Toolbox select the Button control:
Step 11
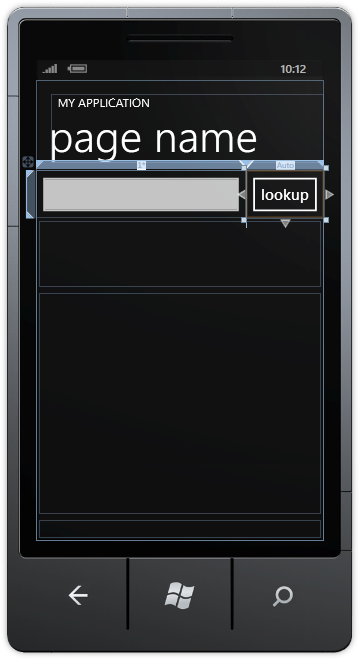
Draw a Button onto the Toolbar Section by dragging the Button from the Toolbox onto the Toolbar section of the Grid on the Page, then in the XAML Pane change the "Button1" line to the following:
<Button Grid.Column="1" Content="lookup" Click="Lookup_Click"/>
See below:
Step 12
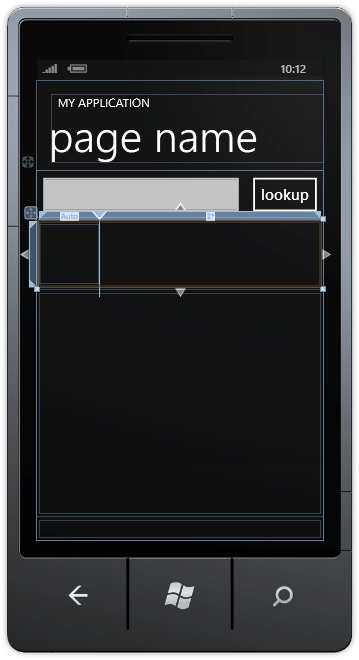
In the XAML Pane for MainPage.xaml below the <!-- Score --> line, type the following Image and TextBlock XAML:
<Image Grid.Column="0" Width="100" Height="100"
Source="{Binding Path=Picture}"/>
<TextBlock Grid.Column="1" Margin="10" VerticalAlignment="Center"
Style="{StaticResource PhoneTextExtraLargeStyle}"
Foreground="{Binding Account}" Text="{Binding Path=Score}"/>
XAML:

Design:
Step 12
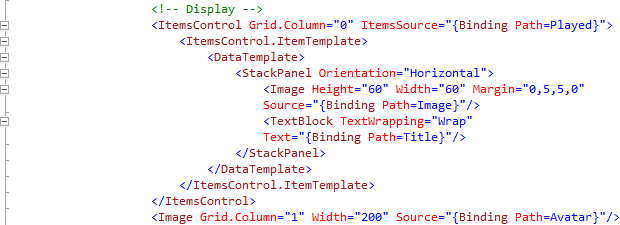
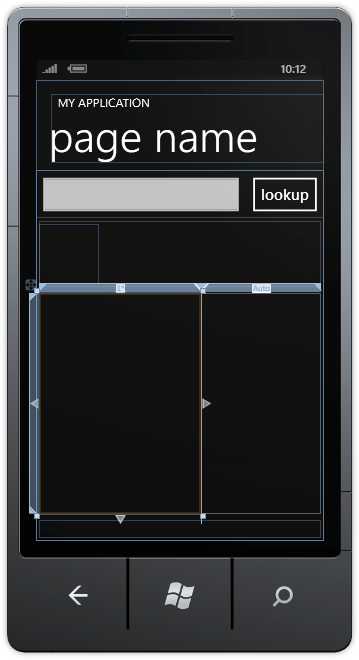
While still in the XAML Pane for MainPage.xaml below the <!-- Display --> line, type the following ItemsControl and Image XAML:
<ItemsControl Grid.Column="0" ItemsSource="{Binding Path=Played}">
  <ItemsControl.ItemTemplate>
    <DataTemplate>
      <StackPanel Orientation="Horizontal">
        <Image Height="60" Width="60" Margin="0,5,5,0"
        Source="{Binding Path=Image}"/>
        <TextBlock TextWrapping="Wrap"
        Text="{Binding Path=Title}"/>
      </StackPanel>
    </DataTemplate>
  </ItemsControl.ItemTemplate>
</ItemsControl>
<Image Grid.Column="1" Width="200" Source="{Binding Path=Avatar}"/>
XAML:
Design:
Step 13
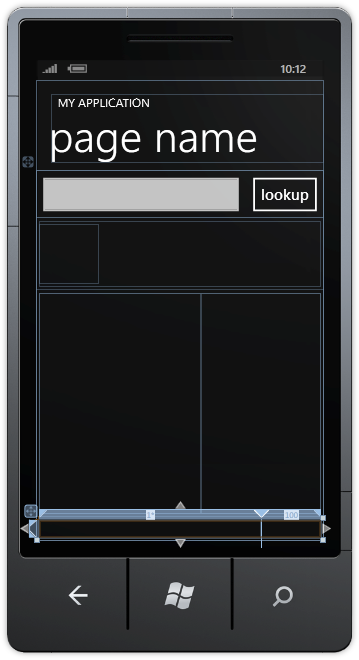
While still in the XAML Pane for MainPage.xaml below the <!-- Info --> line, type the following TextBlock XAML:
<TextBlock Grid.Column="0" FontWeight="Bold" Text="{Binding Path=Zone}"/>
<TextBlock Grid.Column="1" FontWeight="Bold" Text="{Binding Path=Reputation}"/>
XAML:
Design:
Step 14
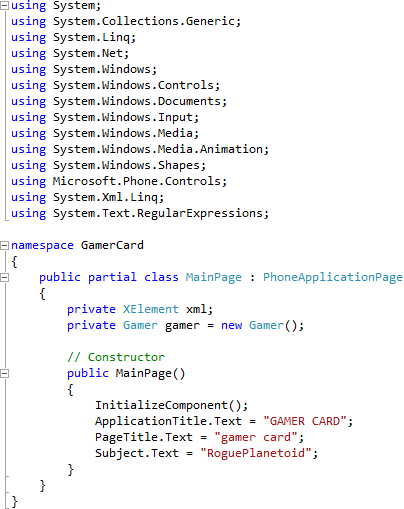
Right Click on the Page or the entry for "MainPage.xaml" in Solution Explorer and choose the "View Code" option. In the Code View above "namespace GamerCard()" type the following:
using System.Xml.Linq;
using System.Text.RegularExpressions;
Also in the CodeView above "public MainPage()" type the following Declarations:
private XElement xml;
private Gamer gamer = new Gamer();
Again in the CodeView in the "public MainPage()" Constructor below "InitializeComponent();" type the following:
ApplicationTitle.Text = "GAMER CARD";
PageTitle.Text = "gamer card";
Subject.Text = "RoguePlanetoid";
See Below:
Step 15
While still the Code View for MainPage.xaml.cs above "public MainPage()" type the following Event Handlers:
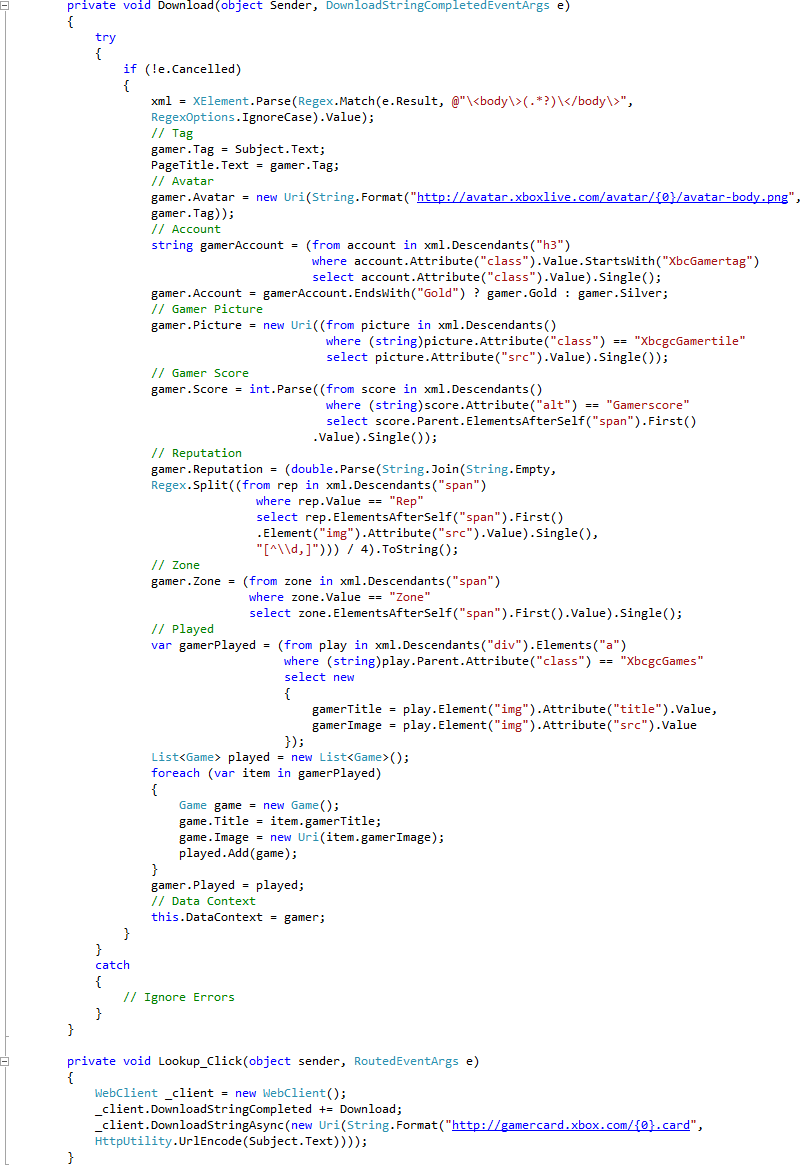
private void Download(object Sender, DownloadStringCompletedEventArgs e)
{
  try
  {
    if (!e.Cancelled)
    {
      xml = XElement.Parse(Regex.Match(e.Result, @"\<body\>(.*?)\</body\>",
      RegexOptions.IgnoreCase).Value);
      // Tag
      gamer.Tag = Subject.Text;
      PageTitle.Text = gamer.Tag;
      // Avatar
      gamer.Avatar = new Uri(String.Format("http://avatar.xboxlive.com/avatar/{0}/avatar-body.png",
      gamer.Tag));
      // Account
      string gamerAccount = (from account in xml.Descendants("h3")
      where account.Attribute("class").Value.StartsWith("XbcGamertag")
      select account.Attribute("class").Value).Single();
      gamer.Account = gamerAccount.EndsWith("Gold") ? gamer.Gold : gamer.Silver;
      // Gamer Picture
      gamer.Picture = new Uri((from picture in xml.Descendants()
        where (string)picture.Attribute("class") == "XbcgcGamertile"
        select picture.Attribute("src").Value).Single());
      // Gamer Score
      gamer.Score = int.Parse((from score in xml.Descendants()
        where (string)score.Attribute("alt") == "Gamerscore"
        select score.Parent.ElementsAfterSelf("span").First()
      .Value).Single());
      // Reputation
      gamer.Reputation = (double.Parse(String.Join(String.Empty,
        Regex.Split((from rep in xml.Descendants("span")
        where rep.Value == "Rep"
        select rep.ElementsAfterSelf("span").First()
        .Element("img").Attribute("src").Value).Single(),
        "[^\\d,]"))) / 4).ToString();
      // Zone
      gamer.Zone = (from zone in xml.Descendants("span")
        where zone.Value == "Zone"
        select zone.ElementsAfterSelf("span").First().Value).Single();
      // Played
      var gamerPlayed = (from play in xml.Descendants("div").Elements("a")
        where (string)play.Parent.Attribute("class") == "XbcgcGames"
        select new
        {
          gamerTitle = play.Element("img").Attribute("title").Value,
          gamerImage = play.Element("img").Attribute("src").Value
        });
      List<Game> played = new List<Game>();
      foreach (var item in gamerPlayed)
      {
        Game game = new Game();
        game.Title = item.gamerTitle;
        game.Image = new Uri(item.gamerImage);
        played.Add(game);
      }
      gamer.Played = played;
      // Data Context
      this.DataContext = gamer;
    }
  }
  catch
  {
    // Ignore Errors
  }
}

private void Lookup_Click(object sender, RoutedEventArgs e)
{
  WebClient _client = new WebClient();
  _client.DownloadStringCompleted += Download;
  _client.DownloadStringAsync(new Uri(String.Format("http://gamercard.xbox.com/{0}.card",
  HttpUtility.UrlEncode(Subject.Text))));
}
See Below:
Step 16
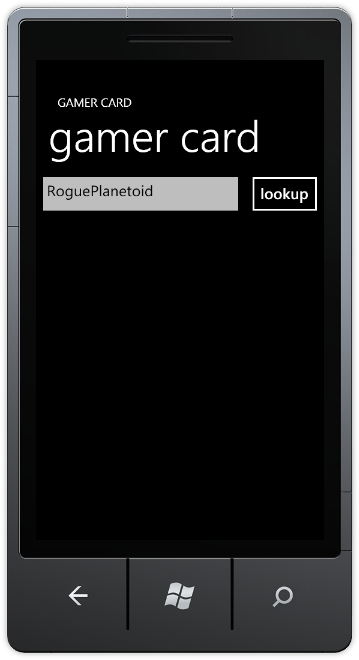
Save the Project as you have now finished the Windows Phone Silverlight application. Select the Windows Phone Emulator option then Select Debug then Start Debugging or click on Start Debugging:
After you do, the following will appear in the Windows Phone Emulator after it has been loaded:
Step 17
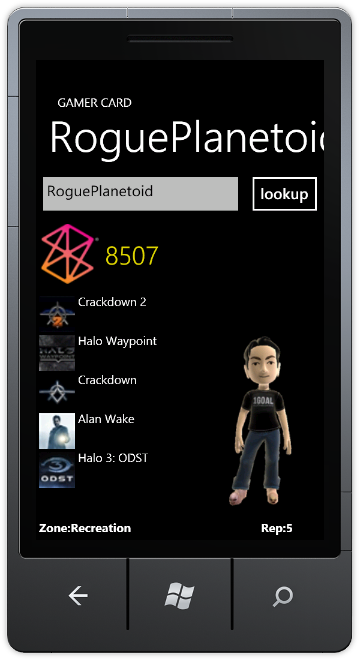
Tap the TextBox and then using the SIP or Keyboard enter a GamerTag to lookup, then Tap on "lookup" to display their Gamer Card information, see below:
Step 18
You can then Stop the application by selecting the Visual Studio 2010 application window and clicking on the Stop Debugging button:
This is an example of displaying Gamer Card information from Xbox LIVE®, you could display the Reputation as Stars like on the actual GamerCard, or instead of changing the foregound colour for Silver or Gold add a gradient, or use this as the basis of your own Gamer Card application - make it your own!


