Doodle Pad is a simple drawing package using InkPresenter control in Silverlight for Windows Phone 7, application features Draw Width and Colour plus Open/Save support using LINQ to XML.
Printer Friendly Download Tutorial (1.18MB) Download Source Code (23.4KB)
Step 1
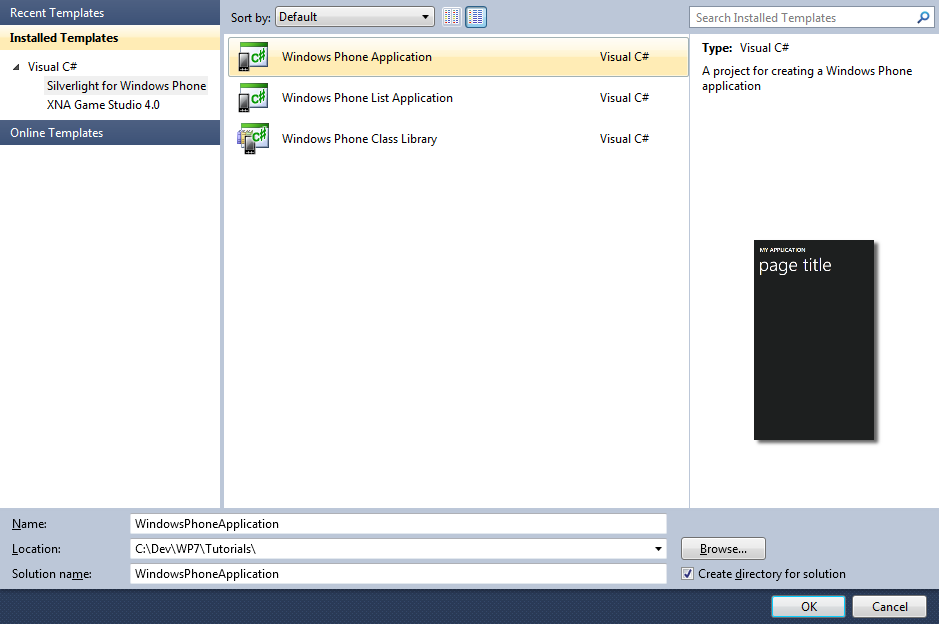
Start Microsoft Visual Studio 2010 Express for Windows Phone, then Select File then New Project... Select "Visual C#" then "Silverlight for Windows Phone" and then "Windows Phone Application" from Templates, select a Location if you wish, then enter a name for the Project and then click OK, see below:
Step 2
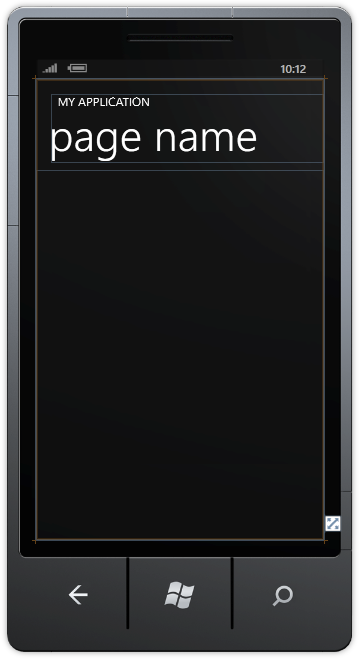
A Windows Phone application Page named MainPage.xaml should then appear, see below:
Step 3
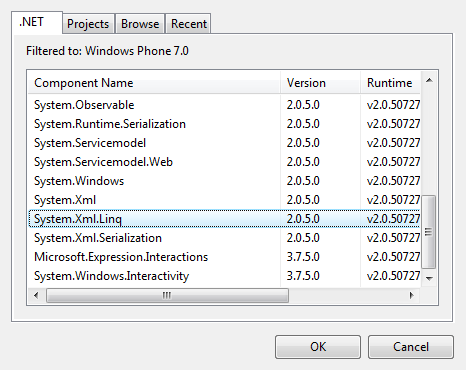
Select Project then Add Reference... The "Add Reference" window should appear, select "System.XML.Linq" from the ".NET" List, see below:
Step 4
Add the Reference to "System.XML.Linq" by Clicking on OK.
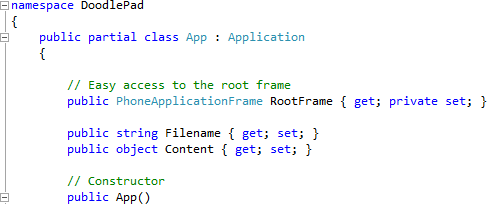
Right Click on the App.xaml Entry in the Solution Explorer and choose "View Code" then in the Code View for App.xaml.css, above the "public App()" line type the following:
public string Filename { get; set;}
public object Content { get; set;}
See below:
Step 5
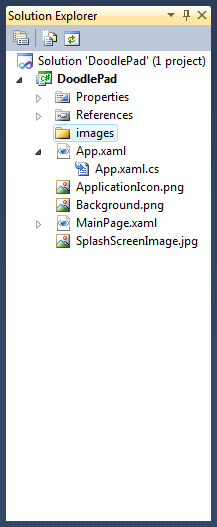
Right Click on the Entry for the Project in the Solution Explorer and choose "Add" then "New Folder", and give it the Name "images" (without quotes), see below:
Step 6
Download the following images (delete.png, new.png, open & save.png) by right-clicking on the images below and choose "Save Picture As..." or "Save Image As..." and Save them to a Folder on your computer:
Step 7
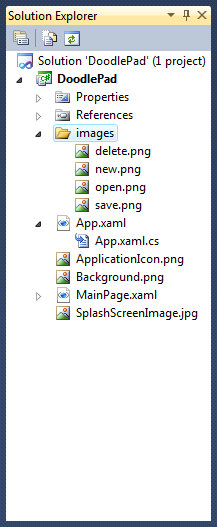
Right Click on the Entry for the "images" Folder for the Project in Solution Explorer, and choose "Add", then "Existing Item...", then in the "Add Existing Item" dialog select Folder you saved the images, then choose "Add" to add the delete.png, new.png, open.png and save.png to the images folder in the project, see below:
Step 8
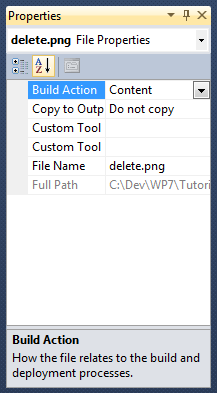
While still in the Solution Explorer click on the "delete.png" image then goto the Properties box and change the Build Action to Content, do the same for the "new.png", "open.png" and "save.png" images, see below:
Step 9
In the Solution Explorer select the "DoodlePad" entry from the list, below the Solution Entry.
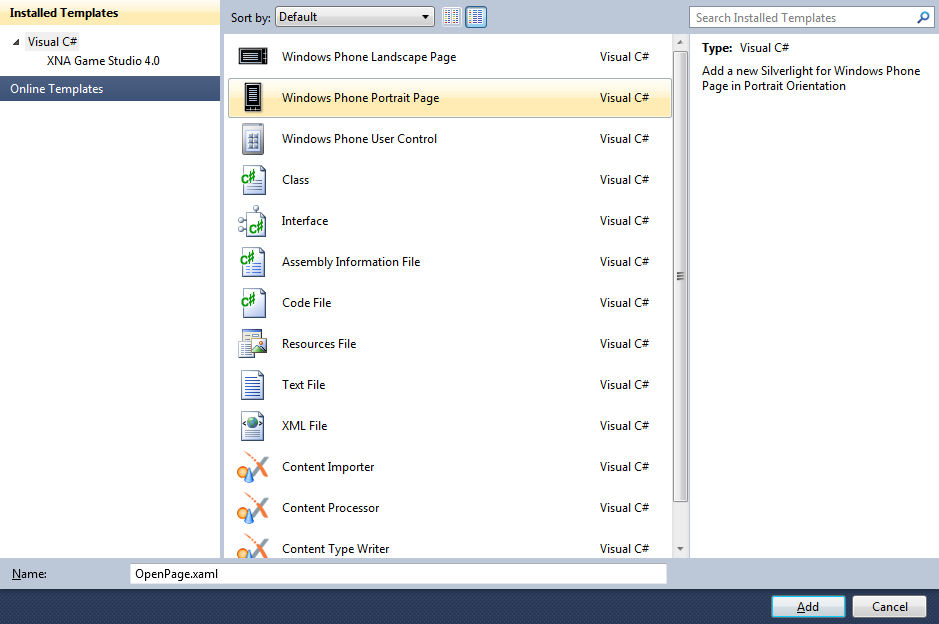
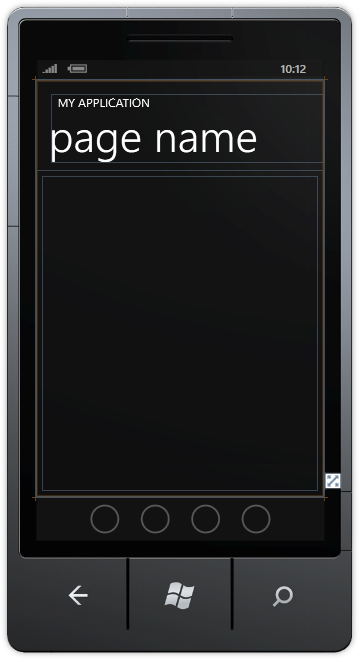
Then select Project then "Add New Item...", and select the "Windows Phone Portrait Page" Template, then change the "Name" to OpenPage.xaml, see below:
Step 10
Click on "Add" to add the new Windows Phone Portrait Page to the Project
Then in the XAML Pane for OpenPage.xaml, above the <Grid x:Name="LayoutRoot" Background="Transparent"> Tag type the following ApplicationBar XAML:
<phone:PhoneApplicationPage.ApplicationBar>
  <shell:ApplicationBar IsVisible="True" IsMenuEnabled="False">
    <shell:ApplicationBar.Buttons>
      <shell:ApplicationBarIconButton Text="open" IconUri="/images/open.png" Click="Open_Click"/>
      <shell:ApplicationBarIconButton Text="delete" IconUri="/images/delete.png" Click="Delete_Click"/>
    </shell:ApplicationBar.Buttons>
  </shell:ApplicationBar>
</phone:PhoneApplicationPage.ApplicationBar>
See below:

Step 11
While still in the XAML Pane between between the <Grid Grid.Row="1" x:Name="ContentGrid"> and </Grid> lines type the following XAML:
<ListBox Margin="10" FontSize="{StaticResource PhoneFontSizeExtraLarge}" Name="Files"/>
XAML:
Design:
Step 12
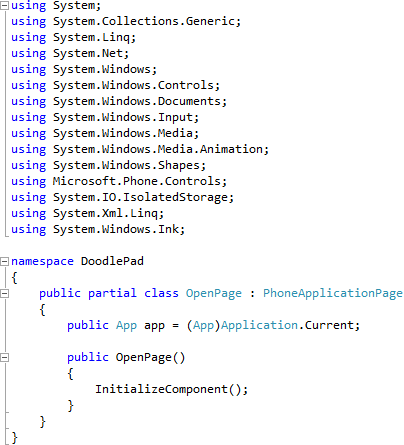
Right Click on the Page or the entry for "OpenPage.xaml" in Solution Explorer and choose the "View Code" option. In the Code View above "namespace DoodlePad" type the following:
using System.IO.IsolatedStorage;
using System.Xml.Linq;
using System.Windows.Ink;
Also in the CodeView above "public OpenPage()" type the following Application declaration:
public App app = (App)Application.Current;
See Below:
Step 13
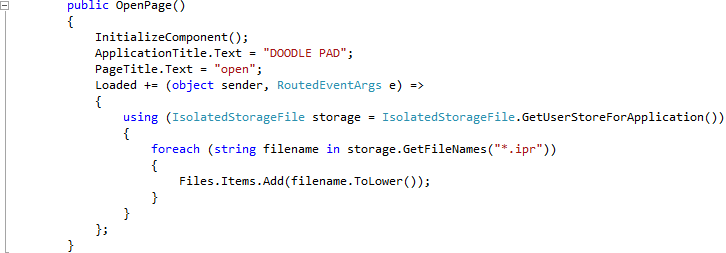
While still in the Code View for OpenPage.xaml.cs in the "public OpenPage()" Constructor below "InitializeComponent();" type the following:
ApplicationTitle.Text = "DOODLE PAD";
PageTitle.Text = "open";
Loaded += (object sender, RoutedEventArgs e) =>
{
  using (IsolatedStorageFile storage = IsolatedStorageFile.GetUserStoreForApplication())
  {
    foreach (string filename in storage.GetFileNames("*.ipr"))
    {
      Files.Items.Add(filename.ToLower());
    }
  }
};
See Below:
Step 14
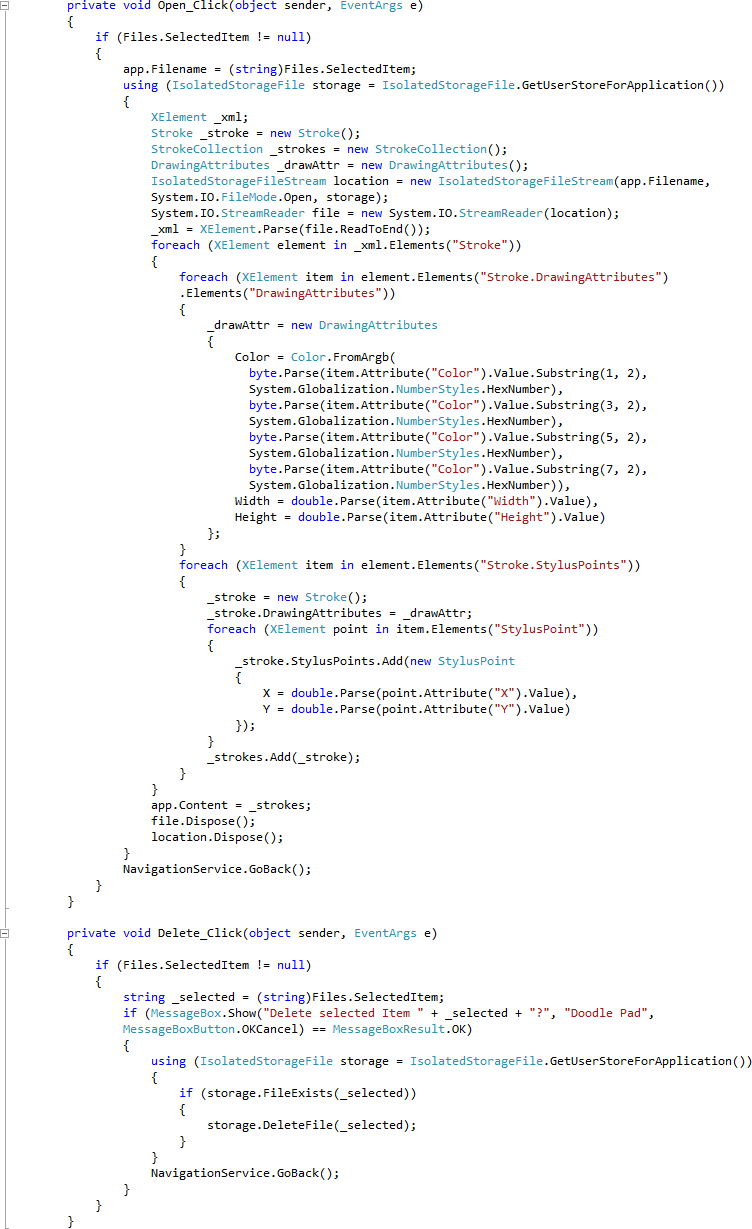
While still in the Code View for OpenPage.xaml.cs, below the "}" of the "public OpenPage()" method type the following Event Handlers:
private void Open_Click(object sender, EventArgs e)
{
  if (Files.SelectedItem != null)
  {
    app.Filename = (string)Files.SelectedItem;
    using (IsolatedStorageFile storage = IsolatedStorageFile.GetUserStoreForApplication())
    {
      XElement _xml;
      Stroke _stroke = new Stroke();
      StrokeCollection _strokes = new StrokeCollection();
      DrawingAttributes _drawAttr = new DrawingAttributes();
      IsolatedStorageFileStream location = new IsolatedStorageFileStream(app.Filename,
      System.IO.FileMode.Open, storage);
      System.IO.StreamReader file = new System.IO.StreamReader(location);
      _xml = XElement.Parse(file.ReadToEnd());
      foreach (XElement element in _xml.Elements("Stroke"))
      {
        foreach (XElement item in element.Elements("Stroke.DrawingAttributes")
        .Elements("DrawingAttributes"))
        {
          _drawAttr = new DrawingAttributes
          {
            Color = Color.FromArgb(
              byte.Parse(item.Attribute("Color").Value.Substring(1, 2),
              System.Globalization.NumberStyles.HexNumber),
              byte.Parse(item.Attribute("Color").Value.Substring(3, 2),
              System.Globalization.NumberStyles.HexNumber),
              byte.Parse(item.Attribute("Color").Value.Substring(5, 2),
              System.Globalization.NumberStyles.HexNumber),
              byte.Parse(item.Attribute("Color").Value.Substring(7, 2),
              System.Globalization.NumberStyles.HexNumber)),
            Width = double.Parse(item.Attribute("Width").Value),
            Height = double.Parse(item.Attribute("Height").Value)
          };
        }
        foreach (XElement item in element.Elements("Stroke.StylusPoints"))
        {
          _stroke = new Stroke();
          _stroke.DrawingAttributes = _drawAttr;
          foreach (XElement point in item.Elements("StylusPoint"))
          {
            _stroke.StylusPoints.Add(new StylusPoint
            {
              X = double.Parse(point.Attribute("X").Value),
              Y = double.Parse(point.Attribute("Y").Value)
            });
          }
        _strokes.Add(_stroke);
        }
      }
      app.Content = _strokes;
      file.Dispose();
      location.Dispose();
    }
    NavigationService.GoBack();
  }
}

private void Delete_Click(object sender, EventArgs e)
{
  if (Files.SelectedItem != null)
  {
    string _selected = (string)Files.SelectedItem;
    if (MessageBox.Show("Delete selected Item " + _selected + "?", "Doodle Pad",
    MessageBoxButton.OKCancel) == MessageBoxResult.OK)
    {
      using (IsolatedStorageFile storage = IsolatedStorageFile.GetUserStoreForApplication())
      {
        if (storage.FileExists(_selected))
        {
          storage.DeleteFile(_selected);
        }
      }
      NavigationService.GoBack();
    }
  }
}
See Below:
Step 15
Select Project then "Add New Item...", and select the "Windows Phone Portrait Page" Template, then change the "Name" to SavePage.xaml, see below:

Step 16
Click on "Add" to add the new Windows Phone Portrait Page to the Project
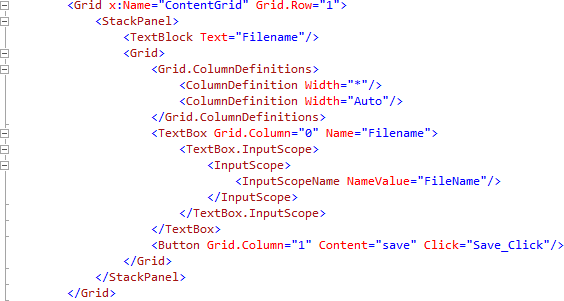
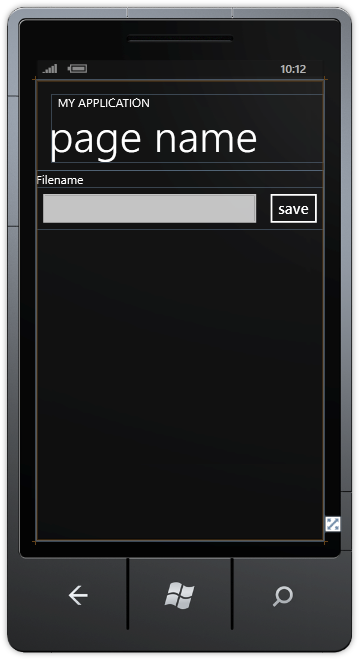
Then the Designer View for SavePage.xaml, in the XAML Pane between between the <Grid Grid.Row="1" x:Name="ContentGrid"> and </Grid> lines type the following XAML:
<StackPanel>
  <TextBlock Text="Filename"/>
  <Grid>
    <Grid.ColumnDefinitions>
      <ColumnDefinition Width="*"/>
      <ColumnDefinition Width="Auto"/>
    </Grid.ColumnDefinitions>
    <TextBox Grid.Column="0" Name="Filename">
      <TextBox.InputScope>
        <InputScope>
          <InputScopeName NameValue="FileName"/>
        </InputScope>
      </TextBox.InputScope>
    </TextBox>
    <Button Grid.Column="1" Content="save" Click="Save_Click"/>
  </Grid>
</StackPanel>
XAML:
Design:
Step 17
Right Click on the Page or the entry for "SavePage.xaml" in Solution Explorer and choose the "View Code" option. In the Code View above "namespace DoodlePad" type the following:
using System.IO.IsolatedStorage;
using System.Xml.Linq;
using System.Windows.Ink;
Also in the CodeView above "public SavePage()" type the following Application declaration:
public App app = (App)Application.Current;
See Below:

Step 18
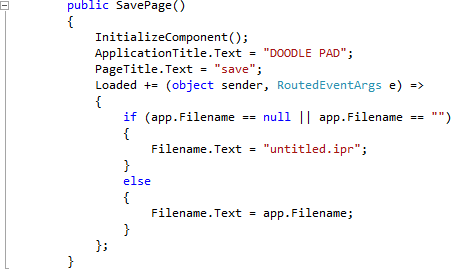
While still in the Code View for SavePage.xaml.cs in the "public SavePage()" Constructor below "InitializeComponent();" type the following:
ApplicationTitle.Text = "DOODLE PAD";
PageTitle.Text = "save";
Loaded += (object sender, RoutedEventArgs e) =>
{
  if (app.Filename == null || app.Filename == "")
  {
    Filename.Text = "untitled.ipr";
  }
  else
  {
    Filename.Text = app.Filename;
  }
};
See Below:
Step 19
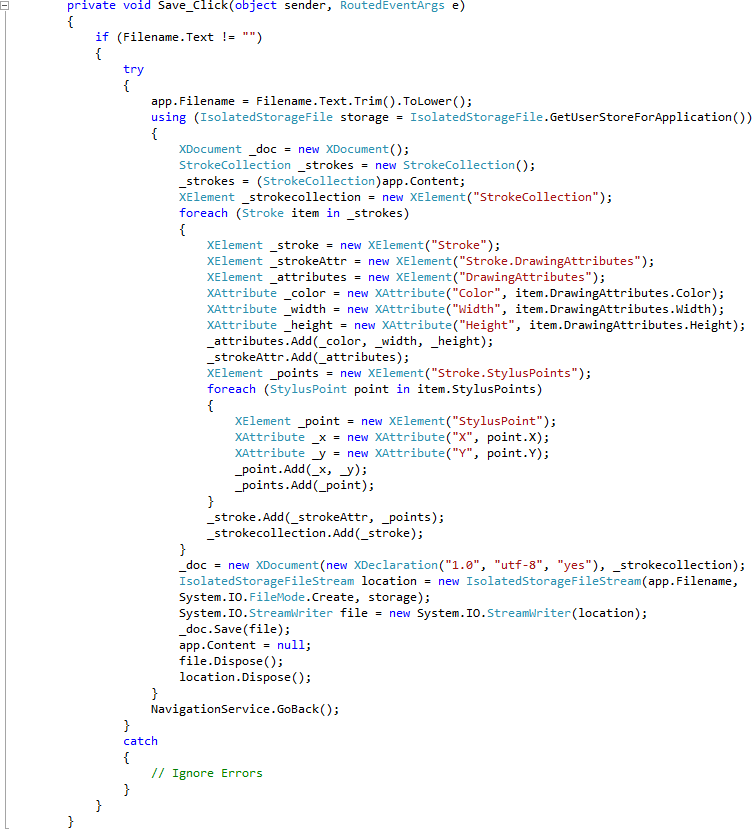
While still in the Code View for SavePage.xaml.cs, below the "}" of the "public SavePage()" method type the following Event Handlers:
private void Save_Click(object sender, RoutedEventArgs e)
{
  if (Filename.Text != "")
  {
    try
    {
      app.Filename = Filename.Text.Trim().ToLower();
      using (IsolatedStorageFile storage = IsolatedStorageFile.GetUserStoreForApplication())
      {
        XDocument _doc = new XDocument();
        StrokeCollection _strokes = new StrokeCollection();
        _strokes = (StrokeCollection)app.Content;
        XElement _strokecollection = new XElement("StrokeCollection");
        foreach (Stroke item in _strokes)
        {
          XElement _stroke = new XElement("Stroke");
          XElement _strokeAttr = new XElement("Stroke.DrawingAttributes");
          XElement _attributes = new XElement("DrawingAttributes");
          XAttribute _color = new XAttribute("Color", item.DrawingAttributes.Color);
          XAttribute _width = new XAttribute("Width", item.DrawingAttributes.Width);
          XAttribute _height = new XAttribute("Height", item.DrawingAttributes.Height);
          _attributes.Add(_color, _width, _height);
          _strokeAttr.Add(_attributes);
          XElement _points = new XElement("Stroke.StylusPoints");
          foreach (StylusPoint point in item.StylusPoints)
          {
            XElement _point = new XElement("StylusPoint");
            XAttribute _x = new XAttribute("X", point.X);
            XAttribute _y = new XAttribute("Y", point.Y);
            _point.Add(_x, _y);
            _points.Add(_point);
          }
          _stroke.Add(_strokeAttr, _points);
          _strokecollection.Add(_stroke);
        }
        _doc = new XDocument(new XDeclaration("1.0", "utf-8", "yes"), _strokecollection);
        IsolatedStorageFileStream location = new IsolatedStorageFileStream(app.Filename,
        System.IO.FileMode.Create, storage);
        System.IO.StreamWriter file = new System.IO.StreamWriter(location);
        _doc.Save(file);
        app.Content = null;
        file.Dispose();
        location.Dispose();
      }
      NavigationService.GoBack();
    }
    catch
    {
      // Ignore Errors
    }
  }
}
See Below:
Step 20
Select the "MainPage.xaml" Tab, then in the XAML Pane for MainPage.xaml, above the <Grid x:Name="LayoutRoot" Background="Transparent"> Tag type the following ApplicationBar XAML:
<phone:PhoneApplicationPage.ApplicationBar>
  <shell:ApplicationBar IsVisible="True" IsMenuEnabled="False">
    <shell:ApplicationBar.Buttons>
      <shell:ApplicationBarIconButton Text="new" IconUri="/images/new.png" Click="New_Click"/>
      <shell:ApplicationBarIconButton Text="open" IconUri="/images/open.png" Click="Open_Click"/>
      <shell:ApplicationBarIconButton Text="save" IconUri="/images/save.png" Click="Save_Click"/>
    </shell:ApplicationBar.Buttons>
  </shell:ApplicationBar>
</phone:PhoneApplicationPage.ApplicationBar>
See below:

Step 21
Then in while still in the XAML Pane, between the <Grid x:Name="ContentGrid" Grid.Row="1"> and </Grid> lines type the following XAML:
<Grid x:Name="ContentMain">
  <Grid.RowDefinitions>
    <RowDefinition Height="90"/>
    <RowDefinition Height="*"/>
  </Grid.RowDefinitions>
  <Grid x:Name="Toolbar" Grid.Row="0">
    <Grid.ColumnDefinitions>
      <ColumnDefinition Width="*"/>
      <ColumnDefinition Width="Auto"/>
    </Grid.ColumnDefinitions>
    <!-- Toolbar -->
  </Grid>
  <!-- Content -->
</Grid>
XAML:
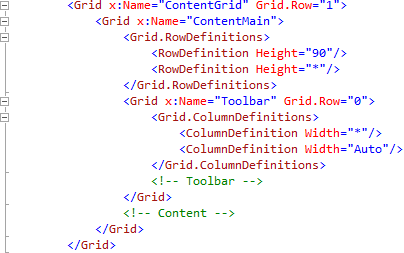
Design:

Step 22
While still in the XAML Pane within the "ContentMain" Grid, below <!-- Toolbar --> type the following ListBox XAML:
<ListBox Grid.Column="0" Name="Size"
SelectionChanged="Size_SelectionChanged">
  <ListBoxItem Tag="1">
    <Rectangle Margin="10" Width="340" Height="1" Fill="{StaticResource PhoneAccentBrush}"/>
  </ListBoxItem>
  <ListBoxItem Tag="2">
    <Rectangle Margin="10" Width="340" Height="2" Fill="{StaticResource PhoneAccentBrush}"/>
  </ListBoxItem>
  <ListBoxItem Tag="5" IsSelected="True">
    <Rectangle Margin="10" Width="340" Height="5" Fill="{StaticResource PhoneAccentBrush}"/>
  </ListBoxItem>
  <ListBoxItem Tag="10">
    <Rectangle Margin="10" Width="340" Height="10" Fill="{StaticResource PhoneAccentBrush}"/>
  </ListBoxItem>
  <ListBoxItem Tag="15">
    <Rectangle Margin="10" Width="340" Height="15" Fill="{StaticResource PhoneAccentBrush}"/>
  </ListBoxItem>
  <ListBoxItem Tag="20">
    <Rectangle Margin="10" Width="340" Height="20" Fill="{StaticResource PhoneAccentBrush}"/>
  </ListBoxItem>
  <ListBoxItem Tag="25">
    <Rectangle Margin="10" Width="340" Height="25" Fill="{StaticResource PhoneAccentBrush}"/>
  </ListBoxItem>
  <ListBoxItem Tag="30">
    <Rectangle Margin="10" Width="340" Height="30" Fill="{StaticResource PhoneAccentBrush}"/>
  </ListBoxItem>
  <ListBoxItem Tag="40">
    <Rectangle Margin="10" Width="340" Height="40" Fill="{StaticResource PhoneAccentBrush}"/>
  </ListBoxItem>
  <ListBoxItem Tag="50">
    <Rectangle Margin="10" Width="340" Height="50" Fill="{StaticResource PhoneAccentBrush}"/>
  </ListBoxItem>
</ListBox>

<ListBox Grid.Column="1" Width="120" Name="Colour"
SelectionChanged="Colour_SelectionChanged">
  <ListBoxItem Tag="FF000000" IsSelected="True">
    <Rectangle Margin="5" Width="120" Height="20" Fill="Black"/>
  </ListBoxItem>
  <ListBoxItem Tag="FF808080">
    <Rectangle Margin="5" Width="120" Height="20" Fill="Gray"/>
  </ListBoxItem>
  <ListBoxItem Tag="FFFF0000">
    <Rectangle Margin="5" Width="120" Height="20" Fill="Red"/>
  </ListBoxItem>
  <ListBoxItem Tag="FFFFA500">
    <Rectangle Margin="5" Width="120" Height="20" Fill="Orange"/>
  </ListBoxItem>
  <ListBoxItem Tag="FFFFFF00">
    <Rectangle Margin="5" Width="120" Height="20" Fill="Yellow"/>
  </ListBoxItem>
  <ListBoxItem Tag="FF008000">
    <Rectangle Margin="5" Width="120" Height="20" Fill="Green"/>
  </ListBoxItem>
  <ListBoxItem Tag="FF00FFFF">
    <Rectangle Margin="5" Width="120" Height="20" Fill="Cyan"/>
  </ListBoxItem>
  <ListBoxItem Tag="FF0000FF">
    <Rectangle Margin="5" Width="120" Height="20" Fill="Blue"/>
  </ListBoxItem>
  <ListBoxItem Tag="FFFF00FF">
    <Rectangle Margin="5" Width="120" Height="20" Fill="Magenta"/>
  </ListBoxItem>
  <ListBoxItem Tag="FF800080">
    <Rectangle Margin="5" Width="120" Height="20" Fill="Purple"/>
  </ListBoxItem>
</ListBox>
XAML:
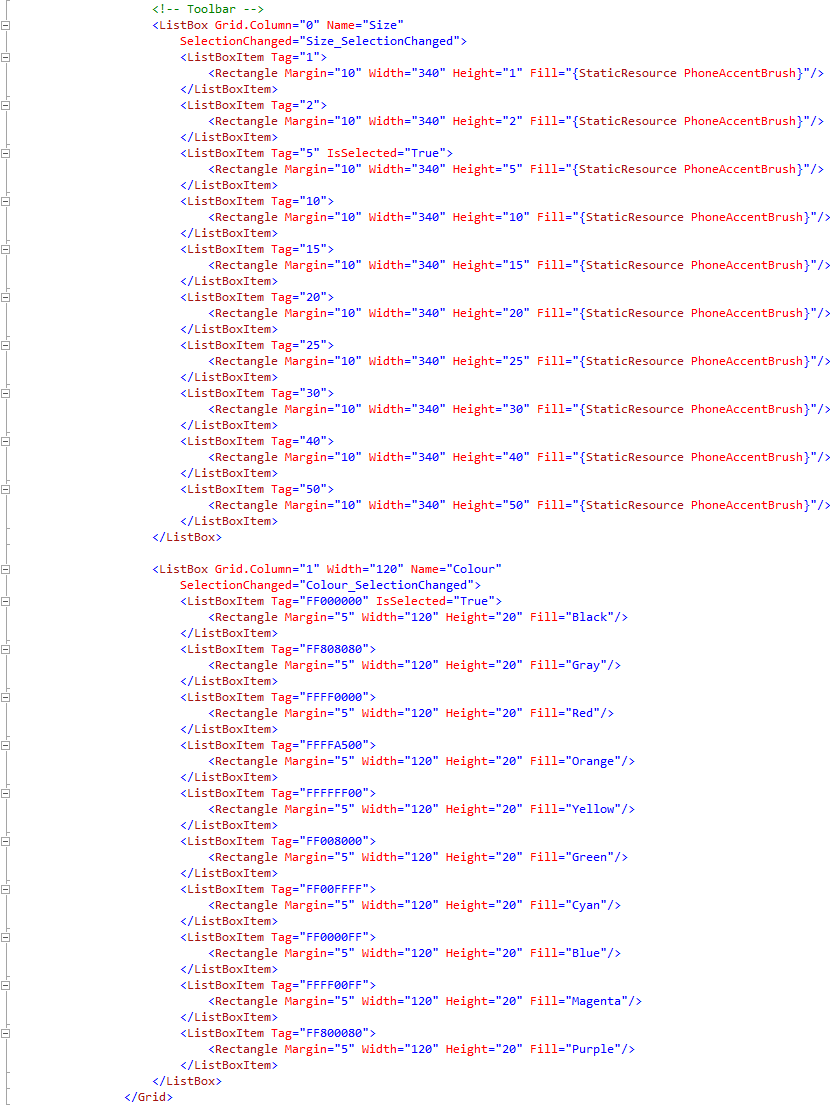
Design:
Step 23
While still in the XAML Pane for MainPage.xaml below the <!-- Content --> line, type the following InkPresenter XAML:
<InkPresenter Grid.Row="1" Background="White" Name="Surface"
MouseLeftButtonDown="Surface_MouseLeftButtonDown"
MouseLeftButtonUp="Surface_MouseLeftButtonUp"
MouseMove="Surface_MouseMove" />
XAML:

Design:

Step 24
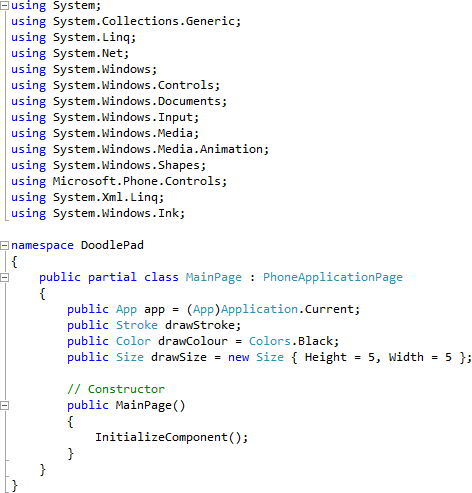
Select the "MainPage.xaml" Tab then Right Click on the Page or the entry for "MainPage.xaml" in Solution Explorer and choose the "View Code" option. In the Code View above "namespace DoodlePad" type the following:
using System.Xml.Linq;
using System.Windows.Ink;
Also in the CodeView above "public MainPage()" type the following declarations:
public App app = (App)Application.Current;
public Stroke drawStroke;
public Color drawColour = Colors.Black;
public Size drawSize = new Size { Height = 5, Width = 5 };
See Below:
Step 25
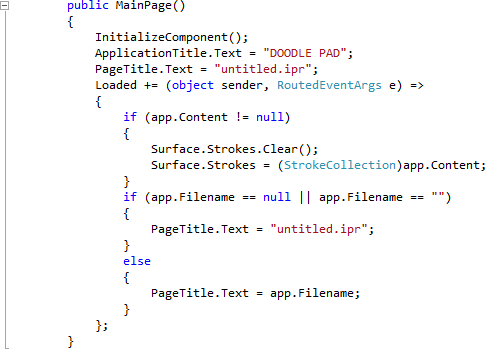
While still in the Code View for MainPage.xaml.cs in the "public MainPage()" Constructor below "InitializeComponent();" type the following:
ApplicationTitle.Text = "DOODLE PAD";
PageTitle.Text = "untitled.ipr";
Loaded += (object sender, RoutedEventArgs e) =>
{
  if (app.Content != null)
  {
    Surface.Strokes.Clear();
    Surface.Strokes = (StrokeCollection)app.Content;
  }
  if (app.Filename == null || app.Filename == "")
  {
    PageTitle.Text = "untitled.ipr";
  }
  else
  {
    PageTitle.Text = app.Filename;
  }
};
See Below:
Step 26
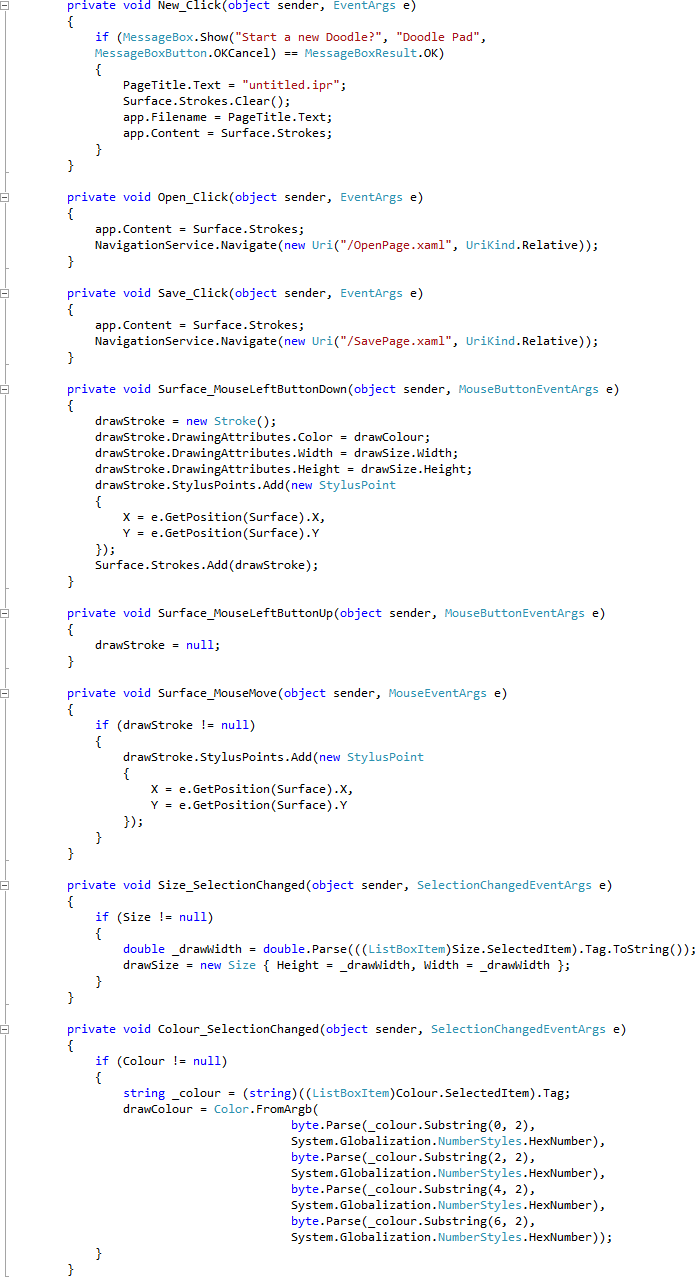
While still in the Code View for MainPage.xaml.cs, below the "}" of the "public MainPage()" method type the following Event Handlers:
private void New_Click(object sender, EventArgs e)
{
  if (MessageBox.Show("Start a new Doodle?", "Doodle Pad",
  MessageBoxButton.OKCancel) == MessageBoxResult.OK)
  {
    PageTitle.Text = "untitled.ipr";
    Surface.Strokes.Clear();
    app.Filename = PageTitle.Text;
    app.Content = Surface.Strokes;
  }
}

private void Open_Click(object sender, EventArgs e)
{
  app.Content = Surface.Strokes;
  NavigationService.Navigate(new Uri("/OpenPage.xaml", UriKind.Relative));
}

private void Save_Click(object sender, EventArgs e)
{
  app.Content = Surface.Strokes;
  NavigationService.Navigate(new Uri("/SavePage.xaml", UriKind.Relative));
}

private void Surface_MouseLeftButtonDown(object sender, MouseButtonEventArgs e)
{
  drawStroke = new Stroke();
  drawStroke.DrawingAttributes.Color = drawColour;
  drawStroke.DrawingAttributes.Width = drawSize.Width;
  drawStroke.DrawingAttributes.Height = drawSize.Height;
  drawStroke.StylusPoints.Add(new StylusPoint
  {
    X = e.GetPosition(Surface).X,
    Y= e.GetPosition(Surface).Y
  });
  Surface.Strokes.Add(drawStroke);
}

private void Surface_MouseLeftButtonUp(object sender, MouseButtonEventArgs e)
{
  drawStroke = null;
}

private void Surface_MouseMove(object sender, MouseEventArgs e)
{
  if (drawStroke != null)
  {
    drawStroke.StylusPoints.Add(new StylusPoint
    {
      X = e.GetPosition(Surface).X,
      Y = e.GetPosition(Surface).Y
    });
  }
}

private void Size_SelectionChanged(object sender, SelectionChangedEventArgs e)
{
  if (Size != null)
  {
    double _drawWidth = double.Parse(((ListBoxItem)Size.SelectedItem).Tag.ToString());
    drawSize = new Size { Height = _drawWidth, Width = _drawWidth };
  }
}

private void Colour_SelectionChanged(object sender, SelectionChangedEventArgs e)
{
  if (Colour != null)
  {
    string _colour = (string)((ListBoxItem)Colour.SelectedItem).Tag;
    drawColour = Color.FromArgb(
      byte.Parse(_colour.Substring(0, 2),
      System.Globalization.NumberStyles.HexNumber),
      byte.Parse(_colour.Substring(2, 2),
      System.Globalization.NumberStyles.HexNumber),
      byte.Parse(_colour.Substring(4, 2),
      System.Globalization.NumberStyles.HexNumber),
      byte.Parse(_colour.Substring(6, 2),
      System.Globalization.NumberStyles.HexNumber));
  }
}
See Below:
Step 27
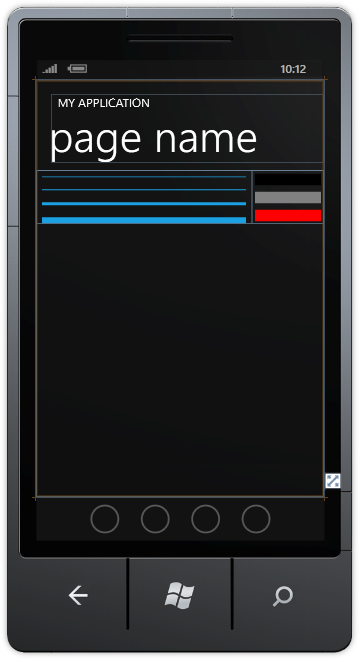
Save the Project as you have now finished the Windows Phone Silverlight application. Select the Windows Phone Emulator option then Select Debug then Start Debugging or click on Start Debugging:
After you do, the following will appear in the Windows Phone Emulator after it has been loaded:
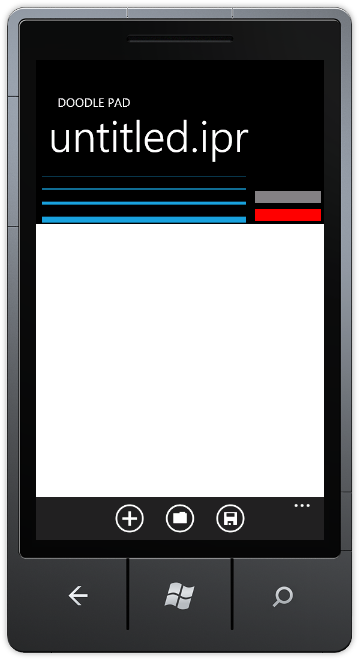
Step 28
Scroll down the "Colour" ListBox then Tap a Colour for example Blue to select a Draw Colour, select a Draw Width the same way then Tap-and-hold to draw something, which can then be saved, see below:

Step 29
You can then Stop the application by selecting the Visual Studio 2010 application window and clicking on the Stop Debugging button:
This is a simple Doodle Pad example using the InkPresenter and LINQ-to-XML to Save and Open the "strokes" used to draw with, try adding more features such as more Draw Widths and Colours - make it your own!
![]()