Another common task is Drawing, and what better way to do this than with a Drawing Package using PictureBox, Open/Save/Colour Dialogs, plus Draw Width selection!
Printer Friendly Download Tutorial (307KB) Download Source Code (13KB)
Step 1
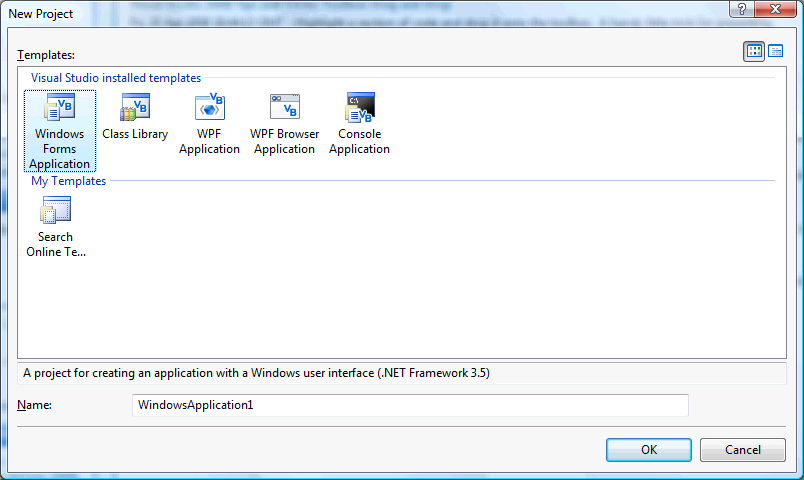
Start Microsoft Visual Basic 2008 Express Edition, then select File then New Project... Choose Windows Forms Application from the New Project Window, enter a name for the Project and then click OK, see below:
Step 2
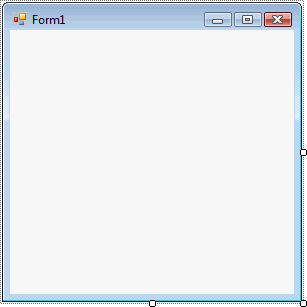
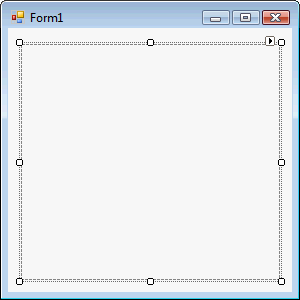
A Blank Form named Form1 should then appear, see below:
Step 3
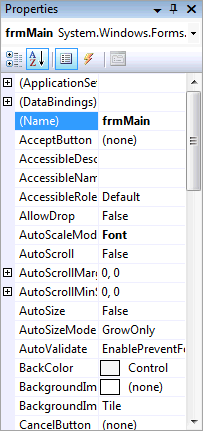
With Form1 selected goto the Properties box and change the Name from Form1 to frmMain
Step 4
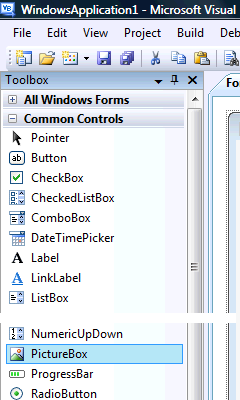
Then from the Common Controls tab on the Toolbox select the PictureBox component:
Step 5
Draw a PictureBox on the Form, see below:
Step 6
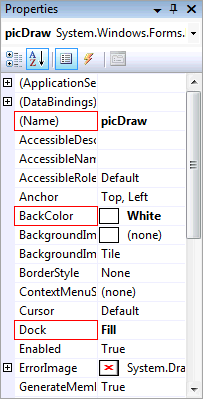
Then goto the Properties box and change the Name to picDraw, BackColor to White and Dock to Fill, see Below:
Step 7
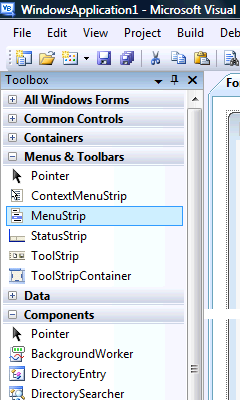
Then from the Menus & Toolbars tab on the Toolbox select the MenuStrip Control, see Below:
Step 8
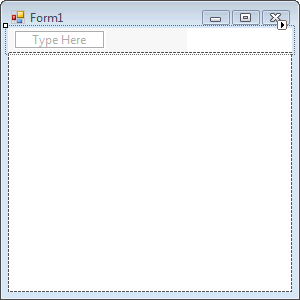
Either double-click on the MenuStrip Control entry in the Menu & Toolbars tab on the Toolbox or keep the MenuStrip Component Clicked and then move it over the Form then let go. Change the Name of the MenuStrip in the properties to mnuDraw The Form will then look as below:
Step 9
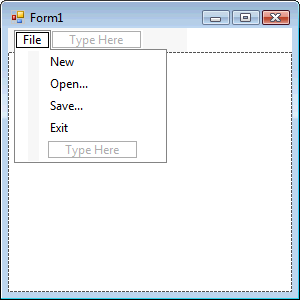
Click or select where the MenuStrip says "Type Here", an editable Textbox will appear type in "File" without the quotes in this Box, then in the Box below that type in "New", below that "Open...", then "Save..." and finally "Exit". The MenuStrip should look as below:
Step 10
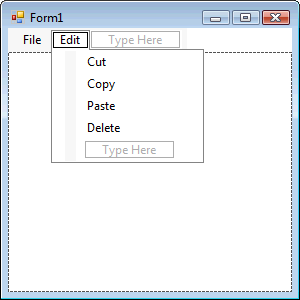
Click or select next to "File" where the MenuStrip says "Type Here", and type in "Edit" without the quotes in this Box, then in the Box below that type in "Cut", below that "Copy", then "Paste" and finally "Delete". The MenuStrip should look as below:
Step 11
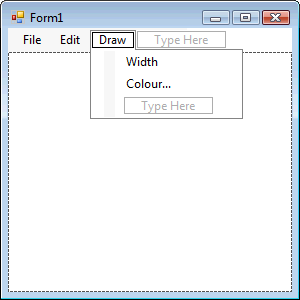
Click or select next to "Edit" where the MenuStrip says "Type Here", and type in "Draw" without the quotes in this Box, then in the Box below that type in "Width" and below that "Colour". The MenuStrip should look as below:
Step 12
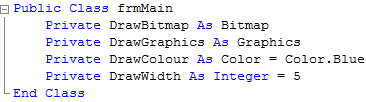
Right Click on the Form or the entry of the Form in Solution Explorer and choose the "View Code" option then below the "Public Class frmMain" type the following:
Private DrawBitmap As Bitmap
Private DrawGraphics As Graphics
Private DrawColour As Color = Color.Blue
Private DrawWidth As Integer = 5
See Below:
Step 13
Return to the Design view by selecting the [Design] tab or Right Click on the "View Designer" option in Solution Explorer for frmMain.
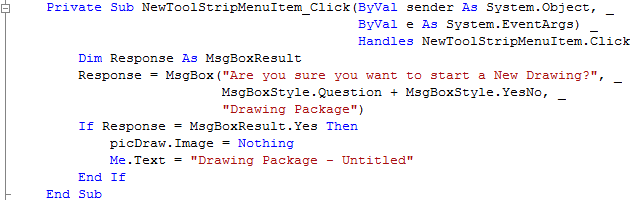
Click on "File" on the MenuStrip to show the MenuStrip then Double Click on the Menu Item Labeled "New" (NewToolStripMenuItem) and
type the following in the NewToolStripMenuItem_Click() Sub:
Dim Response As MsgBoxResult
Response = MsgBox("Are you sure you want to start a New Drawing?", _
                  MsgBoxStyle.Question + MsgBoxStyle.YesNo, _
                  "Drawing Package")
If Response = MsgBoxResult.Yes Then
  picDraw.Image = Nothing
  Me.Text = "Drawing Package - Untitled"
End If
See Below:
Step 14
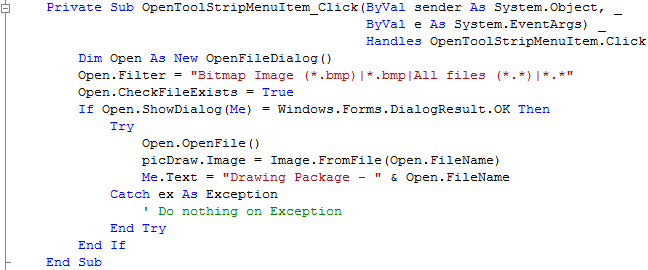
Click on the [Design] Tab to view the form again, then Click on "File" on the MenuStrip to show the MenuStrip then Double Click on the Menu Item Labeled "Open..." (OpenToolStripMenuItem) and type the following in the OpenToolStripMenuItem_Click() Sub:
Dim Open As New OpenFileDialog()
Open.Filter = "Bitmap Image (*.bmp)|*.bmp|All files (*.*)|*.*"
Open.CheckFileExists = True
If Open.ShowDialog(Me) = Windows.Forms.DialogResult.OK Then
  Try
    Open.OpenFile()
    picDraw.Image = Image.FromFile(Open.FileName)
    Me.Text = "Drawing Package - " & Open.FileName
  Catch ex As Exception
    ' Do nothing on Exception
  End Try
End If
See Below:
Step 15
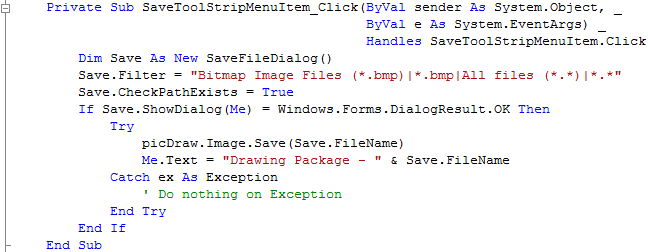
Click on the [Design] Tab to view the form again, then Click on "File" on the MenuStrip to show the MenuStrip then Double Click on the Menu Item Labeled "Save..." (SaveToolStripMenuItem) and type the following in the SaveToolStripMenuItem_Click() Sub
Dim Save As New SaveFileDialog()
Save.Filter = "Bitmap Image (*.bmp)|*.bmp|All files (*.*)|*.*"
Save.CheckPathExists = True
If Save.ShowDialog(Me) = Windows.Forms.DialogResult.OK Then
  Try
    picDraw.Image.Save(Save.FileName)
    Me.Text = "Drawing Package - " & Save.FileName
  Catch ex As Exception
    ' Do nothing on Exception
  End Try
End If
See Below:
Step 16
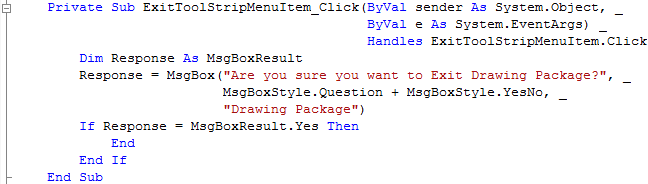
Click on the [Design] Tab to view the form again, then Click on "File" on the MenuStrip to show the MenuStrip then Double Click on the Menu Item Labeled "Exit" (ExitToolStripMenuItem) and type the following in the ExitToolStripMenuItem_Click() Sub
Dim Response As MsgBoxResult
Response = MsgBox("Are you sure you want to Exit Drawing Package?", _
                  MsgBoxStyle.Question + MsgBoxStyle.YesNo, _
                  "Drawing Package")
If Response = MsgBoxResult.Yes Then
   End
End If
See Below:
Step 17
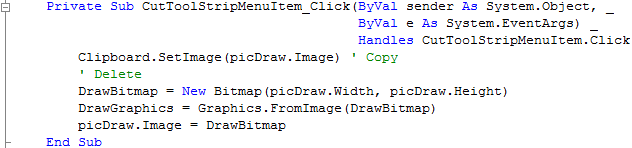
Click on the [Design] Tab to view the form again, then Click on "Edit" on the MenuStrip to show the MenuStrip then Double Click on the Menu Item Labeled "Cut" (CutToolStripMenuItem) and type the following in the CutToolStripMenuItem_Click() Sub
Clipboard.SetImage(picDraw.Image) ' Copy
' Delete
DrawBitmap = New Bitmap(picDraw.Width, picDraw.Height)
DrawGraphics = Graphics.FromImage(DrawBitmap)
picDraw.Image = DrawBitmap
See Below:
Step 18
Click on the [Design] Tab to view the form again, then Click on "Edit" on the MenuStrip to show the MenuStrip then Double Click on the Menu Item Labeled "Copy" (CopyToolStripMenuItem) and type the following in the CopyToolStripMenuItem_Click() Sub
Clipboard.SetImage(picDraw.Image) ' Copy
See Below:

Step 19
Click on the [Design] Tab to view the form again, then Click on "Edit" on the MenuStrip to show the MenuStrip then Double Click on the Menu Item Labeled "Paste" (PasteToolStripMenuItem) and type the following in the PasteToolStripMenuItem_Click() Sub
picDraw.Image = Clipboard.GetImage ' Paste
See Below:

Step 20
Click on the [Design] Tab to view the form again, then Click on "Edit" on the MenuStrip to show the MenuStrip then Double Click on the Menu Item Labeled "Delete" (DeleteToolStripMenuItem) and type the following in the DeleteToolStripMenuItem_Click() Sub
' Delete
DrawBitmap = New Bitmap(picDraw.Width, picDraw.Height)
DrawGraphics = Graphics.FromImage(DrawBitmap)
picDraw.Image = DrawBitmap
See Below:

Step 21
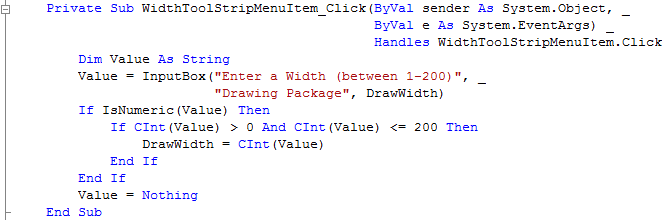
Click on the [Design] Tab to view the form again, then Click on "Draw" on the MenuStrip to show the MenuStrip then Double Click on the Menu Item Labeled "Width" (WidthToolStripMenuItem) and type the following in the WidthToolStripMenuItem_Click() Sub
Dim Value As String
Value = InputBox("Enter a Width (between 1-200)", _
                 "Drawing Package", DrawWidth)
If IsNumeric(Value) Then
  If CInt(Value) > 0 And CInt(Value) <= 200 Then
    DrawWidth = CInt(Value)
  End If
End If
Value = Nothing
See Below:
Step 22
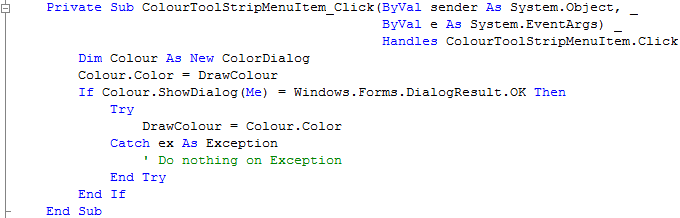
Click on the [Design] Tab to view the form again, then Click on "Draw" on the MenuStrip to show the MenuStrip then Double Click on the Menu Item Labeled "Colour..." (ColourToolStripMenuItem) and type the following in the ColourToolStripMenuItem_Click() Sub
Dim Colour As New ColorDialog
Colour.Color = DrawColour
If Colour.ShowDialog(Me) = Windows.Forms.DialogResult.OK Then
  Try
    DrawColour = Colour.Color
  Catch ex As Exception
    ' Do nothing on Exception
  End Try
End If
See Below:
Step 23
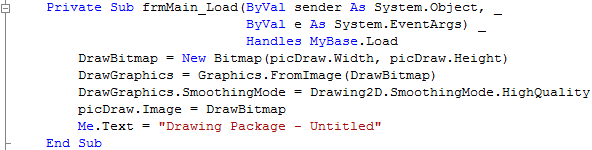
Click on the [Design] Tab to view the form again, then Double Click on the Form (frmMain) and type the following in the frmMain_Load() Sub
DrawBitmap = New Bitmap(picDraw.Width, picDraw.Height)
DrawGraphics = Graphics.FromImage(DrawBitmap)
DrawGraphics.SmoothingMode = Drawing2D.SmoothingMode.HighQuality
picDraw.Image = DrawBitmap
Me.Text = "Drawing Package - Untitled"
See Below:
Step 24
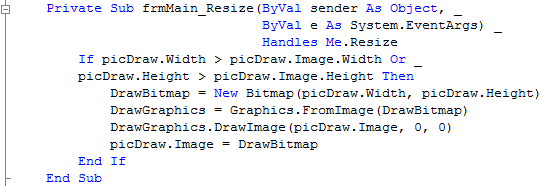
While Still in the Code View, if not double click on the Form, the Window Area of the Form will work, this will show the frmMain_Load Sub from the previous step, on this screen at the top are two Drop-down boxes one labeled (frmMain Events) and the other is Load. Click on the drop-down box with "Load" in it to show the list of events for frmMain click on Resize, and type the following in the frmMain_Resize() Sub
If picDraw.Width > picDraw.Image.Width Or _
picDraw.Height > picDraw.Image.Height Then
  DrawBitmap = New Bitmap(picDraw.Width, picDraw.Height)
  DrawGraphics = Graphics.FromImage(DrawBitmap)
  DrawGraphics.DrawImage(picDraw.Image, 0, 0)
  picDraw.Image = DrawBitmap
End If
See Below:
Step 25
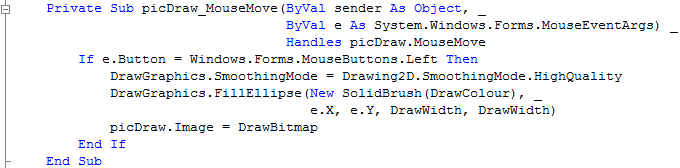
With the Code View shown, click on the Drop-down labelled (frmMain Events), or the Left large Drop-down with (General) at the top, then look down this list and click on "picDraw", then from the Drop-Down list next to this select "MouseMove", and type the following in the picDraw_MouseMove() Sub
If e.Button = Windows.Forms.MouseButtons.Left Then
  DrawGraphics.SmoothingMode = Drawing2D.SmoothingMode.HighQuality
  DrawGraphics.FillEllipse(New SolidBrush(DrawColour), _
                           e.X, e.Y, DrawWidth, DrawWidth)
  picDraw.Image = DrawBitmap
End If
See Below:
Step 26
Steps 26-30 are optional and just add Keyboard Shortcuts to the MenuItems, you don't have to do these if you don't want to!
Return to the Design view of the Form by selecting the [Design] tab for the Form, or double click on the Form's name in Solution Explorer.
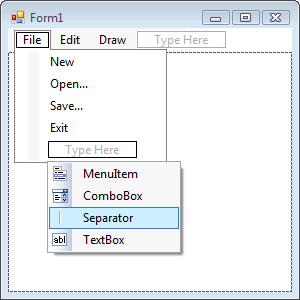
Click on "File" on the Menu Strip to select the Menu Strip and show the File Menu then mouse over the "Type Here" box.
Click on the Drop Down arrow inside the "Type Here" box to show the following options: MenuItem, ComboBox, Separator and TextBox, see below:
Step 27
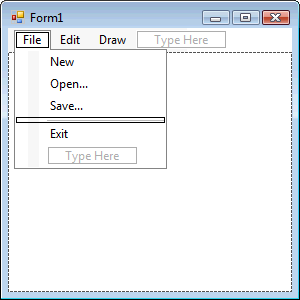
Click on the "Separator" option to place a Menu Separator in this menu, then click on it an move it so it goes above the "Exit" option in the file menu, do this by clicking on the separator (the horizontal line which has appeared) then whilst keeping clicked move it up, it should appear as below:
Step 28
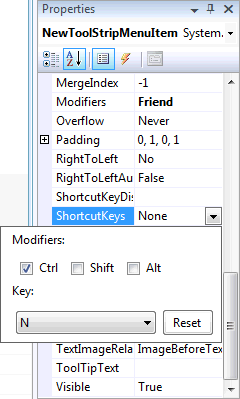
With the "File" Menu still being displayed click on "New" then in the Properties box look for the "Shortcut Key" option and click on the Drop Down arrow where "None" appears. Check the "Ctrl" Checkbox in "Modifiers" and then in the "Key" dropdown list select "N", see below:
Step 29
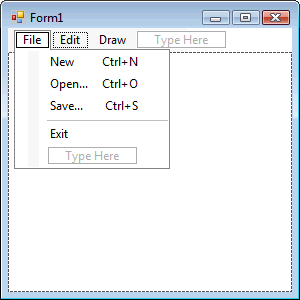
Set the rest of the "File" MenuItem "Shortcut Key" Properties except the "Exit" Menu Item, "Open" should be set to "Ctrl" and "O", "Save" to "Ctrl" and "S", the File Menu should appear as below:
Step 30
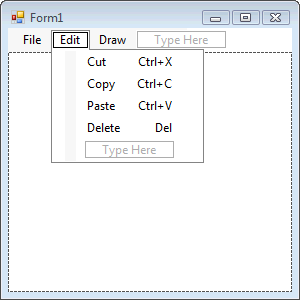
Click on or select the "Edit" Menu and set the "Shortcut Keys" Properties, "Cut" should be set to "Ctrl" and "X", "Copy" to "Ctrl" and "C", "Paste" to "Ctrl" and "V" finally "Delete" should be just "Del" in the Keys drop-down list, The Edit Menu should appear as below:
Step 31
Save the Project as you have now finished the application, then click on Start:
When you do the following will appear:
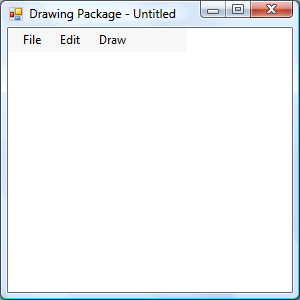
Step 32
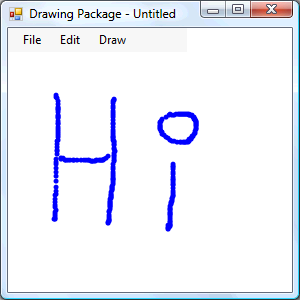
You can draw on the PictureBox, by holding down the left-mouse button and moving the cursor to draw use the Draw menu to change the Width and Colour plus you can then Save your image to Open later if you want, see below:
Step 33
Click File then Exit or click on the Close button ![]() on the top right of the window to end the application.
on the top right of the window to end the application.
This Drawing package uses a PictureBox plus the capabilities of GDI+ to draw the dot that allows you to create the drawing, try changing the code to add more features such as alternative shapes and more!
![]()