This simple game uses Random Numbers, Functions and Drawing using Windows Presentation Foundation (WPF).
Printer Friendly Download Tutorial (213KB) Download Source Code (11.4KB)
Step 1
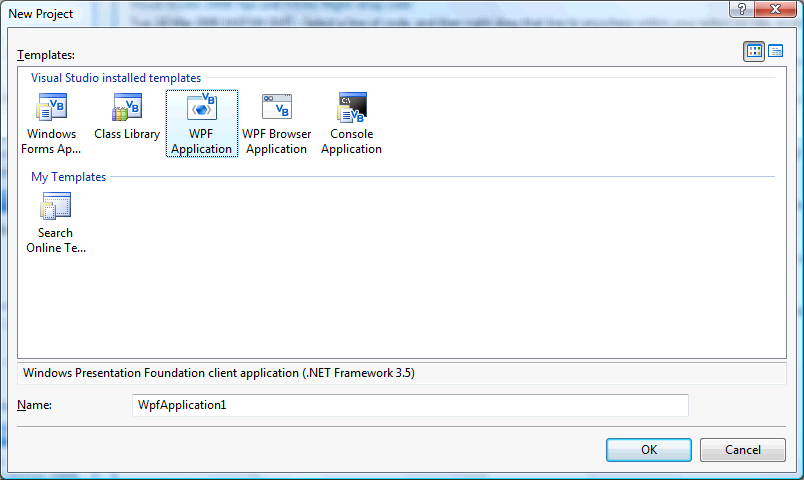
Start Microsoft Visual Basic 2008 Express Edition, then select File then New Project... Choose WPF Application from the New Project Window, enter a name for the Project and then click OK, see below:
Step 2
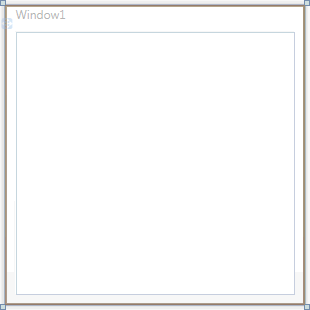
A Blank Window named Window1 should then appear, see below:
Step 3
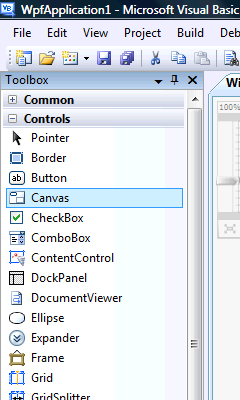
Then from the Controls tab on the Toolbox select the Canvas component:
Step 4
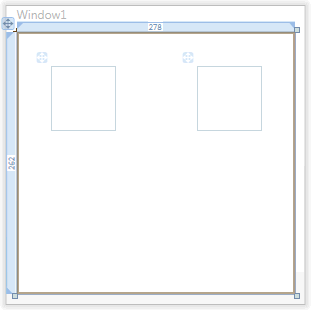
Draw two Canvases on the Window or in the XAML Pane below the "<Grid>" type the following:
<Canvas Margin="34,34,0,0" Name="Canvas1" Height="64" Width="64" VerticalAlignment="Top" HorizontalAlignment="Left" />
<Canvas Margin="0,34,34,0" Name="Canvas2" Height="64" Width="64" VerticalAlignment="Top" HorizontalAlignment="Right" />
See below:
Step 5
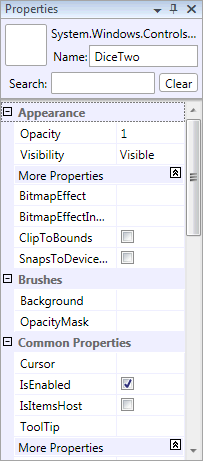
Select or click on the first Canvas (Canvas1) and goto the Properties box, change the Name to "DiceOne" without the quotes, then select the second Canvas (Canvas2) and Change the Name to "DiceTwo" again without quotes, see below:
Step 6
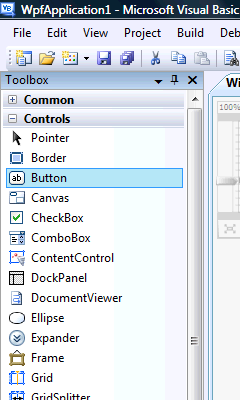
Then from the Controls tab on the Toolbox select the Button component:
Step 7
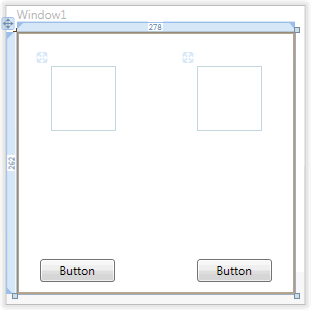
Draw two Buttons on the Window, by dragging the button from the Toolbox onto the Window, or in the XAML Pane above the "</Grid>" type the following:
<Button Margin="23,0,0,12" Name="Button1" Height="23" Width="75" VerticalAlignment="Bottom" HorizontalAlignment="Left">Button</Button>
<Button Margin="0,0,23,12" Name="Button2" Height="23" Width="75" VerticalAlignment="Bottom" HorizontalAlignment="Right">Button</Button>
See below:
Step 8
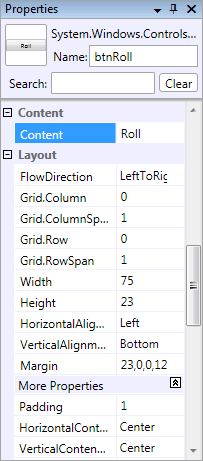
Select the first Button (Button1), then goto the Properties box and change the Name to btnRoll and the Content property from Button to Roll, see below:
Step 9
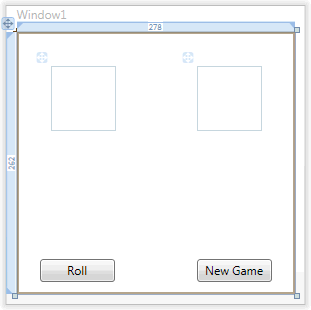
Select the second Button (Button2), then goto the Properties box and change the Name to btnNew and the Content property from Button to New Game, the window should appear as below:
Step 10
Right Click on the Window or the entry for "Window1" in the Solution Explorer and choose the "View Code" option then below the "Class Window1" type the following:
Private Turn As Integer
See Below:

Step 11
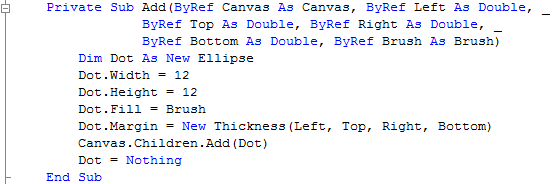
While still in the Code View for Window1, above "End Class" type the following:
Private Sub Add(ByRef Canvas As Canvas, ByRef Left As Double, _
            ByRef Top As Double, ByRef Right As Double, _
            ByRef Bottom As Double, ByRef Brush As Brush)
  Dim Dot As New Ellipse
  Dot.Width = 12
  Dot.Height = 12
  Dot.Fill = Brush
  Dot.Margin = New Thickness(Left, Top, Right, Bottom)
  Canvas.Children.Add(Dot)
  Dot = Nothing
End Sub
See Below:
Step 12
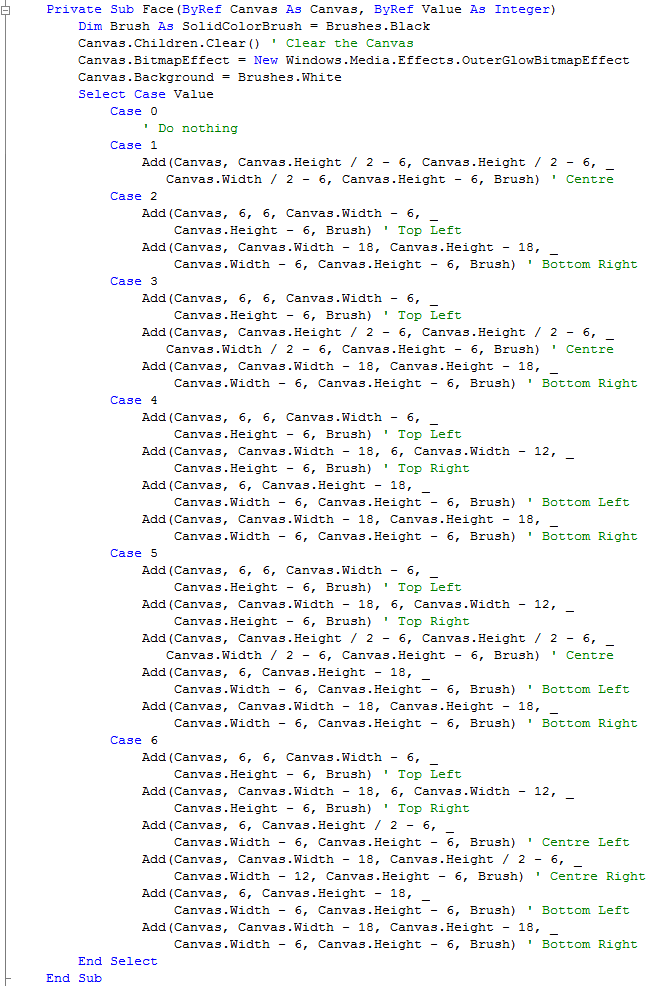
Again while still in the Code View for Window1, below the "End Sub" for "Private Sub Add(...)", type the following:
Private Sub Face(ByRef Canvas As Canvas, ByRef Value As Integer)
  Dim Brush As SolidColorBrush = Brushes.Black
  Canvas.Children.Clear() ' Clear the Canvas
  Canvas.BitmapEffect = New Windows.Media.Effects.OuterGlowBitmapEffect
	Canvas.Background = Brushes.White
  Select Case Value
    Case 0
      ' Do nothing
    Case 1
      Add(Canvas, Canvas.Height / 2 - 6, Canvas.Height / 2 - 6, _
         Canvas.Width / 2 - 6, Canvas.Height - 6, Brush) ' Centre
    Case 2
      Add(Canvas, 6, 6, Canvas.Width - 6, _
          Canvas.Height - 6, Brush) ' Top Left
      Add(Canvas, Canvas.Width - 18, Canvas.Height - 18, _
          Canvas.Width - 6, Canvas.Height - 6, Brush) ' Bottom Right
    Case 3
      Add(Canvas, 6, 6, Canvas.Width - 6, _
          Canvas.Height - 6, Brush) ' Top Left
      Add(Canvas, Canvas.Height / 2 - 6, Canvas.Height / 2 - 6, _
         Canvas.Width / 2 - 6, Canvas.Height - 6, Brush) ' Centre
      Add(Canvas, Canvas.Width - 18, Canvas.Height - 18, _
          Canvas.Width - 6, Canvas.Height - 6, Brush) ' Bottom Right
    Case 4
      Add(Canvas, 6, 6, Canvas.Width - 6, _
          Canvas.Height - 6, Brush) ' Top Left
      Add(Canvas, Canvas.Width - 18, 6, Canvas.Width - 12, _
          Canvas.Height - 6, Brush) ' Top Right
      Add(Canvas, 6, Canvas.Height - 18, _
          Canvas.Width - 6, Canvas.Height - 6, Brush) ' Bottom Left
      Add(Canvas, Canvas.Width - 18, Canvas.Height - 18, _
          Canvas.Width - 6, Canvas.Height - 6, Brush) ' Bottom Right
    Case 5
      Add(Canvas, 6, 6, Canvas.Width - 6, _
          Canvas.Height - 6, Brush) ' Top Left
      Add(Canvas, Canvas.Width - 18, 6, Canvas.Width - 12, _
          Canvas.Height - 6, Brush) ' Top Right
      Add(Canvas, Canvas.Height / 2 - 6, Canvas.Height / 2 - 6, _
         Canvas.Width / 2 - 6, Canvas.Height - 6, Brush) ' Centre
      Add(Canvas, 6, Canvas.Height - 18, _
          Canvas.Width - 6, Canvas.Height - 6, Brush) ' Bottom Left
      Add(Canvas, Canvas.Width - 18, Canvas.Height - 18, _
          Canvas.Width - 6, Canvas.Height - 6, Brush) ' Bottom Right
    Case 6
      Add(Canvas, 6, 6, Canvas.Width - 6, _
          Canvas.Height - 6, Brush) ' Top Left
      Add(Canvas, Canvas.Width - 18, 6, Canvas.Width - 12, _
          Canvas.Height - 6, Brush) ' Top Right
      Add(Canvas, 6, Canvas.Height / 2 - 6, _
          Canvas.Width - 6, Canvas.Height - 6, Brush) ' Centre Left
      Add(Canvas, Canvas.Width - 18, Canvas.Height / 2 - 6, _
          Canvas.Width - 12, Canvas.Height - 6, Brush) ' Centre Right
      Add(Canvas, 6, Canvas.Height - 18, _
          Canvas.Width - 6, Canvas.Height - 6, Brush) ' Bottom Left
      Add(Canvas, Canvas.Width - 18, Canvas.Height - 18, _
          Canvas.Width - 6, Canvas.Height - 6, Brush) ' Bottom Right
  End Select
End Sub
See Below:
Step 13
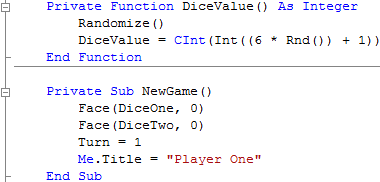
Finally with the Code View still displayed, below the "End Sub" for "Private Sub Face(...)", type the following Function and Sub:
Private Function DiceValue() As Integer
    Randomize()
    DiceValue = CInt(Int((6 * Rnd()) + 1))
End Function

Private Sub NewGame()
    Face(DiceOne, 0)
    Face(DiceTwo, 0)
    Turn = 1
    Me.Title = "Player One"
End Sub
See Below:
Step 14
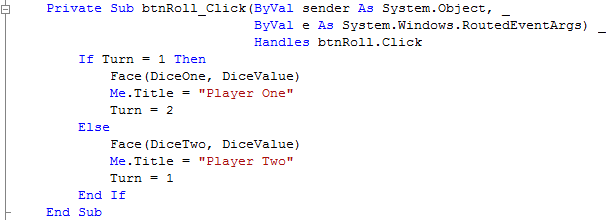
Return to the Design view by selecting the [Design] tab or Right Click on the "View Designer" option in Solution Explorer for Window1. Double Click on the "Roll" Button (btnRoll) and type the following in the btnRoll_Click() Sub:
If Turn = 1 Then
  Face(DiceOne, DiceValue)
  Me.Title = "Player One"
  Turn = 2
Else
  Face(DiceTwo, DiceValue)
  Me.Title = "Player Two"
  Turn = 1
End If
See Below:
Step 15
Click on the [Design] Tab to view the window again, then Double Click on the "New Game" Button (btnNew) and type the following in the btnNew_Click() Sub:
NewGame()
See Below:

Step 16
While still in Code View, if not Right Click on the Window or the entry for "Window1" in the Solution Explorer and choose "View Code". The top of this window will have two drop-down boxes one with "(General)" in and the other "(Declarations)", click on the first and select the "(Window1 Events)" Option, then from the drop-down next to this select "Loaded", type the following in the Window1_Loaded Sub:
NewGame()
See Below:

Step 17
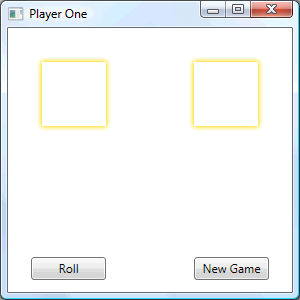
Save the Project as you have now finished the application, then click on Start:
When you do the following will appear:
Step 18
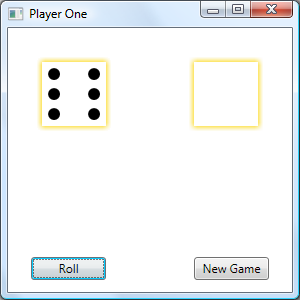
Click on Roll to roll the dice for Player One by clicking on Roll, see below:
Step 19
Click on the Close button ![]() on the top right of Window1 to end the application.
on the top right of Window1 to end the application.
By clicking on the Roll button it will alternate between Player One and Player Two (Left & Right). You have just created a simple Dice Game, but what about scoring and proper dice rules, try and make it have a scoring system/rules yourself and see what else you can achieve with this simple program.

